Adobe Premiere Pro Tutorial: The Ultimate Beginner’s Guide (2025)
Ever wanted to craft your own videos but had no clue where to start? Adobe Premiere Pro is the go-to tool that turns video editing from a daunting task into something anyone can learn. Sure, it looks packed with features at first glance—but this guide will break it down so simply, you’ll be editing with confidence in no time.
We’re ditching the confusing jargon and sticking to straight talk. Plus, every section has short video demos to walk you through things. By the end, you’ll realize video editing isn’t the beast you thought it was—and you’ll have the skills to make your own content shine.
1. Why Pick Adobe Premiere Pro?
If you’re new to editing, you’ve definitely heard of Premiere Pro—and for good reason. It’s the industry standard, used by both first-timers and Hollywood pros alike. Here’s why it’s worth your time:
What Makes Premiere Pro Stand Out?
●All the Tools You’ll Ever Need: Whether you’re making YouTube vlogs, TikTok Reels, or even a short film, Premiere Pro has everything to make your content look professional. No more switching between apps for basic edits.
●Seamless Adobe Integration: If you use Photoshop, After Effects, or Audition, you’re in luck. Tweak a thumbnail in Photoshop and drop it right into your Premiere timeline without switching apps. Need to add motion graphics? Send your project to After Effects and bring it back in seconds .
●Help Around Every Corner: It’s the most popular editing software for a reason—there are endless YouTube tutorials, Reddit threads, and official Adobe guides to fix whatever stumps you. The app even has built-in tips for beginners.
Beginner-Friendly Flexibility
Don’t let the “professional” label scare you. You don’t need to master every feature on day one. Start with simple cuts and trims, then dive into color grading or audio mixing once you’re comfortable. It grows with you—perfect if you want to turn hobby editing into a skill .
2. Setting Up Premiere Pro for the First Time
First-time setup might feel overwhelming, but follow these steps, and you’ll be editing in 10 minutes flat.
Step 1: Install Premiere Pro
Head to the Adobe Creative Cloud website to grab Premiere Pro. It’s part of the CC suite, and you can get a 7-day free trial—no credit card required for the trial period.
Step 2: Create Your First Project
Open the app and click “New Project.” Here’s how to set it up right:
1.Name It Clearly: Pick something descriptive, like “Summer_BBQ_Vlog” or “Birthday_Party_Edit”—no more guessing what “Project123” is later.
2.Choose a Save Spot: Make a dedicated folder for your project first. Put all your clips, photos, and audio here—organization saves headaches later .
3.Sequence Settings: Stick to “Automatic” if you’re unsure. For YouTube, 1080p resolution and 30 frames per second (fps) work great. For TikTok, 1080p vertical (9:16 aspect ratio) is standard.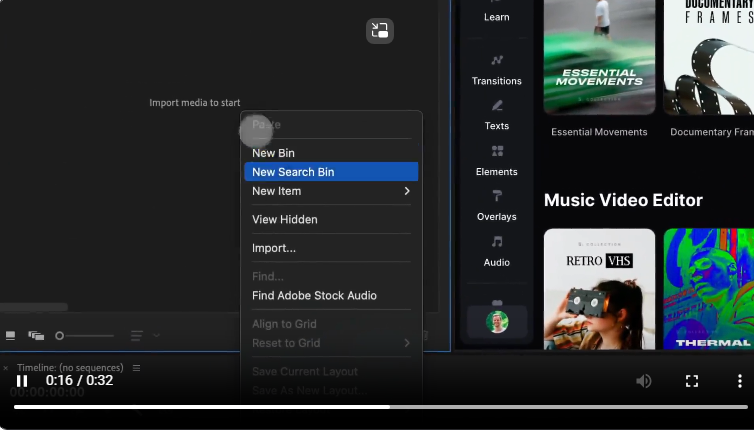
Step 3: Tweak Your Workspace
Premiere Pro has pre-built workspaces for editing, color, and audio. Stick to the “Editing” workspace as a beginner—it puts all the essential tools front and center. You can drag panels around later if you want to customize it.
For more details, check out Adobe’s official project setup guide.
3. The Interface: What Matters (and What Doesn’t)
The Premiere Pro screen looks busy at first, but you only need 5 key panels to start editing. Ignore the rest until later.
Key Panels to Focus On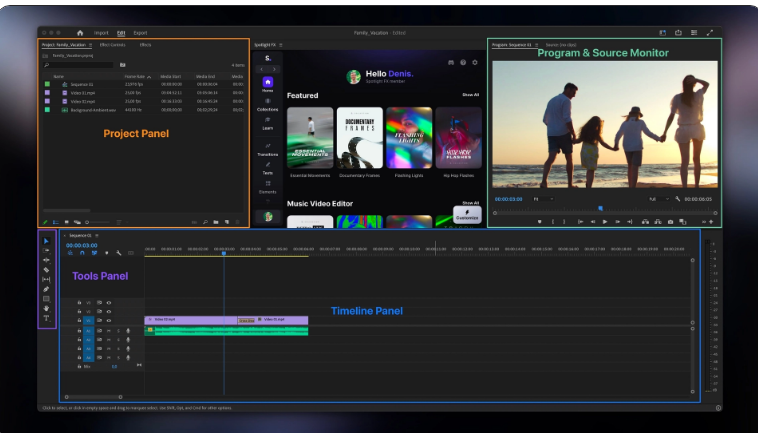
●Project Panel: Think of this as your media closet—all your videos, photos, and audio live here.
●Timeline Panel: This is where the magic happens. Arrange, cut, and trim clips here—most of your editing time will be spent here.
●Source Monitor: Preview and trim clips before adding them to the timeline. It’s like testing a puzzle piece before putting it in.
●Program Monitor: See how your final video looks as you edit. Hit play here to check your work.
●Tools Panel: Quick access to basics like the Selection Tool (move clips) and Razor Tool (cut clips).
Understanding the Timeline
The timeline is split into “tracks”—video on top, audio on bottom. You can stack clips on different tracks to overlay images or add background music. If it feels cluttered, drag the edges of panels to resize them .
To get comfy with the interface, browse Adobe’s beginner-friendly interface guide.
4. Importing and Organizing Media
You can’t edit without素材 (footage)—here’s how to get your files into Premiere and keep them organized.
How to Import Media
1.Drag-and-Drop: The easiest way—just pull files from your computer straight into the Project Panel.
2.File > Import: Go to the File menu, select “Import,” and pick your files.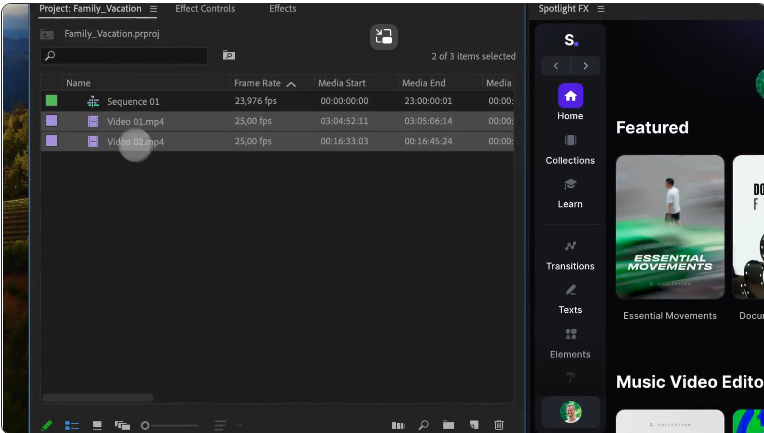
3.Media Browser: Use this panel to browse your computer’s folders and import directly without leaving Premiere.
Organize Like a Pro
Messy media = editing frustration. Here’s how to keep things tidy:
●Make Bins: These are like folders in Premiere. Create separate bins for “Video Clips,” “Audio,” and “Images.”
●Rename Files: Change “Clip001.MOV” to “Beach_Sunset_Clip” so you know what it is at a glance .
Pro Tip: Keep your original files in the same folder—Premiere links to them, so moving files later can break your project.
For more organization hacks, check Adobe’s media management guide.
5. Basic Editing: Cutting, Trimming, and Moving Clips
Now it’s time to start shaping your video. These three skills cover 80% of beginner editing.
Cutting Clips
Use this to remove mistakes or boring parts:
1.Grab the Razor Tool: Press “C” on your keyboard to switch to it.
2.Make the Cut: Move the playhead (the vertical line) to where you want to cut, then click the clip.
3.Delete the Extra: Select the unwanted part and hit “Delete” .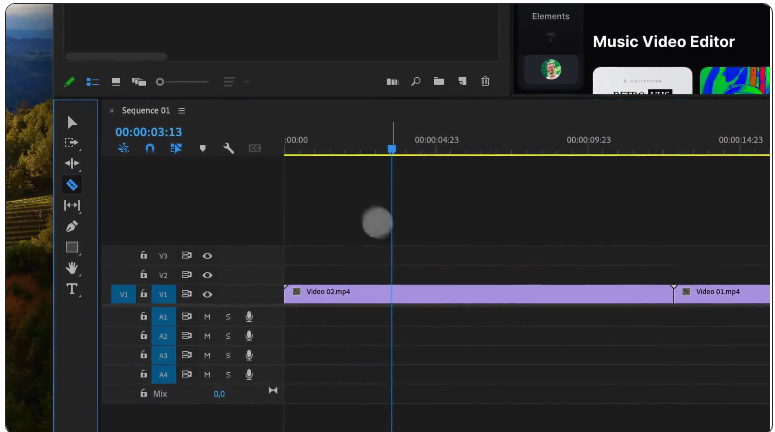
Trimming Clips
Shorten or lengthen clips without cutting:
1.Selection Tool: Press “V” to activate it. Click the edge of a clip and drag inward to shorten it.
2.Ripple Edit Tool: Press “B” to use this. Trim a clip, and it automatically closes the gap—no more manual rearranging.
Moving Clips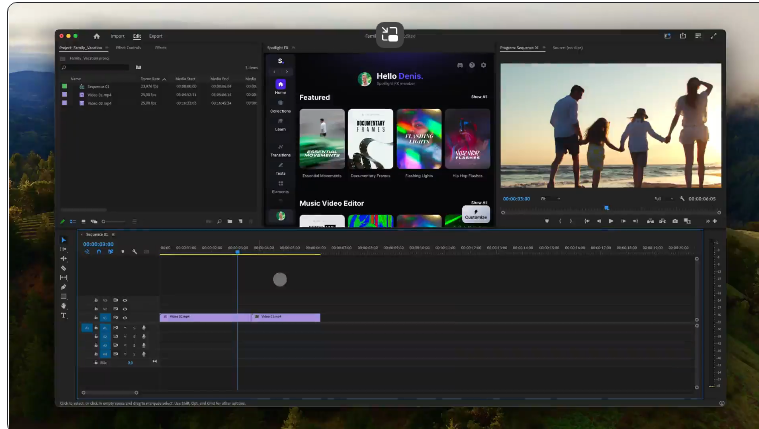
Click and drag clips to reorder them on the timeline. Press “S” to turn on snapping—this lines up clips perfectly so there are no weird gaps.
For a deep dive, check Adobe’s guide to cutting and trimming.
6. Adding Text in Premiere Pro 2025
The 2025 update made text editing way easier—all settings are now in one place, no more jumping between panels.
Option 1: Quick Text via the Program Monitor
1.Text Tool: Click the “T” icon in the Tools Panel (or press “T” on your keyboard).
2.Type Directly: Click anywhere on the Program Monitor to create a text box and start typing.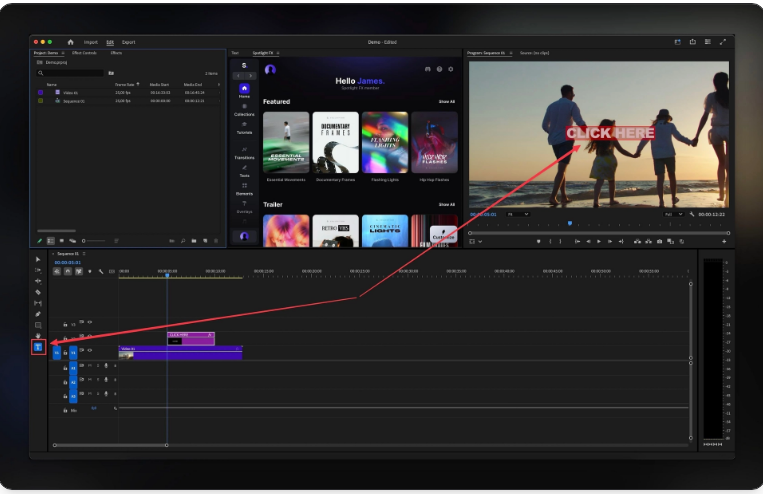
Option 2: Custom Text via the Properties Panel
1.Open Properties: Go to Window > Properties to pull up the panel.
2.Create Text: Click “Create New Graphic” and select “Text.” You can adjust font, color, size, and alignment all here—no more hunting for settings .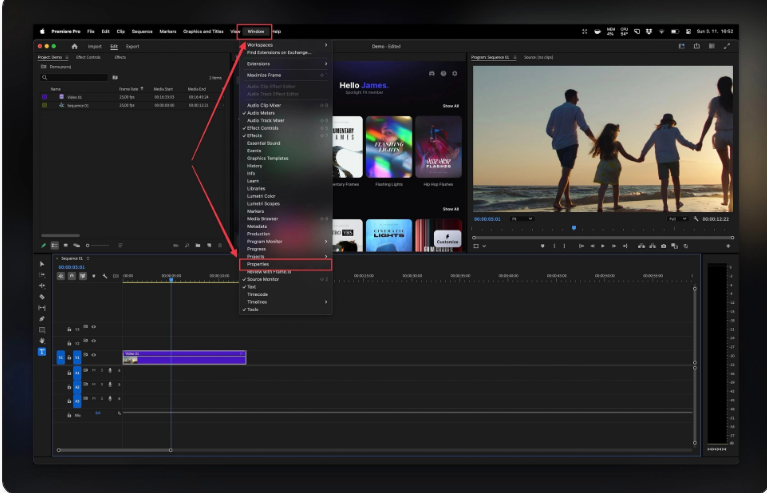
This update is a game-changer for beginners—no more confusion from scattered controls. For more tips, check our full guide to 2025 text editing.
7. Adding Audio, Effects, and Transitions
Great videos need more than just clips—here’s how to make yours pop.
Adding Audio
1.Import First: Add music or sound effects the same way you imported video.
2.Adjust Volume: Select an audio clip, go to Effects Controls, and slide the volume up or down.
3.Don’t Drown Out Voices: Lower background music to 20-30% volume so dialogue stays clear. Bad audio ruins good video—don’t skip this!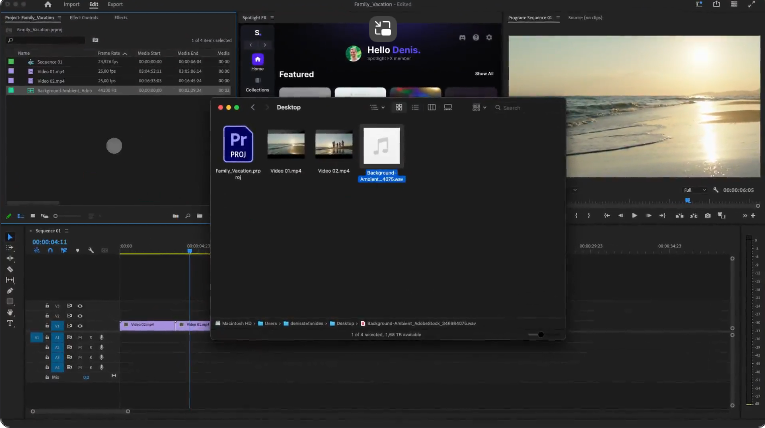
Adding Effects
1.Find Effects: Open the Effects Panel and search for something like “Brightness & Contrast” or “Sharpen.”
2.Apply It: Drag the effect onto a clip in the timeline. Tweak settings in the Effects Controls panel .
Adding Transitions
●Cross Dissolve: The most useful transition—fades one clip into another. Drag it between two clips on the timeline.
●Adjust Length: Pull the edges of the transition to make it shorter (0.5 seconds) or longer (2 seconds).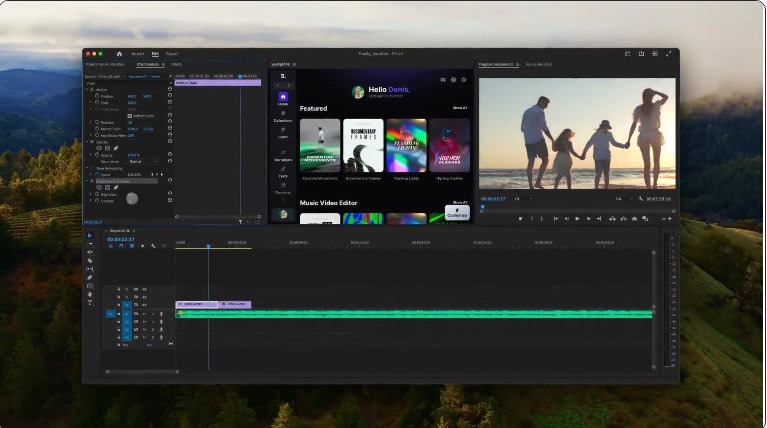
Pro Tip: Less is more. Too many flashy transitions look unprofessional—stick to Cross Dissolve for most edits.
Learn more with Adobe’s effects and transitions guide.
8. Exporting Your Video
You’re done editing—now let’s get your video ready to share.
Step-by-Step Export
1.Open Export Settings: Go to File > Export > Media (or press Ctrl+M/Cmd+M).
2.Choose Format: Pick H.264—it works for every platform (YouTube, Instagram, TikTok).
3.Select a Preset: Use “YouTube 1080p HD” for YouTube or “Vimeo 1080p” for Vimeo. For TikTok, pick “Social Media 1080p Vertical.”
4.Check Range: Make sure “Entire Sequence” is selected so you export the whole video.
5.Hit Export: Rendering time depends on length—a 5-minute video takes 5-10 minutes.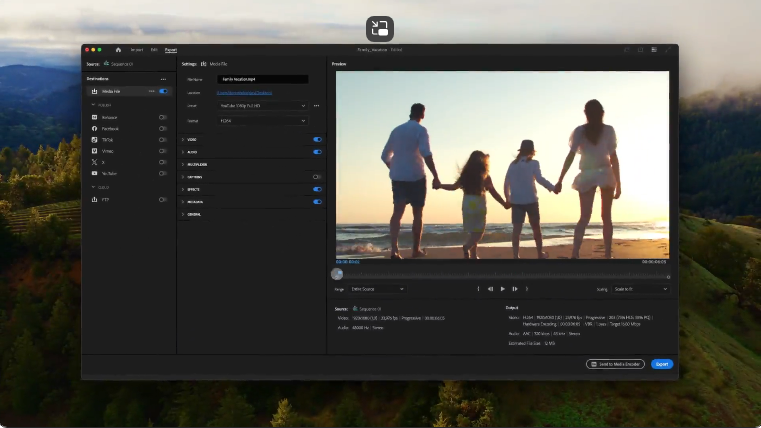
For perfect settings every time, use Adobe’s export guide.
9. Keyboard Shortcuts to Speed Up Editing
Shortcuts save time—here are the 5 every beginner needs:
●V: Selection Tool (move clips)
●C: Razor Tool (cut clips)
●S: Snapping (align clips easily)
●Ctrl+Z/Cmd+Z: Undo mistakes (your new best friend)
●Spacebar: Play/pause the timeline
To customize shortcuts, go to Edit > Keyboard Shortcuts. Get the full list with Adobe’s shortcut guide.
10. Common Mistakes (and How to Avoid Them)
Even pros started with mistakes—here’s how to skip the rookie errors:
Forgetting to Save
Set up auto-save! Go to Edit > Preferences > Auto Save and check “Automatically Save Projects.” Premiere will save every 5-10 minutes, so you won’t lose work if it crashes.
Overusing Transitions
Flashy wipes and spins might look fun, but they distract from your content. Simple cuts are almost always better for vlogs, tutorials, and short films.
Ignoring Audio
A video with great visuals but bad audio gets skipped. Always check volume levels in the Audio Mixer panel—dialogue should be loud and clear, music in the background.
11. More Resources to Keep Learning
Premiere Pro has endless features—here’s how to keep improving:
●Adobe’s Official Tutorials: Free, step-by-step guides for every skill level.
●YouTube Channels: Channels like “Premiere Gal” or “Justin Odisho” have beginner-friendly demos.
●Community Forums: Reddit’s r/VideoEditing or Adobe’s Community Forum are great for troubleshooting.
Frequently Asked Questions
What is Premiere Pro used for?
It’s for editing all kinds of video—YouTube vlogs, short films, ads, documentaries, and social media content. You can cut clips, add audio/effects, and export polished videos for any platform .
Can I learn Premiere Pro in a day?
Absolutely! You can master cutting, trimming, and exporting in one day. Advanced skills like color grading or multi-cam editing take practice, but the basics are quick to pick up.
Can I learn it by myself?
Yes! Tons of creators are self-taught using free tutorials and practice. Start with a simple project (like editing a family video) and build from there .
What’s Premiere Pro best for?
It’s ideal for anyone wanting professional-quality edits. It integrates with other Adobe apps and supports 4K, HDR, and VR—so it grows with you from hobbyist to pro.
Final Thoughts
Premiere Pro might feel intimidating at first, but it’s just a tool—one that gets easier the more you use it. Start small: import a few clips, make a few cuts, and add a title. As you practice, you’ll tackle effects, color grading, and more.
The key is consistency. Edit one video a week, and in a month, you’ll be shocked at how far you’ve come. Happy editing!