Adding captions to your videos in Adobe Premiere Pro is a breeze—whether you’re improving accessibility or just making your content clearer. The best part? You don’t need third-party plugins or extra software. Premiere Pro has all the tools built in.

Here’s a simple, step-by-step guide to get it done.
Step 1: Import Your Video and Open the Captions Workspace
First, load your video into Premiere Pro:
1. Drag and drop your video file into the timeline.
2. Go to Window > Workspaces > Captions to switch to the dedicated captions layout.
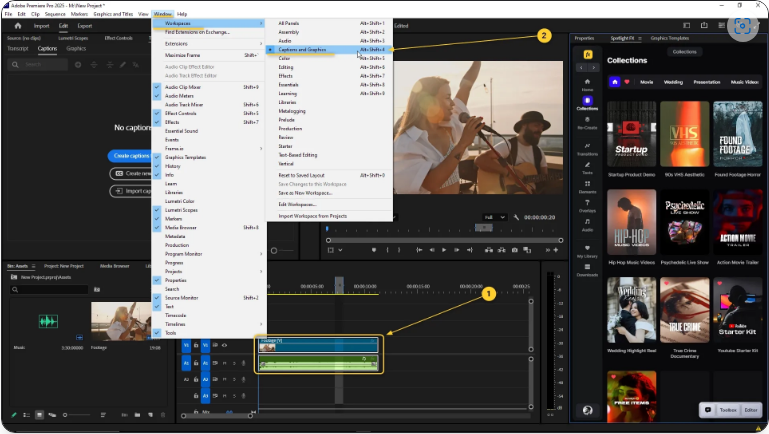
This workspace gives you quick access to all the tools you’ll need for adding and editing captions.
Step 2: Generate a Transcript
Premiere Pro can automatically transcribe your audio:
1. Open the Text panel (Window > Text if it’s not visible).
2. Click Transcript, then select Create Transcription.
3. Choose your audio track and language, then click Transcribe.
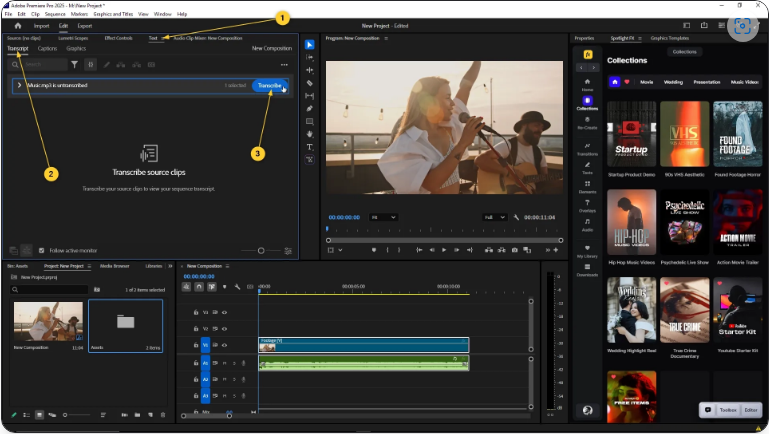
Premiere will analyze your audio and generate a text transcript—usually in just a few minutes, depending on clip length.
Step 3: Convert the Transcript into Captions
Once your transcription is ready:
1. Switch to the Captions tab.
2. Click Create Captions from Transcript.
3. Hit Create, and Premiere will automatically generate timed captions on a new track.
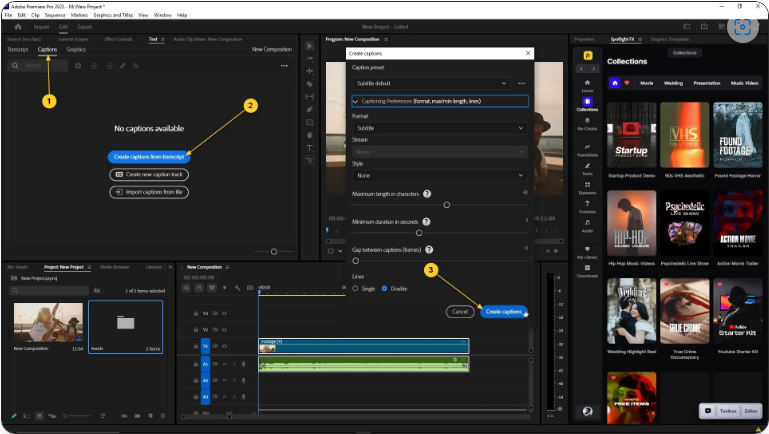
Now, you’ll see captions synced perfectly with your video.
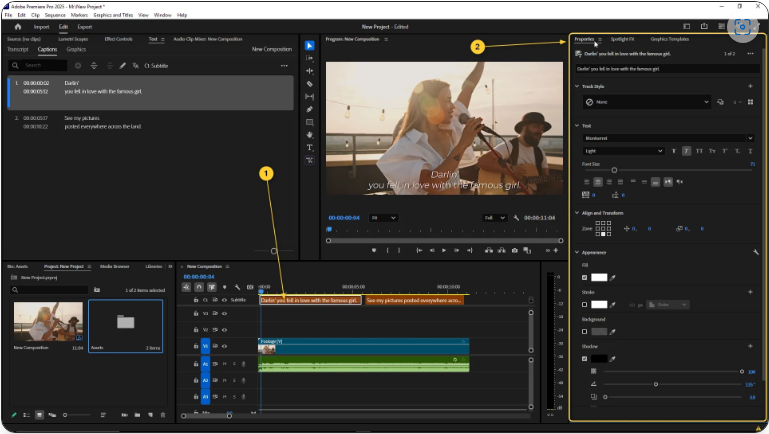
Step 4: Customize Your Captions
Want to adjust the text or styling?
● Edit text: Double-click any caption in the timeline to modify it.
● Change appearance: Use the Essential Graphics panel (Window > Essential Graphics) to tweak font, size, color, and background.
● Adjust timing: Drag caption blocks to fine-tune when they appear.
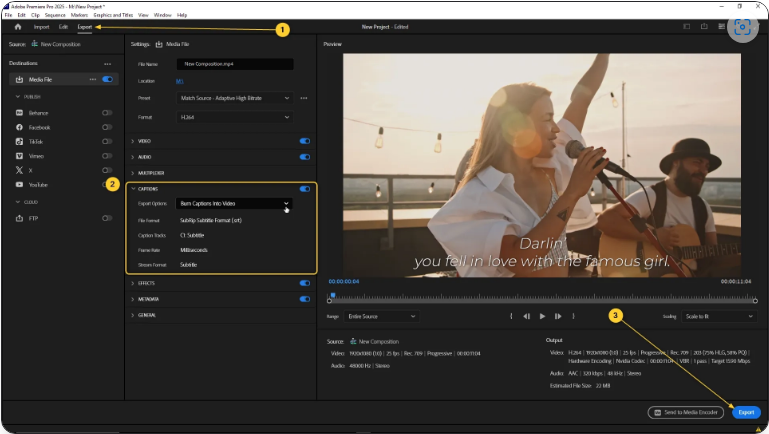
Step 5: Export with Captions
When you’re ready to finalize your video:
1. Go to File > Export > Media (or use the Export tab).
2. Under the Captions tab in the export settings, choose:
● “Burn into video” (for permanent captions)
● “Create sidecar file” (for separate caption files like SRT)
3. Click Export, and you’re done!