Ever been deep into an After Effects project only to realize your solid layer is the wrong color? Maybe you picked the wrong shade initially, or your client suddenly decided on a different color scheme. No worries—it happens to everyone!

The good news? Changing a solid’s color is quick and easy once you know where to look. Below, we’ll cover two straightforward methods to get it done.
Method 1: Adjust the Solid Settings
This is the fastest way to change a solid’s color directly.
1. Select the solid layer in your timeline.
2. Go to Layer > Solid Settings (or press Ctrl+Shift+Y on Windows / Cmd+Shift+Y on Mac).
3. A settings window will appear—click the color swatch next to “Color.”
4. Pick your new color and hit OK.

That’s it! This method updates the original layer, so it’s perfect if you’re not relying on effects tied to the previous color.
Method 2: Apply a Fill Effect
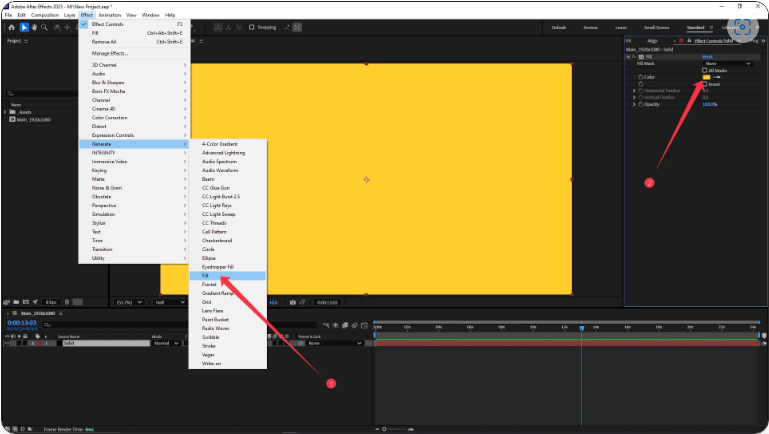
If you need more flexibility—like when working with precomps or planning to animate the color later—the Fill effect is a great alternative.
1. Select your solid layer in the timeline.
2. Go to Effect > Generate > Fill.
3. In the Effect Controls panel, click the color swatch next to “Color.”
4. Choose your new color, and you’re all set!

The advantage here? Your original layer settings stay untouched, making it easier to tweak colors or add effects later without hassle.
Which Method Should You Use?
● Solid Settings → Best for quick, permanent changes.
● Fill Effect → Ideal for non-destructive edits and animations.
Either way, fixing a solid’s color only takes seconds—so you can get back to your project in no time!


