If your Premiere Pro timeline stutters, lags, or doesn’t display effects properly, rendering is the solution. Rendering creates temporary preview files for smoother playback while editing and ensures a clean final export.

Let’s break it down into two key scenarios: rendering for playback and rendering for export.
Step 1: Select the Section You Want to Render
Before rendering, define the part of your timeline you want to process:
1. Move the playhead to your desired starting point.
2. Press I (sets the In point).
3. Move the playhead to your ending point.
4. Press O (sets the Out point).
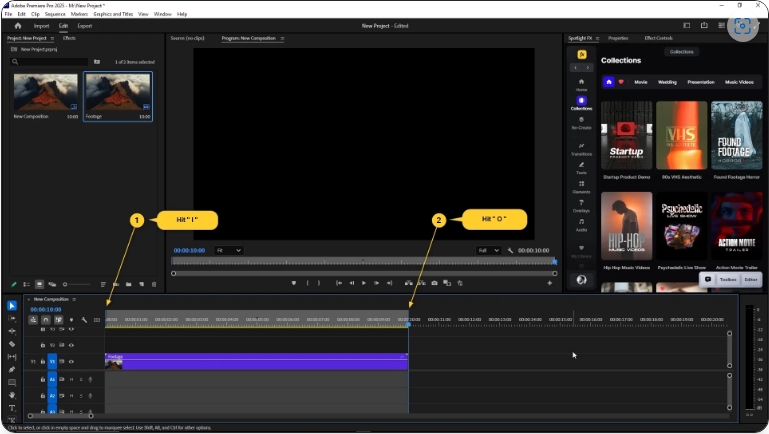
A gray bar will appear above the timeline, marking the section to be rendered.
Step 2: Render for Smooth Playback
If playback is choppy or effects aren’t displaying correctly, follow these steps:
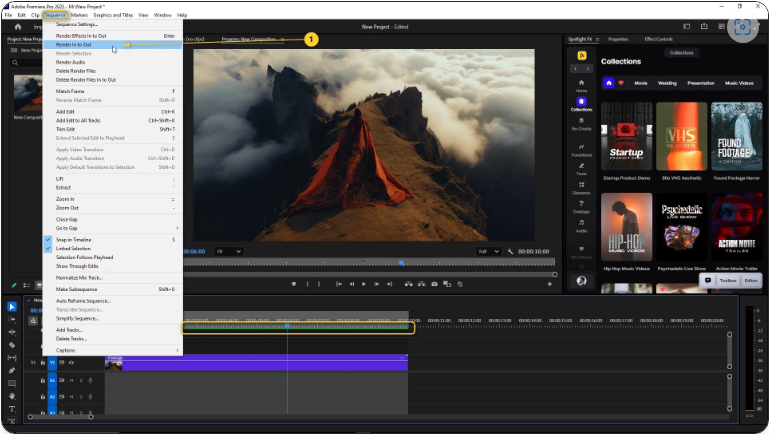
1. Go to Sequence > Render In to Out in the top menu.
Premiere will process the selected area, converting it into preview files. Once done, the gray bar turns green, indicating smooth playback.
Additional Options:
● Render Effects In to Out – Best for clips with heavy effects.
● Render Audio – Fixes audio playback issues.
Step 3: Export Your Final Rendered Video
When you’re ready to save your project:
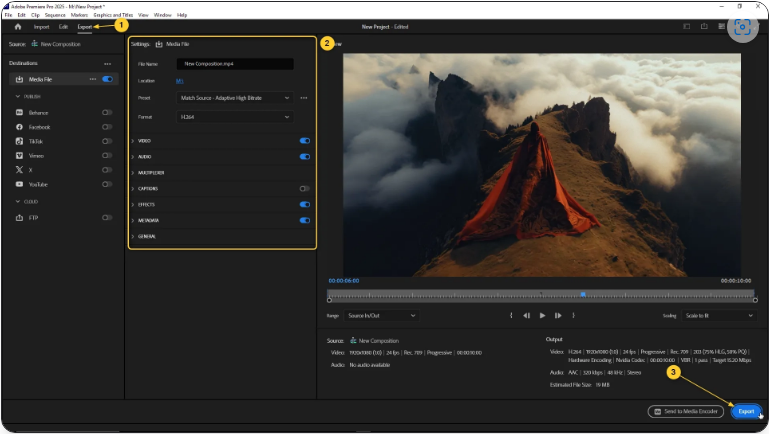
1. Go to File > Export > Media (or press Ctrl/Cmd + M).
2. In the Export Settings window:
● Format: H.264 (ideal for most videos).
● Preset: Match Source – High Bitrate (good balance of quality & file size).
● Output Name: Choose where to save your file.
3. Click Export (or Queue if using Adobe Media Encoder).
Premiere will now render and compress everything into your final video.
Final Thoughts
Rendering in Premiere Pro isn’t just for exporting—it also speeds up editing by improving playback performance. Once you get the hang of it, the process becomes quick and effortless. Follow these steps, and your videos will play smoothly from start to finish.