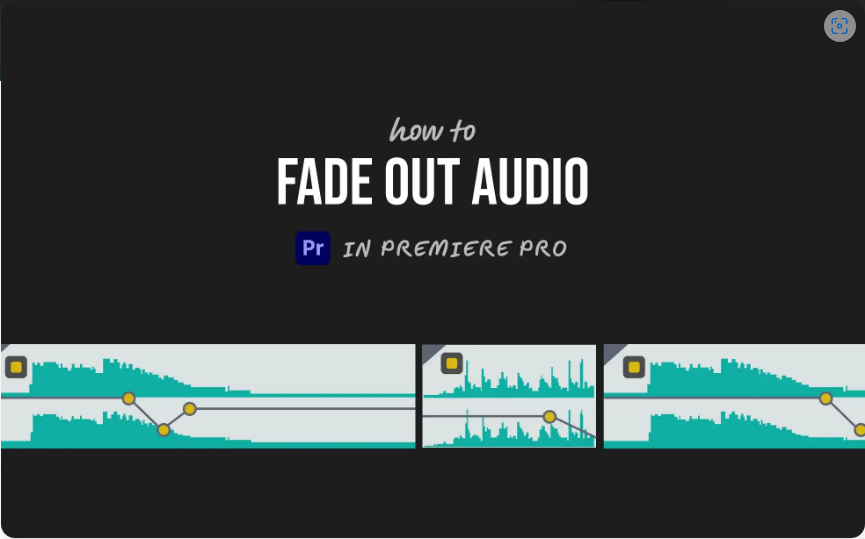
Does your audio clip end abruptly? Whether you’re finishing a video or smoothing a transition, a fade-out adds that professional polish. The good news? Premiere Pro makes it easy—no advanced skills required.

Here are two straightforward ways to fade out audio in Premiere Pro.
1. Manual Fade-Out Using Keyframes
For precise control over your fade, keyframes are the way to go.
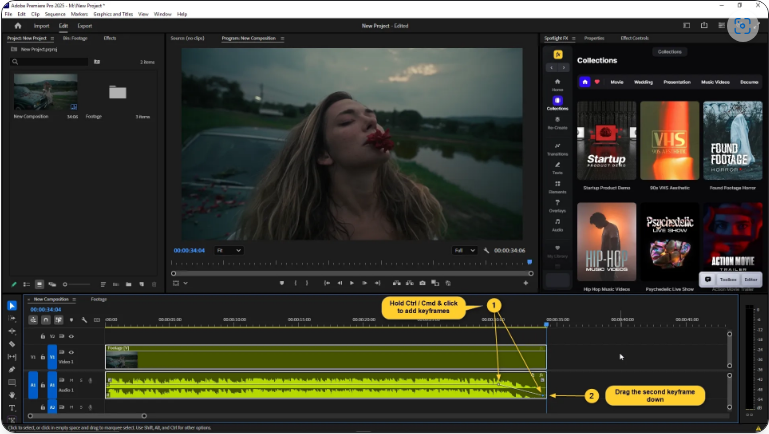
1. Select your audio clip in the timeline.
2. Expand the track height to reveal the white volume line.
3. Hold `Ctrl` (Windows) or `Cmd` (Mac) and click the volume line to add two keyframes near the clip’s end.
4. Drag the second keyframe down to zero for a complete fade-out.
5. Adjust the spacing between keyframes to control fade speed.
That’s it! You now have a custom fade-out exactly where you want it.
2. Quick Fade with the Constant Power Transition
If you prefer an automatic fade without keyframe tweaking, this method is perfect.
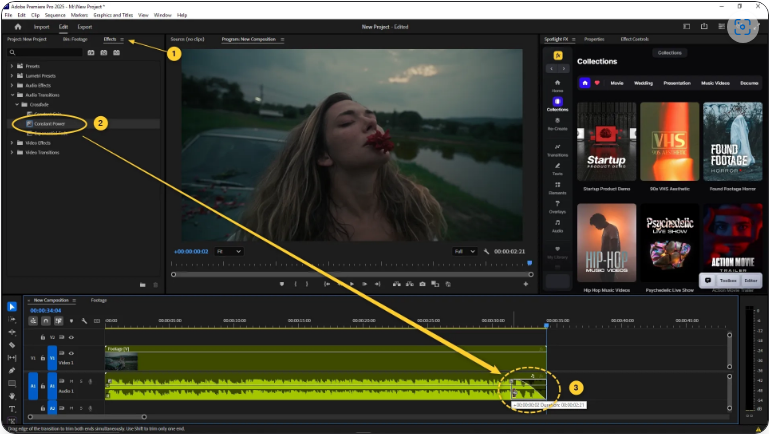
1. Open the Effects panel.
2. Navigate to Audio Transitions > Crossfade and select Constant Power.
3. Drag and drop the transition onto the end of your audio clip.
4. Resize the transition by dragging its edges to adjust fade duration.
This creates a smooth, natural fade-out with minimal effort—ideal for most projects.
Final Thoughts
Fading out audio in Premiere Pro is simple, whether you prefer hands-on keyframe control or the speed of transitions. Try both methods and see which fits your workflow best.
FAQs
How do I fade out audio in Premiere Pro?
● Use keyframes (Ctrl/Cmd + click on the volume line) or apply the Constant Power transition from the Effects panel.
How do I add a fade-out effect?
● Drag the Constant Power transition onto your clip’s end, or manually adjust volume keyframes.
How can I gradually lower volume in Premiere?
● Add two keyframes to the audio clip’s volume line and lower the second one to zero for a smooth decrease.
How do I cut audio in Premiere Pro?
● Use the Razor Tool (C) to split the clip, then delete unwanted sections with Delete (Mac) or Backspace (Windows).