Want to give your footage a professional look in seconds? LUTs (Look-Up Tables) are a quick way to apply cinematic styles, vintage tones, or even match colors between different cameras.
If you’re new to LUTs, importing them into Premiere Pro might seem tricky—but don’t stress. Follow these easy steps, and you’ll be set in no time.

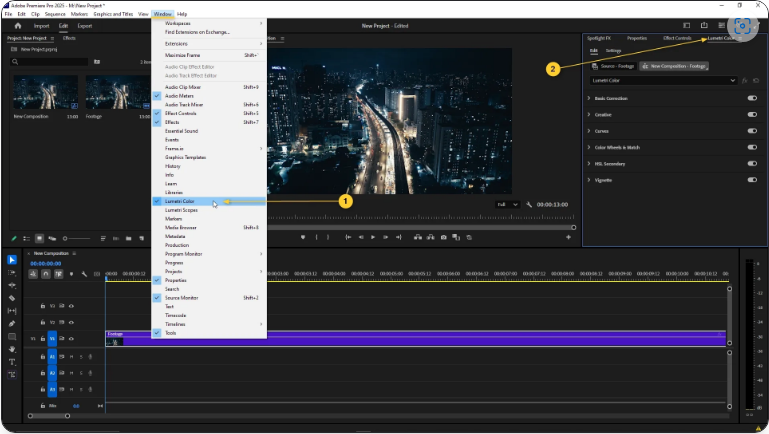
Step 1: Open the Lumetri Color Panel
Before anything else, select your clip in the timeline.
Then, go to Window > Lumetri Color (if it’s not already open). This panel houses all of Premiere Pro’s color grading tools, including Basic Correction, Creative, Curves, and more.
Step 2: Apply Your LUT
You can add LUTs in two places:
● Basic Correction > Input LUT (best for technical fixes, like converting log footage)
● Creative > Look (ideal for stylized color grades)
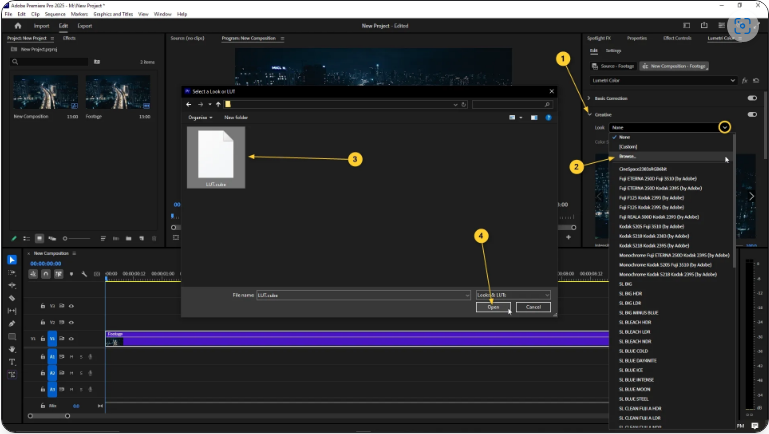
How to Load a Custom LUT:
1. Click the dropdown next to “Input LUT” or “Look”
2. Select Browse
3. Locate your .cube file
4. Click Open
That’s it! Your LUT is now applied.
Step 3: Install LUTs Permanently (Optional)
Tired of browsing for LUTs every time? Save them directly in Premiere Pro’s dropdown menu:
1. Navigate to this folder on your computer:
● Windows: `C:Program FilesAdobeCommonLUTsCreative`
● Mac: `/Library/Application Support/Adobe/Common/LUTs/Creative`
(If the folder doesn’t exist, just create it manually.)
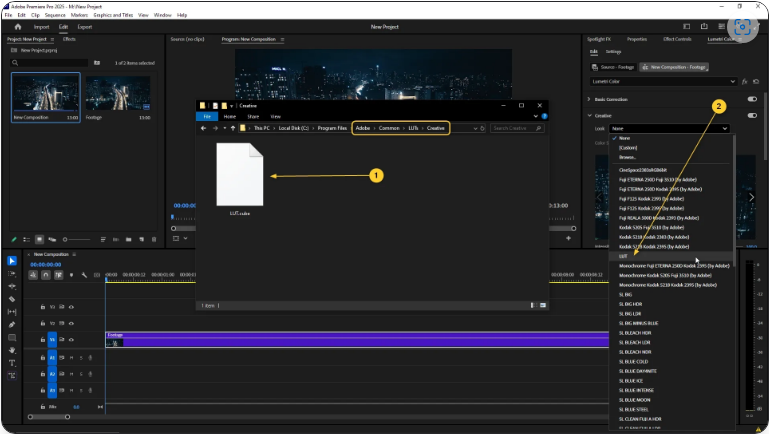
2. Drop your .cube files inside.
Creative vs. Technical Folders
Premiere Pro has two LUT folders for different uses:
● Creative folder → LUTs appear under the Creative > Look dropdown (great for stylized effects).
● Technical folder → LUTs appear under Basic Correction > Input LUT (best for log/RAW conversions).
Once saved, your LUTs will automatically appear in Premiere’s menus—no need to re-import!
FAQs
How do I add LUTs to Premiere Pro?
1. Open Lumetri Color
2. Go to Basic Correction or Creative
3. Click “Input LUT” or “Look”
4. Browse and select your .cube file
How do I permanently install custom LUTs?
Place them in:
● Windows: `C:Program FilesAdobeCommonLUTsCreative`
● Mac: `/Library/Application Support/Adobe/Common/LUTs/Creative`
Restart Premiere Pro, and they’ll appear in the dropdown.
Does Premiere Pro support .cube files?
Yes! .cube is a standard LUT format, fully compatible with Premiere Pro.
Where is the default LUT folder?
● Windows: `C:Program FilesAdobeCommonLUTs`
● Mac: `/Library/Application Support/Adobe/Common/LUTs/`
Create Creative or Technical subfolders if needed.
Where can I get high-quality LUTs?
Some plugins (like Spotlight FX) include ready-to-use LUTs inside Premiere Pro—no manual importing required. Just click and apply!