Got shaky video ruining your project? Don’t stress—you don’t need expensive stabilizers or a reshoot. Adobe After Effects includes Warp Stabilizer, a powerful tool that smooths out wobbly footage in minutes.
 Here’s how to stabilize your video in three simple steps.
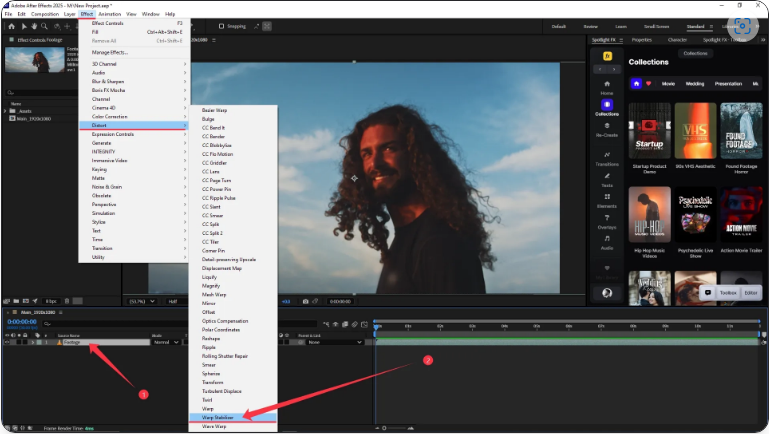
Step 1: Add the Warp Stabilizer Effect
1. Select your clip in the timeline.
2. Go to Effect > Distort > Warp Stabilizer in the top menu.
 Once applied, After Effects will automatically start analyzing your footage.
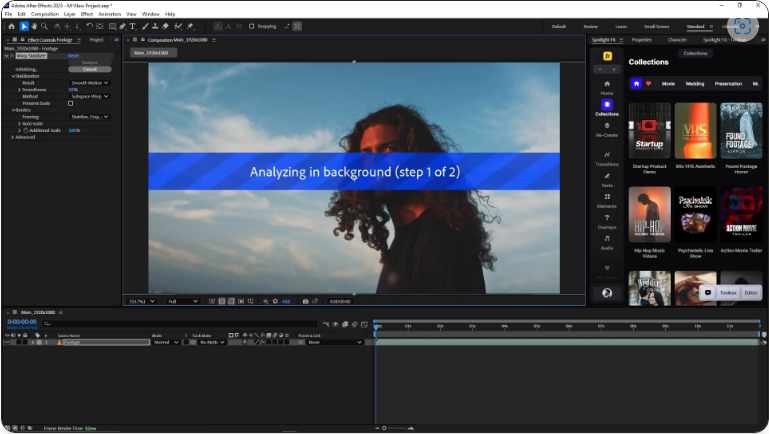
Step 2: Let After Effects Work Its Magic
1. Wait for the blue “Analyzing” bar to finish (this may take a few moments).
2. Press the spacebar to preview the stabilized clip.
In most cases, the default settings will give you a much smoother result right away. If it looks good, you’re done!
Step 3 (Optional): Fine-Tune the Stabilization
If the footage still feels a little off, try adjusting these settings:
● Result: Switch from Smooth Motion to No Motion for a completely locked shot.
● Smoothness: Reduce it (around 10–20%) if the movement feels unnatural.
● Method: Experiment with Subspace Warp, Position, or Position, Scale & Rotation depending on how shaky your footage is.
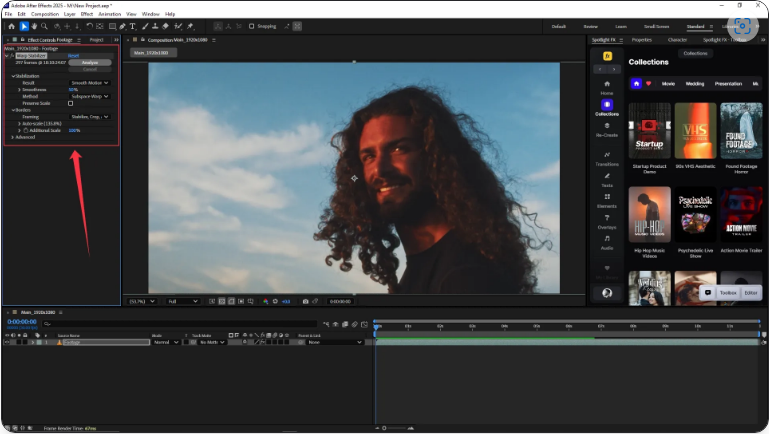
Most clips look great with the default settings, so only tweak these if something seems weird.