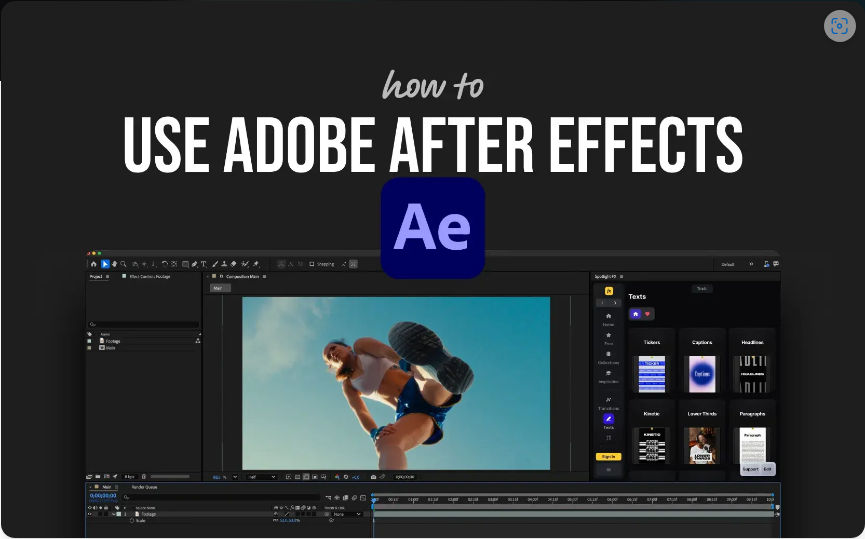
Feeling overwhelmed after opening After Effects for the first time? Don’t worry—that’s completely normal. This software is packed with tools for motion graphics and visual effects, which can be intimidating for beginners. But here’s the good news: You don’t need to master everything at once. Once you grasp the basics—like working with layers, setting keyframes, and previewing animations—you’ll quickly gain confidence.

Let’s break down the essentials so you can start creating without frustration.
1. What Is After Effects Used For?
Before diving into the interface, it helps to understand what After Effects does best. Unlike Premiere Pro (which is for video editing), After Effects specializes in:
● Motion graphics (animated text, logos, lower thirds)
● Visual effects (explosions, screen replacements, CGI enhancements)
● Compositing (combining multiple visuals into one scene)
If you’ve ever seen a YouTube intro with slick animated text or a movie title sequence with dynamic effects, chances are they were made in After Effects.
2. Start a New Project & Composition
To begin:
1. Open After Effects and click New Project.
2. Go to Composition > New Composition.
3. Set your settings:
● Resolution (1920×1080 is standard for HD)
● Frame rate (30 fps is common for online video)
● Duration (e.g., 10 seconds for a short animation)
4. Name your comp (e.g., “My First Animation”) and click OK.
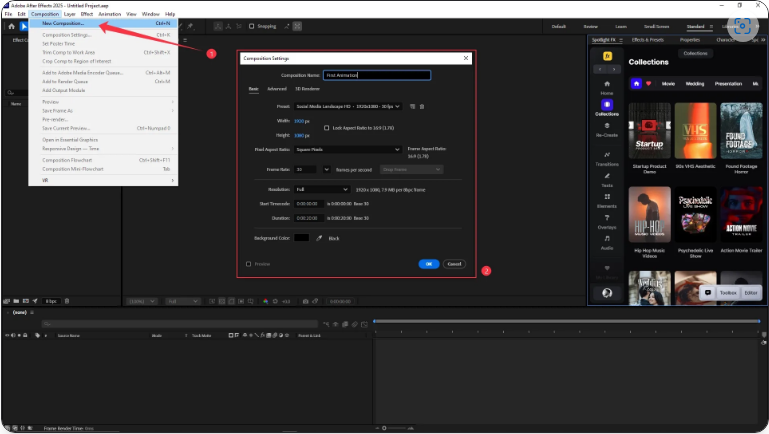 Think of your composition (or “comp”) as your workspace where all the animation happens.
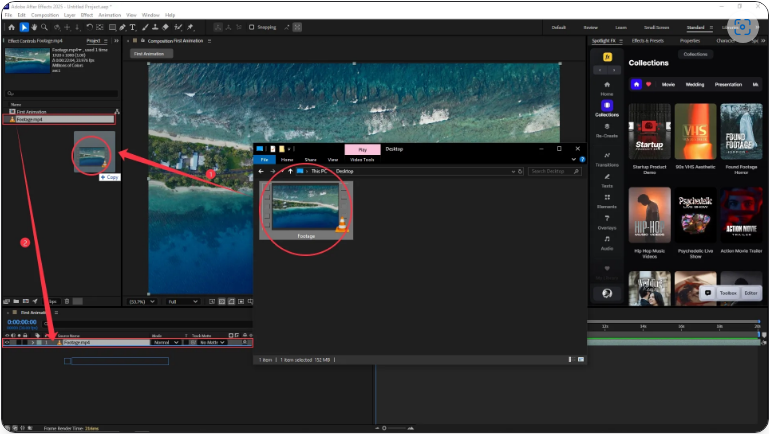
3. Import Your Media
To add images, videos, or audio:
● Go to File > Import > File, OR
● Drag and drop files directly into the Project Panel.
Then, drag them into your Timeline or Composition Panel to start working.
4. Learn the Interface
Here’s a quick tour of the main panels:
● Project Panel – Stores all imported files.
● Timeline – Where layers are stacked and animations are built over time.
● Composition Panel – Your real-time preview window.
● Tools Bar – Contains selection, text, shape tools, and more.
● Effects & Presets Panel – Apply effects like blurs, glows, and distortions.
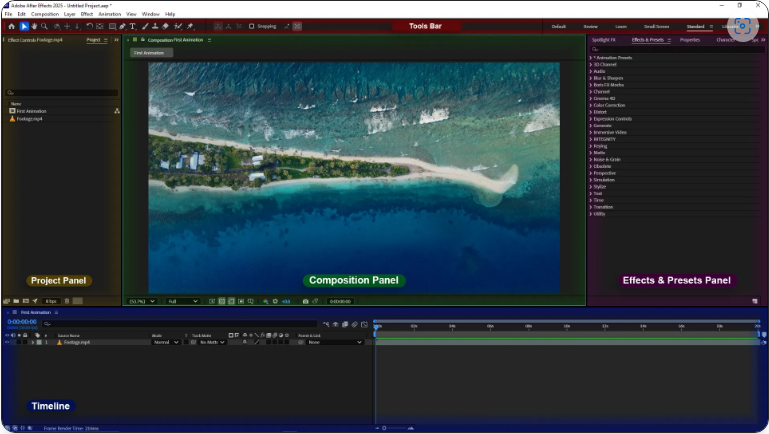
It might look complex at first, but you’ll get familiar with it as you experiment.
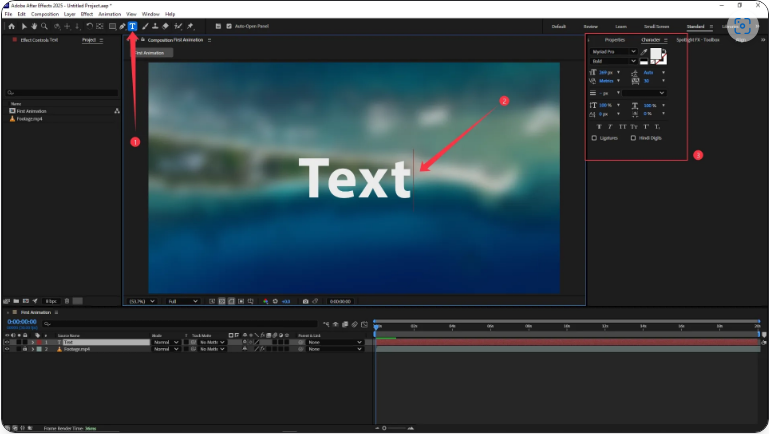
5. Add Text & Shapes
For text animation:
1. Select the Text Tool (T).
2. Click in the Composition Panel and type.
3. Adjust font, size, and color in the Character Panel.
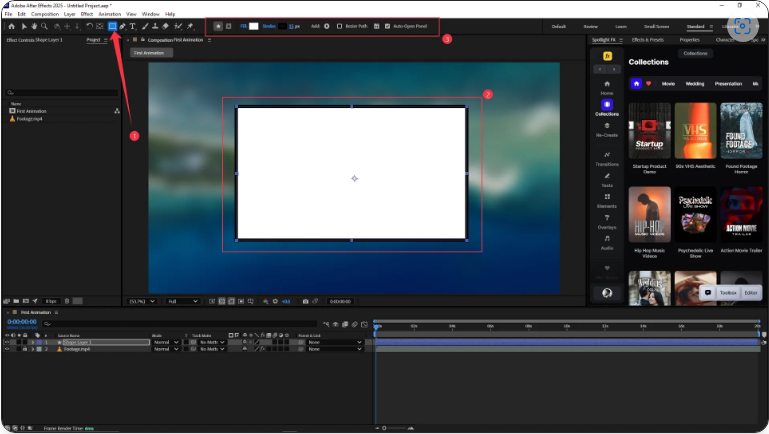
For shapes:
1. Choose the Shape Tool (default: rectangle).
2. Click and drag in your comp.
3. Customize colors and strokes in the toolbar.
6. Animate with Keyframes
This is where the magic happens. For example, to make text slide across the screen:
1. Select your text layer.
2. Press P to reveal the Position property.
3. At frame 0, click the stopwatch icon (this sets a keyframe).
4. Move the playhead forward (e.g., 2 seconds).
5. Drag your text to a new position—After Effects will animate the movement automatically.

You can also animate Scale (S), Rotation (R), and Opacity (T) the same way.
7. Preview Your Work
To check your animation:
● Press the Spacebar for a quick playback.
● For smoother playback, press 0 (on the numpad) for a RAM Preview.
If playback is slow, reduce the preview resolution in the Composition Panel dropdown.
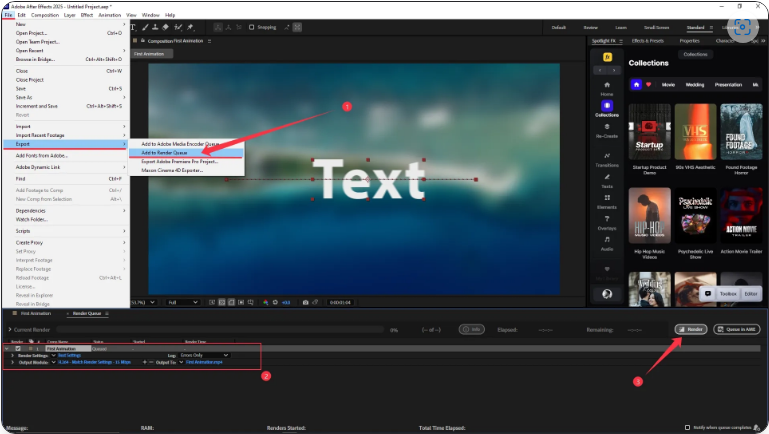
8. Export Your Animation
When you’re ready to save your work:
1. Go to File > Export > Add to Render Queue.
2. In the Render Queue tab:
● Output Module: Choose a format (e.g., H.264 via Media Encoder).
● Output To: Select a save location.
3. Click Render (or use Media Encoder for advanced settings).
And there you go—you’ve just created your first After Effects animation!