Want to make a lyric video that stands out? Whether you’re promoting a new song or just exploring your creative side, Adobe After Effects is the perfect tool for the job. The trick is to tackle it step by step—so it’s not as intimidating as it might seem.

I’ve used this exact method for indie musicians and YouTubers who wanted something more dynamic than basic subtitles. Once you get the hang of it, you’ll be able to crank these out in no time.
Let’s break it down.
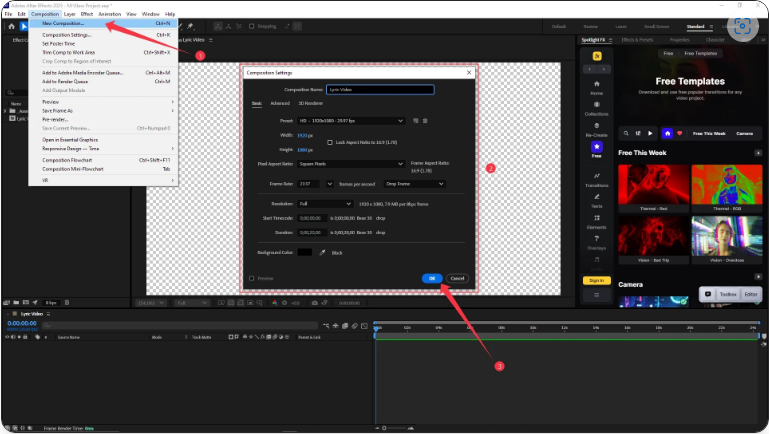
1. Set Up Your Composition
First, launch After Effects and create a new composition:
● Go to Composition > New Composition
● Set your resolution (1920×1080 is standard for HD), frame rate (24 or 30 fps), and duration (match your song length)
● Name it something clear, like “Lyric Video,” to stay organized
This will be your main workspace where all the magic happens.
2. Import Your Song
Now, bring in your audio track:
● File > Import > File (MP3 or WAV works best)
● Or just drag and drop the file directly into the Project panel
● Drag the audio into your timeline
● Press L twice (LL) to display the waveform
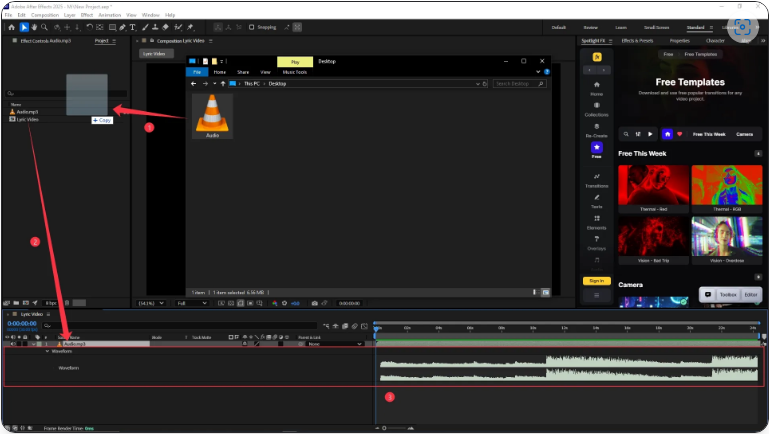
Seeing the waveform makes it way easier to sync lyrics with the beat.
3. Add & Animate Your Lyrics
This is where the real work begins—but it’s also where you get creative control.
● Use the Text Tool (Ctrl/Cmd + T) to type your first lyric line
● Adjust font, size, and position in the Properties panel
● Move the playhead to where the lyric should start
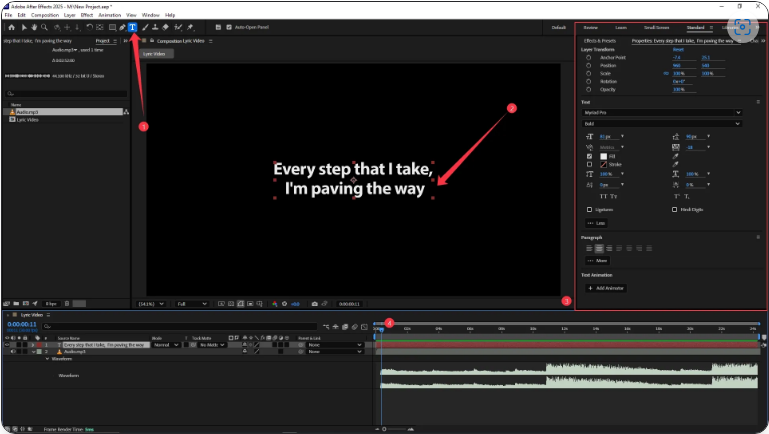
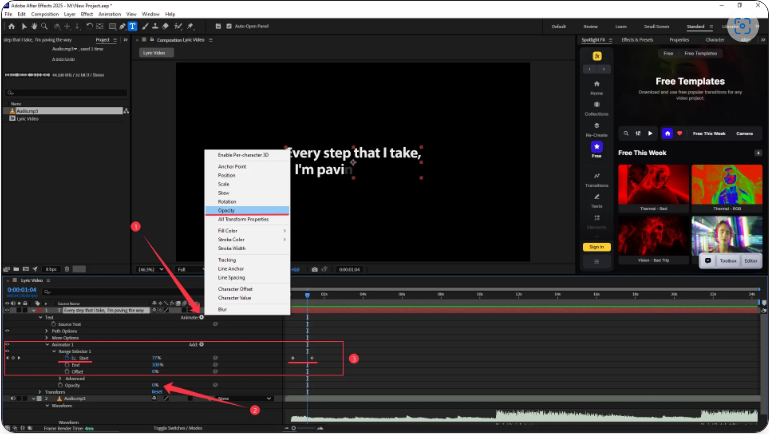
Instead of a basic fade-in, let’s animate the text for a smoother effect:
● Select your text layer, then go to Animate > Opacity
● Set Opacity to 0% (so the text starts invisible)
● Under Range Selector > Start, keyframe Start from 0% to 100% over time
This makes the words appear gradually (letter-by-letter or word-by-word). Adjust the timing to match the song’s rhythm.
Repeat for each line, syncing them with the waveform.
4. Add the Remaining Lyrics (The Fast Way)
No need to redo animations for every line—just reuse and tweak:
● Trim the first text layer so it ends after the animation
● Duplicate it (Ctrl/Cmd + D)
● Move the copy to the next lyric’s start point (use the waveform as a guide)
● Press U to show keyframes and adjust timing
● Double-click the text to update the words

This keeps your animations consistent and saves tons of time. Repeat until the whole song is covered.
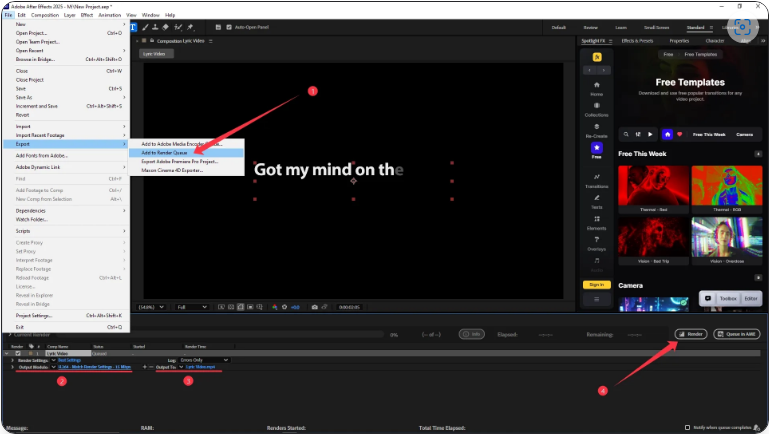
5. Export Your Video
Once everything’s perfectly synced:
● Go to File > Export > Add to Render Queue
● Click Output Module and choose H.264 (for MP4)
● Pick your save location and filename
● Hit Render
Now you’ve got a polished lyric video ready for YouTube, Instagram, or TikTok!
Final Thoughts
At first, making a lyric video in After Effects might feel overwhelming, but once you get into the workflow—especially syncing lyrics with the waveform—it becomes second nature. The best part? You get way more creative freedom than with basic subtitle tools.
Whether you’re making this for your own music or a client’s project, even a little effort can make it look pro. Happy editing!