If your Premiere Pro timeline is lagging or playback feels sluggish, your media cache might be clogged with old files. These temporary files build up over time, eating up valuable storage—especially if you work on multiple projects. The good news? Clearing them is quick, safe, and can even improve performance. Here’s how to do it.

Step 1: Open Media Cache Settings
Start by opening Premiere Pro and navigating to the cache settings:
● Windows: Go to Edit > Preferences > Media Cache
● Mac: Click Premiere Pro > Preferences > Media Cache
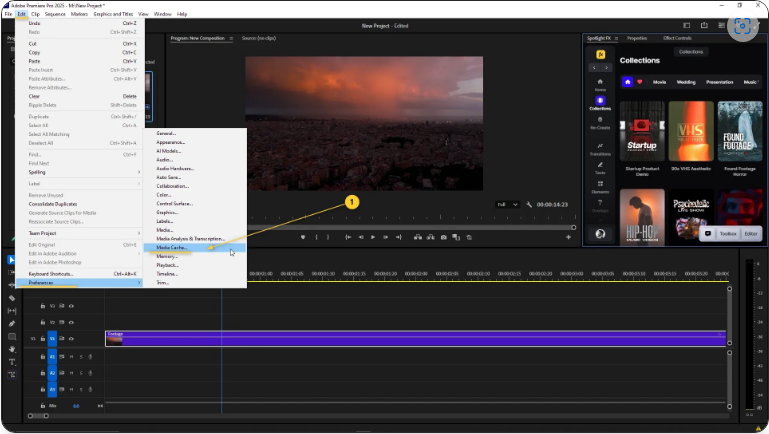
This opens the control panel where you can manage all cached files.
Step 2: Delete Unnecessary Cache Files
Inside the Media Cache settings, you’ll see a “Delete…” button. Clicking it gives you two options:
● Delete Unused Media Cache Files – Removes old files not linked to active projects (best for routine maintenance).
● Delete All Media Cache Files – Wipes everything (use this for a full reset, but note Premiere will rebuild cache files when reopening projects).
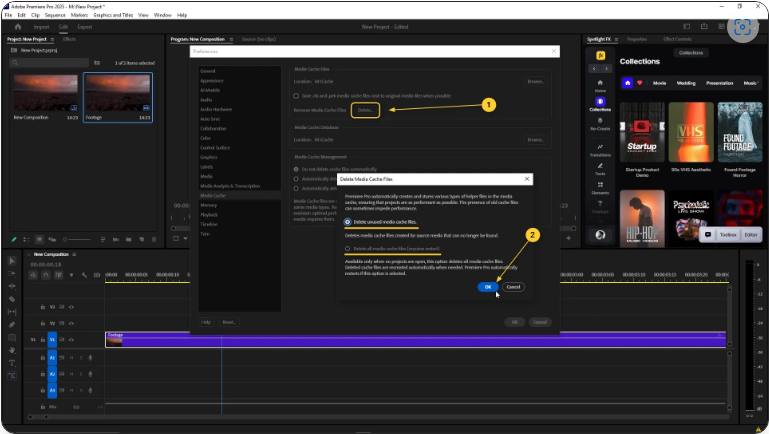
For most users, the first option is the safest choice.
Step 3: Manually Clear the Cache Folder (Advanced Option)
If you want a deeper clean or are running low on storage, you can delete cache files manually:
1. Check the folder paths listed under “Media Cache Files” and “Media Cache Database” in the settings.
2. Close Premiere Pro completely.
3. Open the folders in File Explorer (Windows) or Finder (Mac) and delete their contents.

This step isn’t always necessary but helps free up extra space.
Pro Tip: Move Your Cache to a Faster Drive
By default, Premiere stores cache files on your system drive, which can slow things down if space is tight. For better performance:
● In the Media Cache settings, click “Browse” and select an external SSD or a secondary drive with more space.
● This reduces strain on your main drive and can speed up playback.