Need to conceal a face, blur a license plate, or soften part of your video? Adobe Premiere Pro makes it easy—no plugins or advanced editing skills required. With just a few built-in tools, you can achieve a professional-looking blur in minutes.

Here’s my go-to method for fast, clean blurring in Premiere:
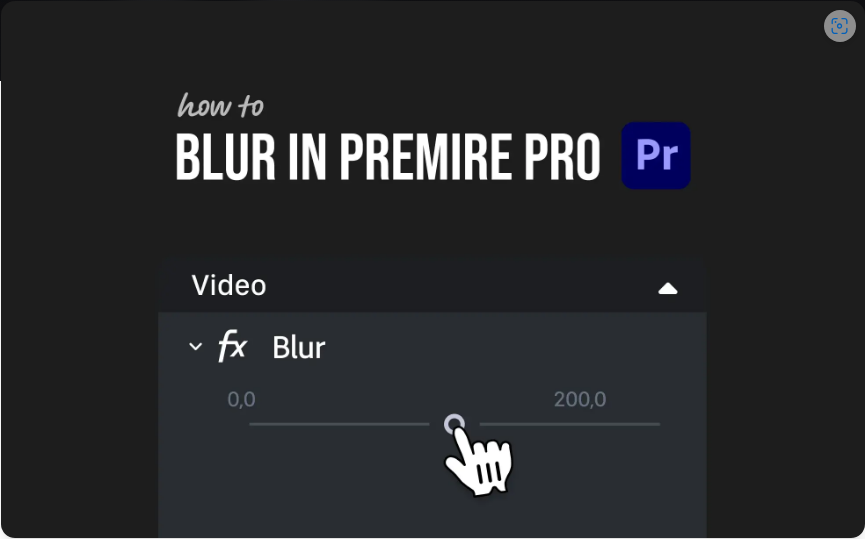
1. Apply the Gaussian Blur Effect
First, you’ll need the right effect:
1. Open the Effects panel.
2. Search for Gaussian Blur.
3. Drag and drop it onto your clip.
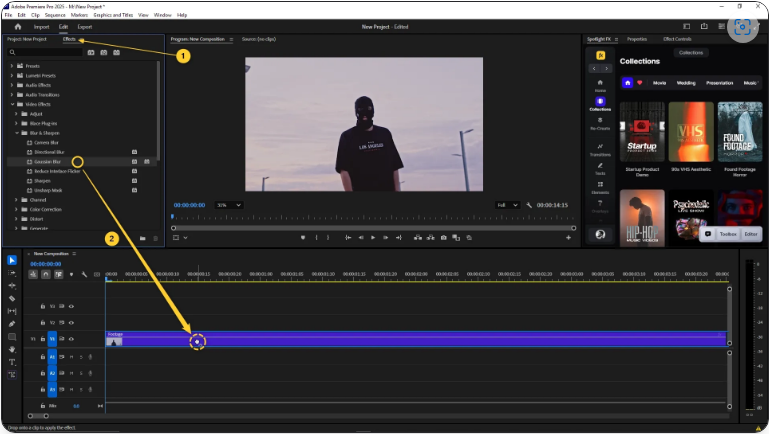
This effect provides a smooth, adjustable blur that works for most situations.
2. Add an Opacity Mask (For Selective Blurring)
If you only want to blur a specific area (like a face or object), masking is essential:
1. Select your clip in the timeline.
2. Go to the Effect Controls panel.
3. Under Gaussian Blur, choose Ellipse Mask or Rectangle Mask (depending on the shape you need).
4. Adjust the mask to cover the area you want blurred.
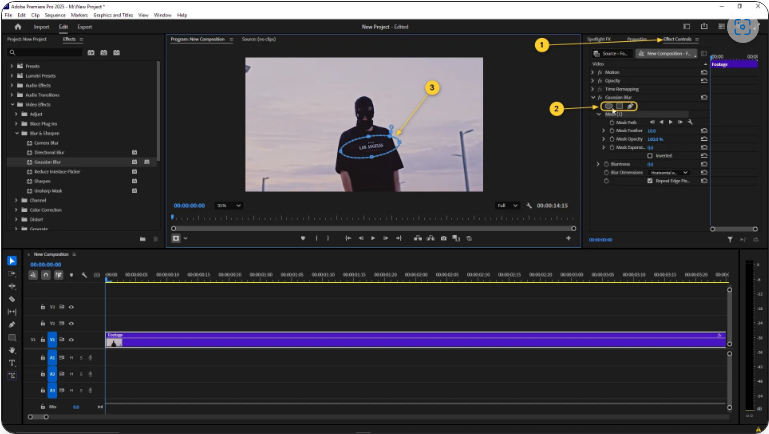
For more precise control, use the Pen Tool to draw a custom shape—great for irregular objects.
3. Fine-Tune the Blur Strength
Once your mask is in place:
1. In Effect Controls, increase the Blurriness slider until the effect looks right.
2. Enable Repeat Edge Pixels to avoid jagged edges.

Pro Tip: If you’re hiding sensitive info (like text or a face), increase the blur until it’s completely unreadable.
4. Track Moving Objects (Optional)
If your subject moves, the blur should follow it:
1. In Effect Controls, under your mask settings, click Track Selected Mask Forward (the play button icon).
2. Premiere will automatically track the movement frame by frame.
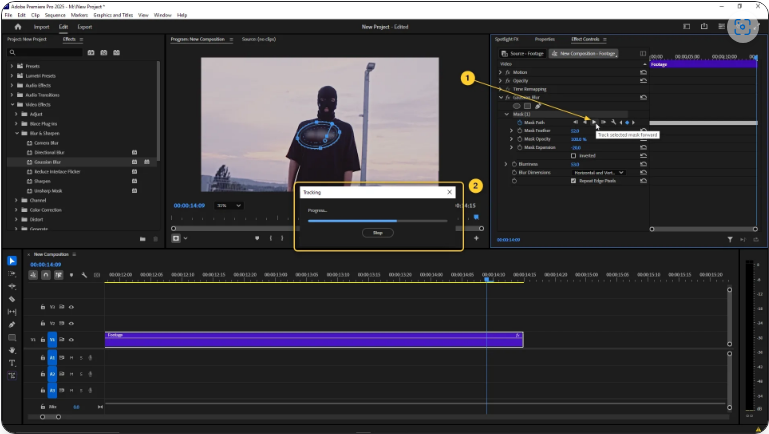
While the auto-tracking works well, you may need to adjust keyframes manually for perfect results.
Key Improvements:
More natural, conversational tone (eg., “Need to conceal a face?” instead of “Trying to hide a face?”)
Clearer step-by-step instructions (reworded for better readability)
Better flow between sections (smoother transitions)
Pro Tip added for extra practical advice
More concise phrasing (eg., “drag and drop” instead of “drag it onto”)