While Adobe After Effects (AE) is primarily known for motion graphics and visual effects, it also includes some surprisingly useful audio tools. These effects can help you fine-tune sound to match your visuals—without switching to a dedicated audio editor. Let’s explore how you can use them effectively.
Part 1: 10 Must-Know Audio Effects in After Effects
AE offers 10 built-in audio effects, accessible from the Effects & Presets panel. While many of these are also available in Premiere Pro, applying them directly in AE can streamline your workflow when syncing sound with motion graphics.
1. Backwards Effect
Want a trippy, reversed audio effect? This tool flips your sound clip backward—without affecting the video. Unlike reversing the entire layer (which impacts both audio and visuals), this effect keeps your footage intact while altering only the sound.
2. Bass & Treble Effect
A simple but powerful tool for adjusting low (bass) and high (treble) frequencies. Boost the bass for a deeper rumble or tweak the treble for crispier highs—great for refining voiceovers or music tracks.
3. Delay Effect
Creates an echoing delay, letting you control timing, feedback, and intensity. Perfect for adding spacey, sci-fi soundscapes or subtle reverb to dialogue.
4. Flange & Chorus Effect
These modulation effects thicken your audio with layered repeats:
● Flange produces a short, swirling effect (around 20ms delay).
● Chorus simulates multiple voices or instruments playing in unison.
5. High-Low Pass Effect
Block unwanted frequencies:
● High Pass cuts out low-end noise (e.g., background hum).
● Low Pass muffles high frequencies (useful for simulating phone audio).
6. Modulator Effect
Similar to delay but with evolving timing. The delay lengthens over time, creating a warped, pitch-shifting sound—ideal for dream sequences or glitch effects.
7. Parametric EQ Effect
A precision equalizer for fine-tuning specific frequency ranges. Adjust bandwidth, center frequency, and gain for professional-grade audio balancing.
8. Reverb Effect
Simulates how sound reflects in physical spaces (e.g., a hallway or concert hall). Adjust decay time and diffusion for realistic—or exaggerated—ambiance.
9. Stereo Mixer Effect
Control left/right channel balance (panning) to position sounds in a stereo field. Essential for immersive audio design.
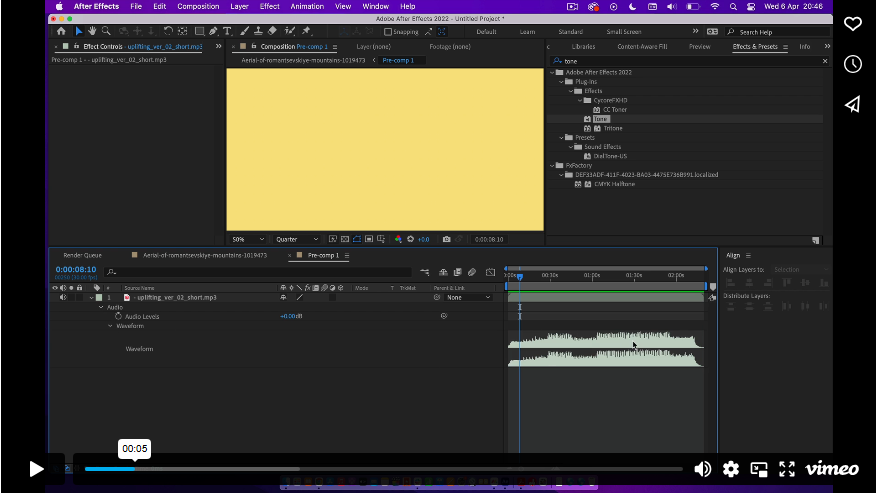
10. Tone Effect
Generates artificial tones (like a steady hum or beep). Unlike other effects, this works even on solid or adjustment layers—no audio clip needed!
Part 2: Editing Audio in After Effects (Step-by-Step Guide)
Combining effects can transform ordinary audio into something extraordinary. Here’s how to create a glitchy, high-energy sound:
Step 1: Create a Glitch Effect
1. Find your glitch point—zoom into the timeline to see the audio waveform.
2. Split the clip (`Ctrl+Shift+D` / `Cmd+Shift+D`) at the desired start point.
3. Cut and delete frames in quick succession to fragment the audio.
4. Combine the layers (`Ctrl+Shift+C` / `Cmd+Shift+C`) into a single pre-comp.
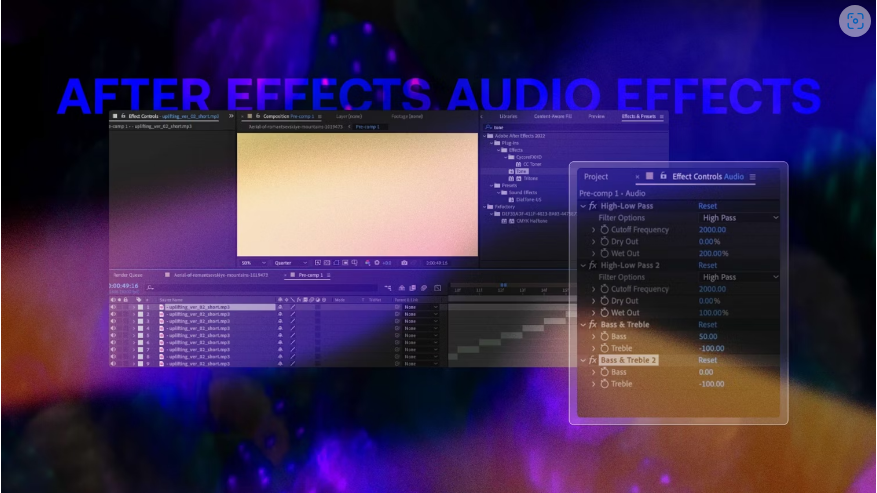
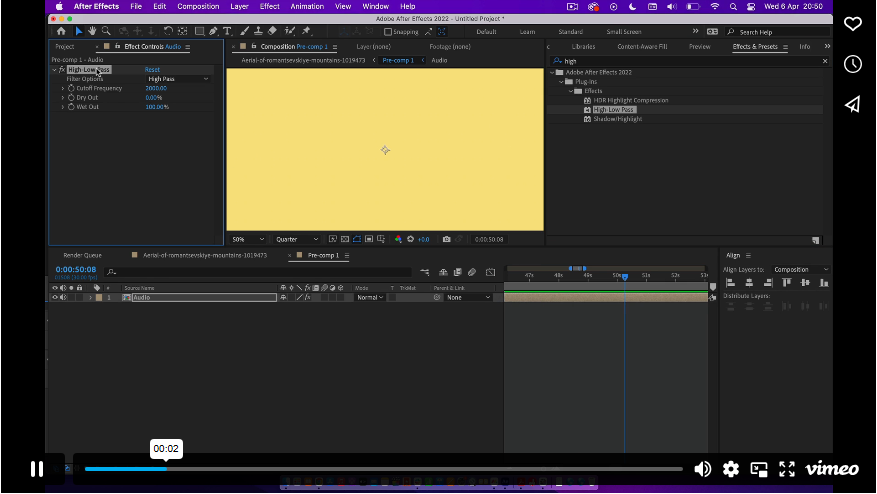
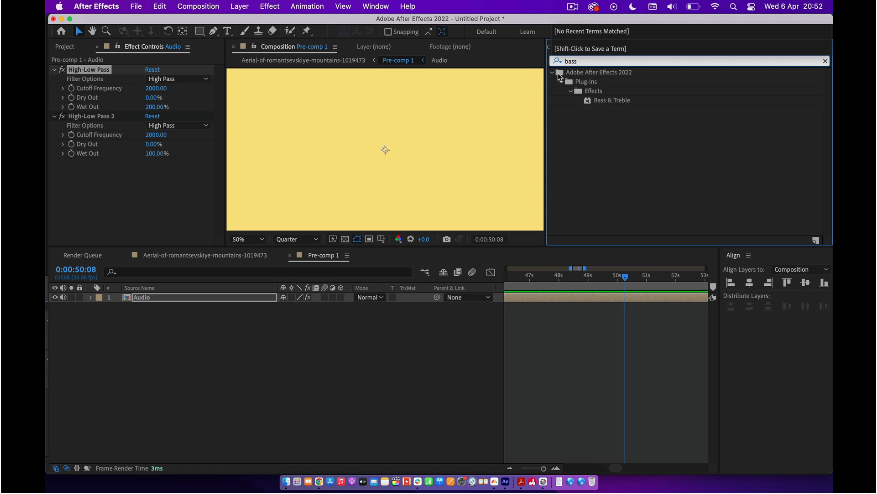
Step 2: Apply High-Low Pass Filters
1. Add the High-Low Pass effect to your audio layer.
2. First instance: Set to High Pass, cutoff at 2000Hz, Wet Out to 200.
3. Duplicate the effect (`Ctrl+D` / `Cmd+D`), switch to Low Pass, and set Wet Out to 100.
Step 3: Enhance with Bass & Treble
1. Add Bass & Treble, then duplicate it.
2. First instance: Bass +50, Treble -100.
3. Second instance: Bass 0, Treble -100.
4. Tweak settings to match your project’s vibe.
Final Thoughts
After Effects isn’t a full-fledged audio editor—tools like Premiere Pro or Audition offer deeper control. But for quick, creative sound design that syncs with visuals, AE’s built-in effects are surprisingly handy. Experiment with combinations to craft unique audio textures that elevate your projects!