Editing audio in Adobe Premiere Pro might feel overwhelming at first, but with these straightforward steps, you’ll be able to polish your sound like a pro—no third-party plugins required. Whether you’re trimming silence, balancing levels, or reducing background noise, this guide will walk you through the essentials.

1. Import & Organize Your Audio
Before making any edits, you’ll need to get your audio into Premiere Pro.
1. Drag and drop your audio file into the Project Panel.
2. Place it on the timeline where you want it to start.
3. If it’s attached to a video clip, right-click and select Unlink to edit the audio independently.
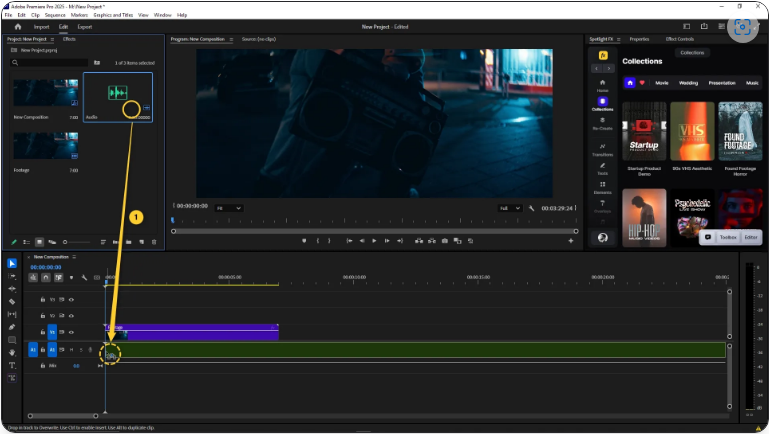
Now you can adjust the audio without affecting the video track.
2. Trim Unwanted Sections with the Razor Tool
Need to remove awkward pauses or mistakes? Here’s how:
1. Press C (Razor Tool) and click where you want to split the audio.
2. Press V (Selection Tool) to exit Razor mode.
3. Click the unwanted segment and hit Delete.
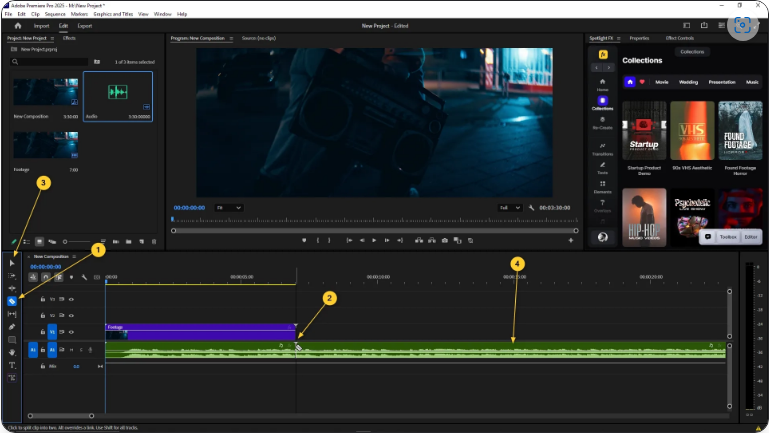
For a smoother edit, use Ripple Delete (right-click > Ripple Delete) to automatically close gaps.
3. Adjust Volume Levels
If your audio is too loud or too quiet:
1. Select the clip in the timeline.
2. Open the Effect Controls panel and tweak the Volume Level.
● Or drag the white volume line up/down directly on the clip for quick adjustments.
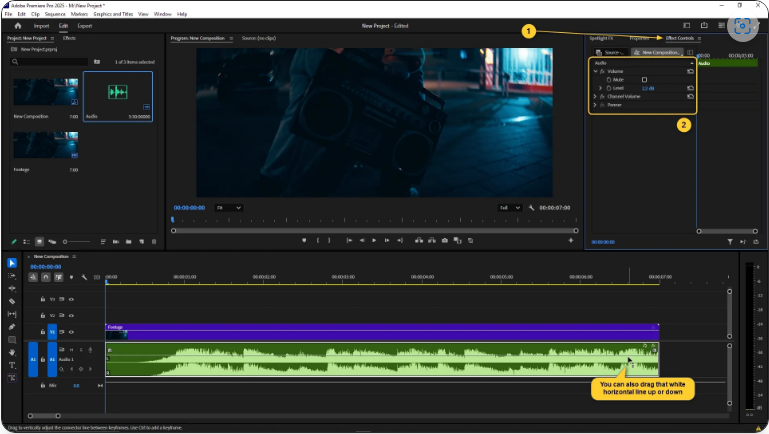
This is perfect for balancing dialogue, music, and sound effects.
4. Fine-Tune with Keyframes
For dynamic volume changes (like fading music under speech):
1. Expand the audio track height for better visibility.
2. Hold Ctrl (Win) / Cmd (Mac) and click the volume line to add keyframes.
3. Drag keyframes up or down to create smooth fades.
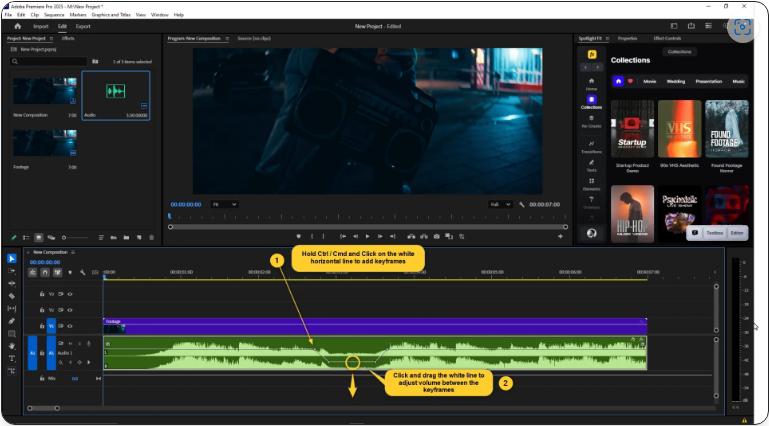
This gives you way more precision than simple cuts.
5. Reduce Background Noise with Essential Sound
Premiere’s built-in tools can clean up messy audio:
1. Select your clip and go to Window > Essential Sound.
2. Click Dialogue and enable Noise Reduction or Reverb Reduction.
3. Adjust the sliders until the audio sounds clearer.
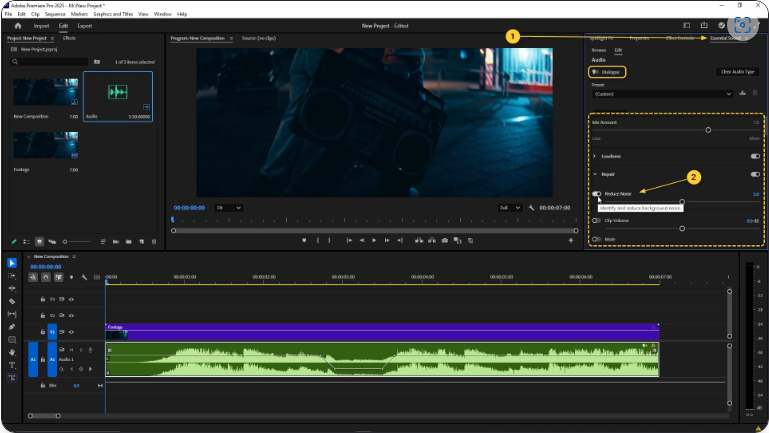
While it won’t fix everything, it’s great for minimizing hums, echoes, and room noise.
Final Thoughts
With these five steps, you can significantly improve your audio in Premiere Pro. Experiment with different settings to find what works best for your project—soon, you’ll be editing sound with confidence!