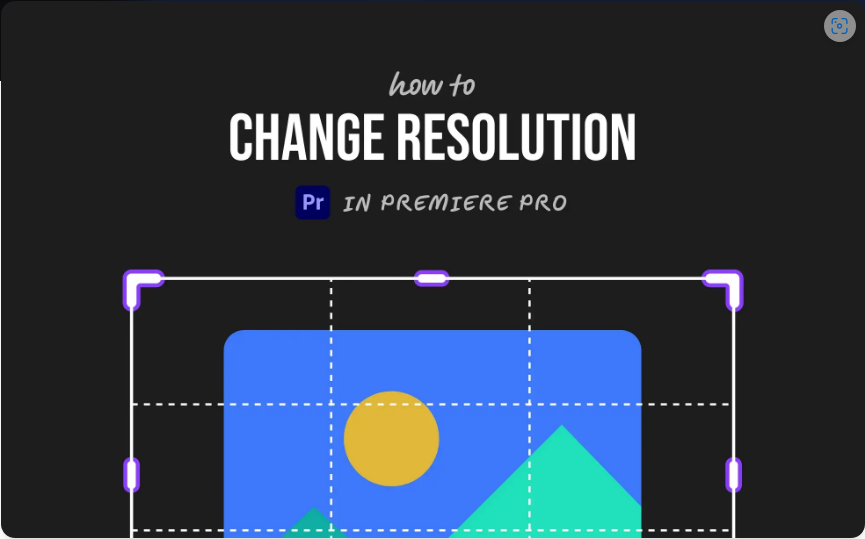
Need to switch your project to 1920×1080? Working with vertical video and need a custom resolution? No problem—adjusting resolution in Premiere Pro is quick and easy once you know the steps.

Let’s break it down.
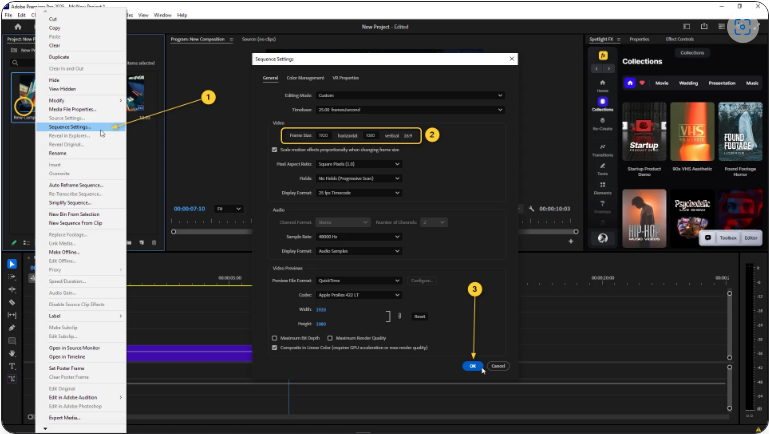
1. Update Your Sequence Settings
This is where you’ll change your timeline’s resolution.
Here’s how:
1. In the Project panel, right-click your sequence.
2. Select Sequence Settings.
3. Under Video, find Frame Size.
4. Enter your desired resolution (e.g., 1920 for width, 1080 for height).
5. Click OK and confirm if prompted.
Done! Your sequence now matches your target resolution.
Note: This won’t automatically resize your clips—you’ll need to adjust them manually if they don’t fit.
2. Resize Your Video Clips
If your footage looks zoomed in or has black bars after changing the resolution, follow these steps:
1. Select a clip in the timeline.
2. Open the Effect Controls panel.
3. Under Transform, tweak the Scale until it fits correctly.
4. For a quick fix, use the Fill or Fit options.
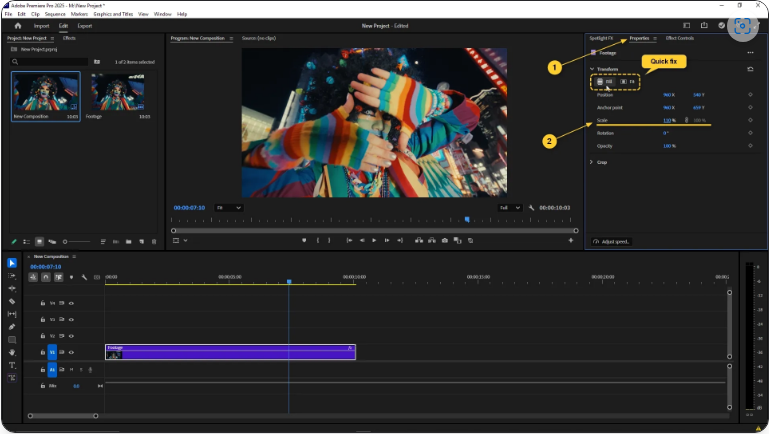
This ensures your clips properly fill the frame without distortion.
3. Export at the Correct Resolution
Your sequence may be set, but exporting ensures your final video matches your desired resolution.
Here’s how to do it:
1. Go to File > Export > Media (or press Ctrl/Cmd + M).
2. In the Export Settings, navigate to the Video tab.
3. Under Basic Video Settings, enter your width and height (e.g., 1920×1080).
4. If the resolution is locked, uncheck Match Source.
5. Choose your format and preset, then click Export (or send to Media Encoder).
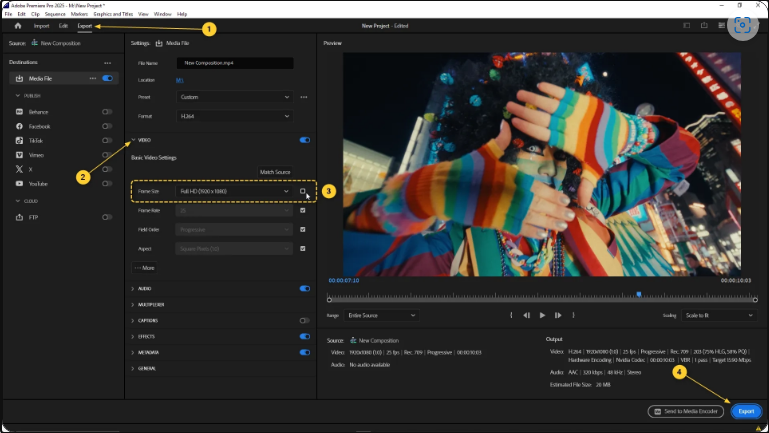
Now your video will render at the exact resolution you need.
Final Thoughts
Changing resolution in Premiere Pro is straightforward—just update your sequence, adjust your clips, and export. Follow these steps, and you’ll have perfect sizing every time!