As video editors, we always hope for pristine footage—but reality often delivers shaky, blurry, or poorly exposed clips instead. Whether it’s camera shake, flickering, or color issues, After Effects offers powerful tools to salvage even the roughest shots. In this guide, we’ll walk through five essential fixes, including stabilization, flicker removal, and exposure correction—complete with step-by-step instructions.
Part 1: Reducing Motion Blur in After Effects
Motion blur can ruin an otherwise sharp shot, but AE’s Camera Shake Deblur effect helps soften the problem. Here’s how to use it:
1. Trim your clip in the timeline to isolate the problematic section.
2. Scrub frame by frame, marking blurry sections with Shift + 1 for quick reference.
3. Apply the Camera Shake Deblur effect (found in the Effects Panel).
4. In the Effect Controls, tweak the Blur Duration to blend blurred frames with sharper ones.
5. Adjust Strength and Shake Sensitivity until the shot looks clean.
Pro Tip: This effect works best on short clips with moderate motion.
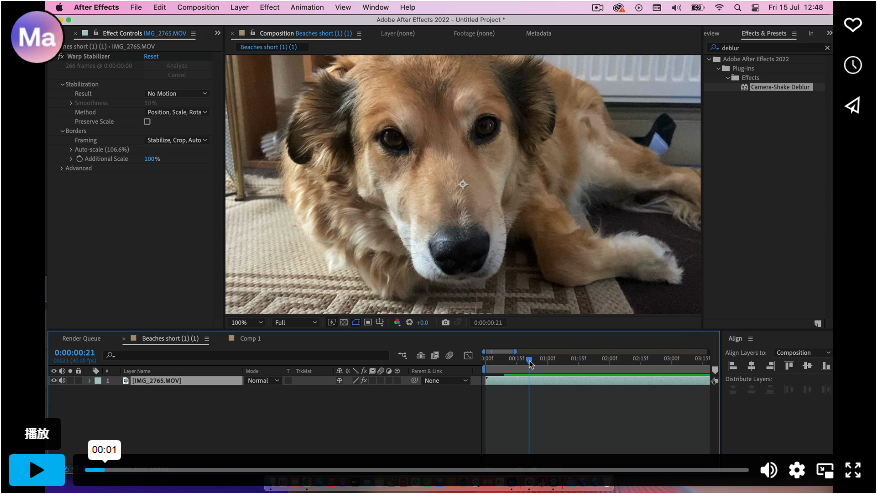
Part 2: Stabilizing Shaky Footage
Handheld shots can be a nightmare, but Warp Stabilizer saves the day—just know it’ll crop your frame slightly.
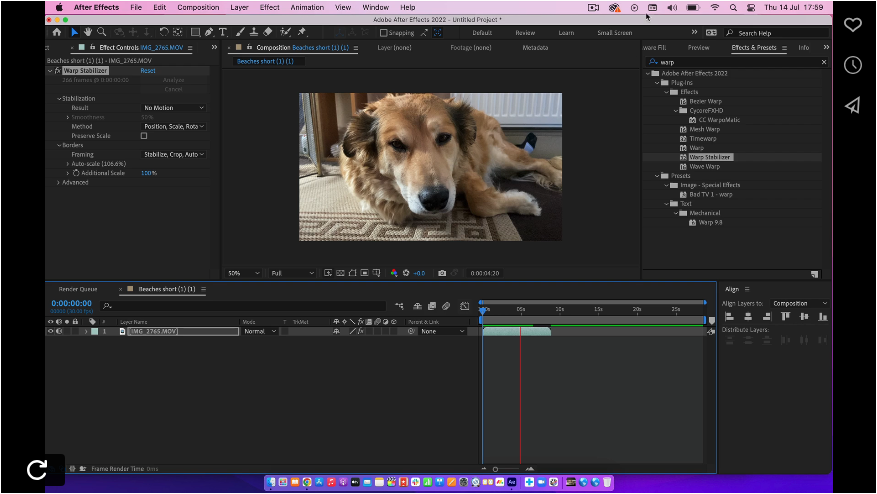
1. Add Warp Stabilizer from the Effects Panel to your clip.
2. Let AE analyze the motion (check progress in Effect Controls).
3. Choose Smooth Motion (for natural stabilization) or No Motion (for a locked-down look).
4. Experiment with Method (e.g., Position, Scale, Rotation) for better results.
Note: Over-stabilizing can make footage look robotic—find a balance!
Part 3: Removing Flicker from Video
Flickering often happens when filming screens or under certain lighting. Here’s a quick fix:
1. Duplicate your clip (Ctrl/Cmd + D).
2. Offset the duplicate by 1 frame.
3. Set the top layer’s Opacity to 50%—this blends frames to cancel out flicker.
Bonus: This trick works in most editing software, not just AE!
Part 4: Fixing Overexposed or Underexposed Shots
Bad exposure doesn’t have to mean reshoots. Use Lumetri Color to recover details:
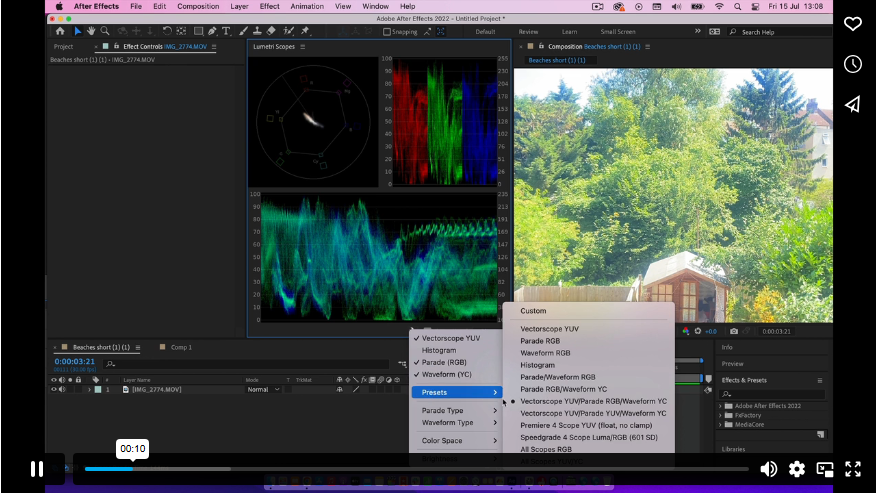
1. Switch to the Color workspace (Window > Workspace > Color).
2. Enable Vectorscope YUV, Parade RGB, and Waveform YC in the Scopes panel.
3. Apply Lumetri Color and open Basic Correction.
4. Adjust Exposure first, then fine-tune Contrast, Shadows, Highlights, Whites, and Blacks.
5. Keep an eye on the scopes to avoid clipping or crushing shadows.
Pro Move: Slightly underexposed footage is easier to correct than blown-out highlights.
 Part 5: Fixing Color Banding
Banding happens when gradients look blocky due to low bit depth. The fix?
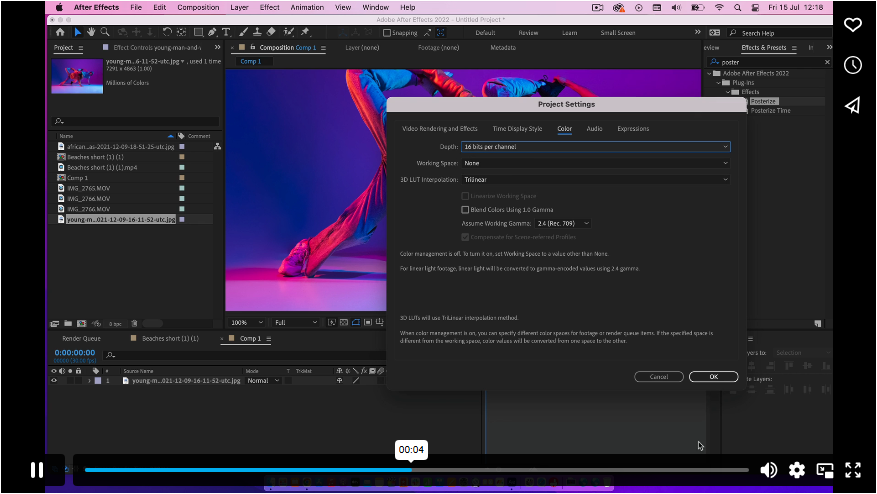
1. At the bottom of the Project Panel, switch from 8-bit to 16-bit or 32-bit.
2. For extra smoothness, add a subtle Gaussian Blur (0.5–1%) to problematic areas.
Why It Works: Higher bit depth = more color data = smoother gradients.
Final Thoughts
From stabilizing shaky clips to fixing exposure, these After Effects tricks can rescue flawed footage and save hours of frustration. Want to dive deeper? Check out our [Advanced Stabilization Guide]for pro-level techniques.