Need to trim or separate audio in Premiere Pro but not sure how? Whether you’re editing a podcast, cleaning up dialogue, or syncing music to video, splitting audio is a fundamental skill that makes your workflow smoother.

The best part? It’s incredibly easy once you know the steps. Let’s break it down.
1. Select the Audio Clip You Want to Split
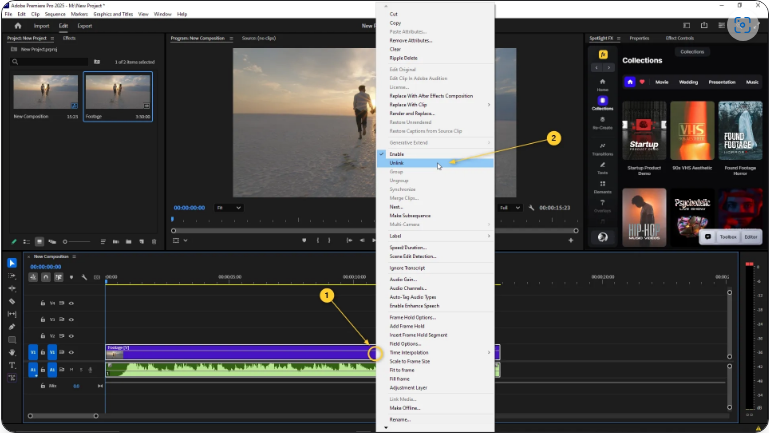
First, make sure your audio is on the timeline. If it’s attached to a video clip and you only want to split the audio, you’ll need to unlink them.
Here’s how:
● Right-click the clip in the timeline
● Select Unlink
● Now you can click and edit just the audio without affecting the video
 If you’re working with a standalone audio file (like a voiceover or music track), you can skip this step.
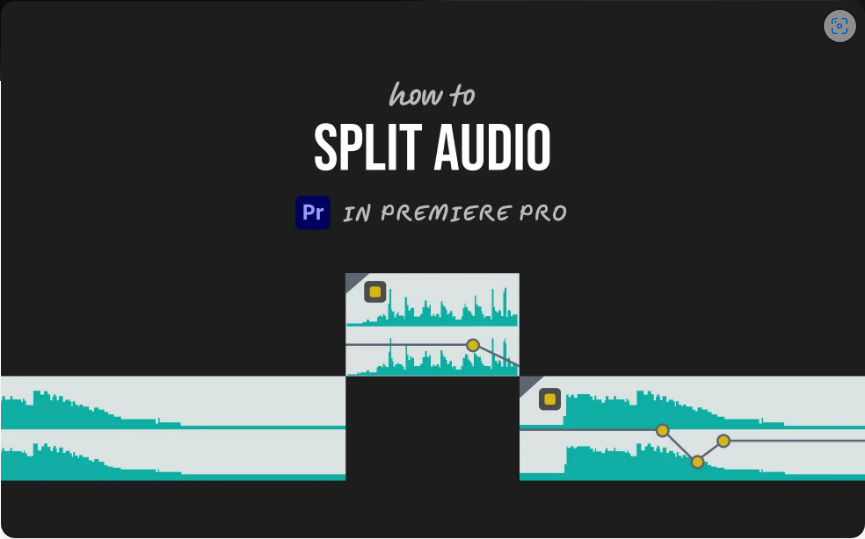
2. Use the Razor Tool or Keyboard Shortcut
Now it’s time to make the cut. You have two quick ways to do this:
Option 1: The Razor Tool
● Press C (this switches you to the Razor Tool)
● Click where you want to split the audio
● Press V to switch back to the Selection Tool
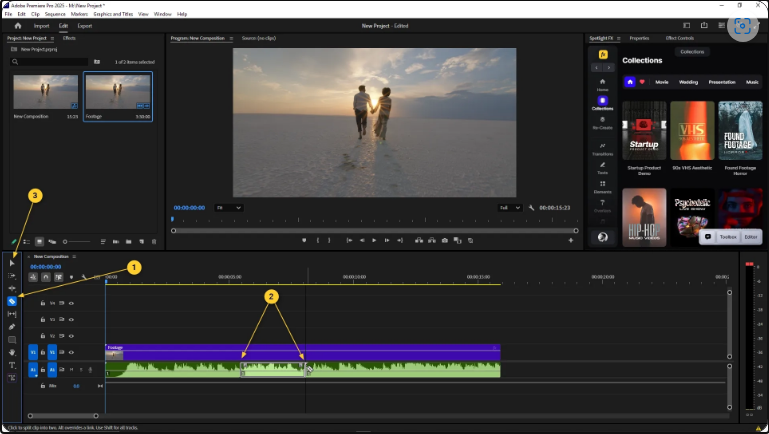
Option 2: The Quick Split Shortcut
● Move the playhead to your desired cut point
● Select the clip
● Press Ctrl+K (Windows) or Cmd+K (Mac)
This instantly splits the clip at the playhead—perfect for fast, precise cuts.
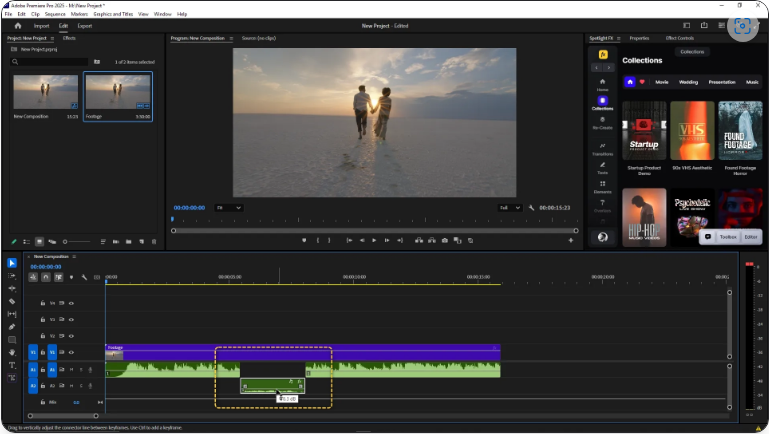
3. Adjust, Delete, or Enhance Your Split Clips
After splitting, each segment becomes its own clip. Now you can:
● Drag sections to rearrange them
● Delete unwanted parts
● Apply effects or fades to specific sections
For smoother transitions between clips, try adding an audio crossfade (found under Audio Transitions in the Effects panel). Just drag and drop it between two clips.
Pro Tip: Zoom In for Better Precision
If you need to cut at an exact moment (like a specific word or beat), zoom in using the + key or the timeline slider. This gives you much finer control over your cuts.