Premiere Pro Multicam Editing Made Simple: A Step-by-Step Guide
Multi-camera editing might seem intimidating at first, especially if you’re used to traditional single-camera workflows. But with Premiere Pro’s Multicam feature, it’s actually a breeze! By the end of this guide, you’ll know how to set up, edit, and fine-tune a multi-camera project like a pro.
First, let’s clarify one thing: Multicam editing is different from split-screen editing. Multicam editing involves cutting between multiple angles of the same scene—all recorded simultaneously. With just a few clicks (or keyboard shortcuts), you can seamlessly switch between camera views.

Part 1: How to Edit Multicam Footage in Premiere Pro
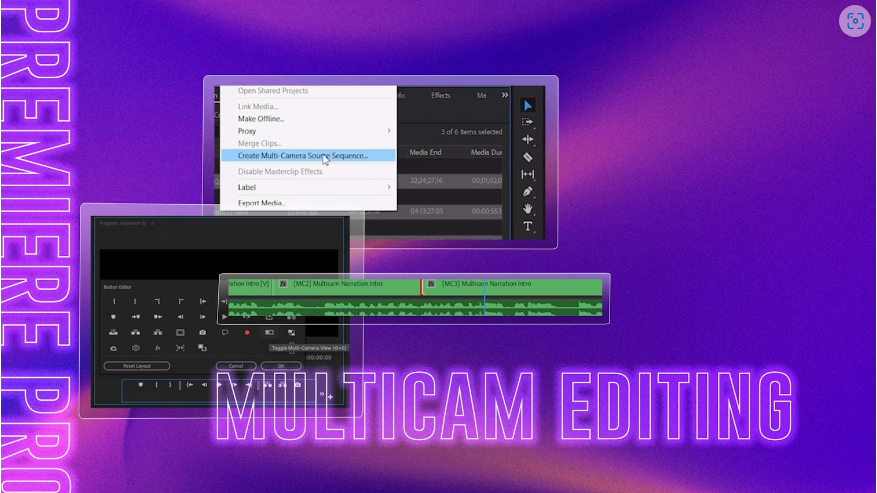
Step 1: Create a Multicam Sequence
1. Import your footage into your project.
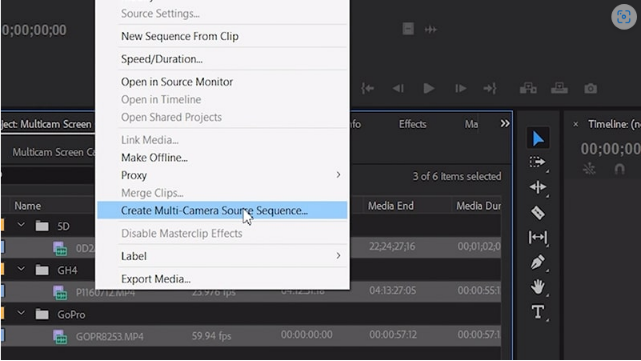
2. In the Project panel, select the clips you want to use (hold Ctrl/Cmd to multi-select).
3. Right-click one of the clips and choose Create Multi-Camera Source Sequence.
4. Name your sequence (e.g., “Interview_Angle1” or “Scene1_Multicam”).
5. Under Synchronize Point, select Audio (this syncs clips based on audio waveforms).
6. Set Sequence Preset to Automatic.
7. Check Enumerate Cameras if your clips aren’t already labeled. Click OK.
Step 2: Set Up the Multicam Workspace
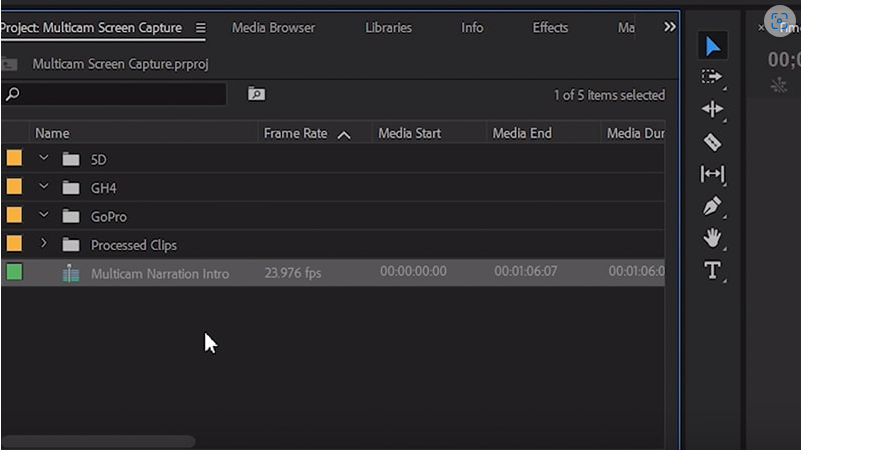
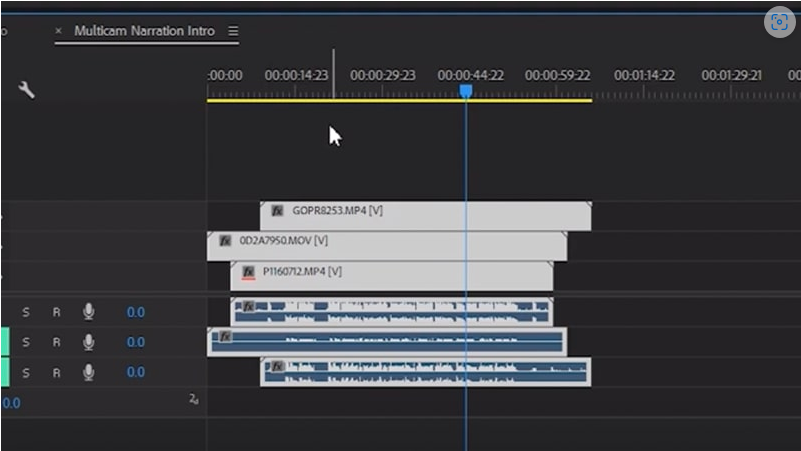
1. Locate your new Multicam sequence in the Project panel, right-click, and select New Sequence from Clip.
2. Your timeline will now display a single merged clip with synced audio.
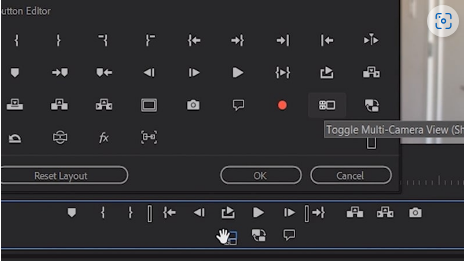
3. 0pen the Button Editor (wrench icon in the Program Monitor) and drag the Multi-Camera View button to your toolbar.
4. Click the Multi-Camera View button to activate the multicam editing interface.
Step 3: Enable Camera Overlays (Recommended)
Adding overlays lets you see and switch between angles easily using hotkeys.
1. In the Program Monitor, click the wrench icon and select Overlay Settings.
2. Check Enable Overlays During Playback and click OK.
3. Go back to the wrench icon and make sure Overlays is selected.
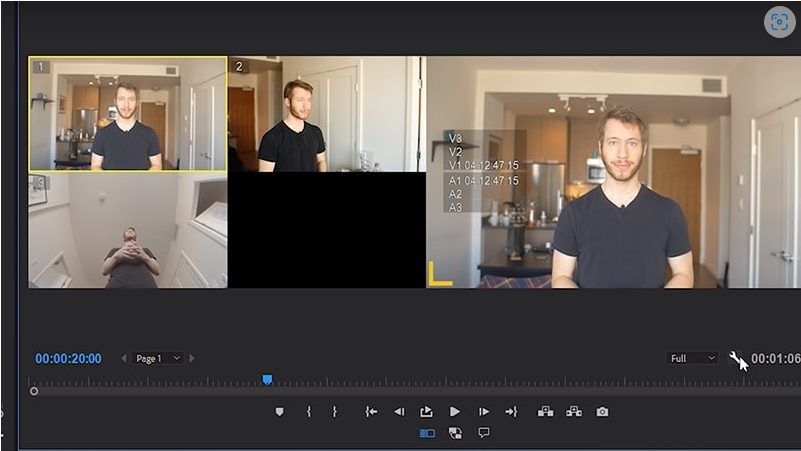
Step 4: Edit & Switch Between Angles
The large preview window shows your active angle, while smaller windows display alternate camera views.
Two ways to switch angles:
● Click Method: Play the sequence, then click a camera angle to cut to it.
● Hotkey Method: Press the number key (1, 2, 3, etc.) assigned to each angle.
Pro Tip: To rearrange cameras, select Edit Cameras and drag clips into your preferred order. You can also disable unused angles by unchecking them.
With practice, you’ll be able to make cuts in real time while the sequence plays!
Part 2: Fine-Tuning Your Multicam Edit
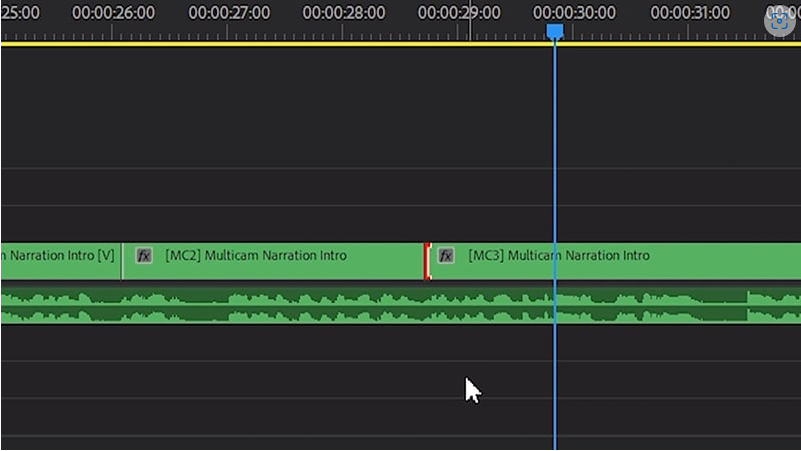
1. Deleting an Edit
● Zoom in on the cut point in your timeline.
● Select the edit marker and press Delete—the clip will revert to the previous angle.
2. Changing a Camera Angle After Cutting
● Select the clip in the timeline, then click a different angle in the Multicam viewer.
3. Adjusting Edit Points
● Press N to activate the Rolling Edit Tool.
● Drag the edit point left or right to adjust timing without changing angles.
Part 3: Troubleshooting & Pro Tips
1. Fixing Audio Sync Issues
If Premiere Pro doesn’t sync clips automatically:
● Open the Multicam clip in the timeline.
● Manually align clips using visual cues (like a clapperboard).
2. Replacing a Clip in Your Multicam Sequence
● Right-click the clip in the timeline and select Reveal in Project.
● Right-click the source file and choose Replace Footage.
● Select the new clip and click OK.
3. Color Correction & Effects
● Open the Multicam clip to apply adjustments to individual source clips.
● Effects will update across all instances in your edit.
Final Thoughts
Multicam editing in Premiere Pro is fast and intuitive once you get the hang of it. The more you practice, the quicker you’ll be able to polish professional-looking multi-angle edits. Now go try it out—your next multicam project will be smoother than ever!