Control your audio mix at the clip level using Adobe Premiere Pro’s clip mixer panel.
Cover image via Shutterstock.
When you’re working in Adobe Premiere Pro, don’t always assume you have to jump into Audition or another program to perform a proper audio mix. Premiere offers you plenty of tools with which to work, including audio effects as well as track and clip mixer panels. The clip mixer, in particular, often gets overlooked, mainly because it doesn’t have as many bells and whistles as the track mixer panel. The clip mixer panel allows you to control keyframing on a clip level and is very powerful and efficient when used in conjunction with the effect controls panel. Let’s take a step-by-step look at how we can quickly mix our audio using the clip mixer panel.
Step 1 — Set up Your Display Options
For the first step, I want to get Premiere set up for an audio mixing workflow. To do this, I’ll first open up the clip mixer panel by selecting Window > Clip Mixer. I can customize the displays on my clip mixer panel meters by control-clicking directly over the audio meters. This will allow me to specify if I want to show peaks and whether I want them to be static or dynamic. I can also show valleys and channel volume. Once I have the clip mixer panel set up, I’ll go down to the timeline panel and make sure I have my clip keyframes displayed by pressing the Show Keyframes button and choosing Clip Keyframes.

Step 2 — Select an Automation Mode
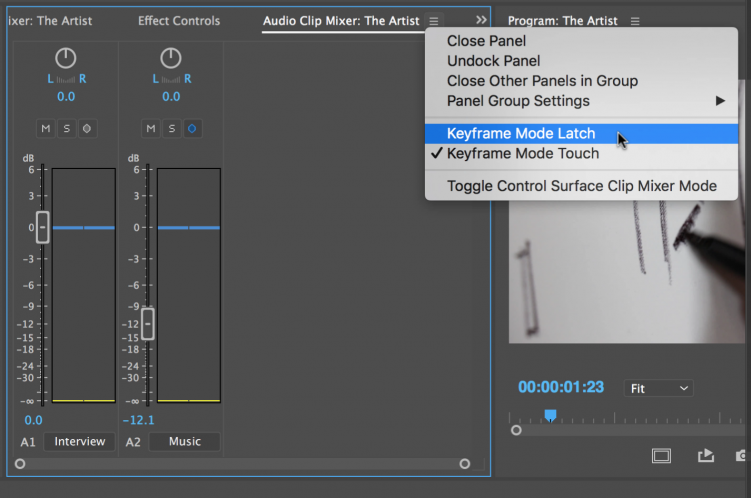
The next step prior to mixing my audio is choosing an automation mode. This will tell the clip mixer fader bars how to react during a live mix. The clip mixer panel provides two different automation modes: latch and touch. During recording, touch mode will snap back to your previous audio levels when you release the audio fader bar. In latch mode, the fader bar will latch to its current position when released. Once I select an automation mode, I’m ready to mix.
Step 3 — Write Keyframes
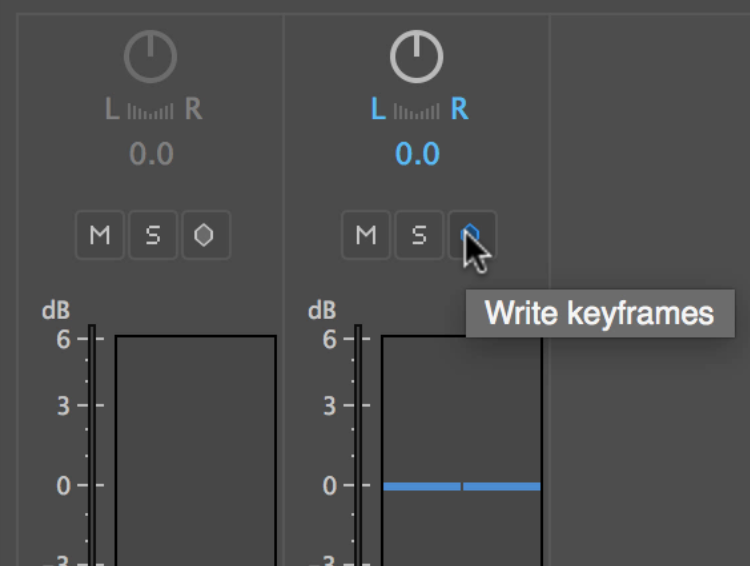
Now that I’ve set up my display options and selected an automation mode, I’m ready to mix my audio. To record a live mix, I simply need to turn on the Write Keyframes button right next to the Mute and Solo buttons. Now, anytime I play back my audio and adjust my fader bars, the changes get recorded with keyframes. In addition to mixing volume, I can also adjust panning and channel volume. After recording, I can see all of the keyframes displayed on each corresponding clip in the timeline and also the Effect Controls panel.
