Quick and Easy Tips on Shooting and Processing Day for Night
In this article, we’ll take a look at the basics of shooting day for night footage — as well as post-production processing in Adobe Premiere Pro.
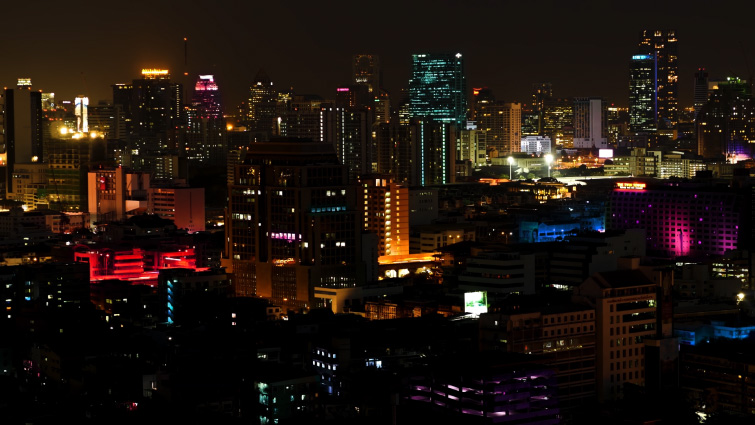
Day for night shooting has a bad reputation — but with a little information, this process can yield incredible results that would be impossible to get while shooting at night.
Shooting Day For Night
The main reason a filmmaker might shoot day for night is to save money. Nighttime lighting setups are usually extremely expensive and complex to move. By shooting during the day, filmmakers can use several tried-and-true tricks to drastically reduce time and equipment.
PremiumBeat contributors Jourdan Aldredge and Noam Kroll both have fantastic write-ups on effective use of day for night.
Here are the basics:
Shoot at the right time of day
You generally get the best day for night results during the middle of the day, while the sun is overhead. During the morning and the evening, the sunlight has a far more distinct look than moonlight, so it will be hard to correct in post.
Set correct exposure
Underexpose your footage. For best results, the director of photography must protect the highlights in the shot and will typically underexpose the image by up to three full stops. Failure to bring down the highlights of an image can make day for night impossible in post.
Adjust white balance
Unless you’re shooting raw, cool the white balance off in the camera. This helps to bake in a cooler look, which will be much easier to manipulate in post.
Pay attention to contrast
Daylight is bright with small areas of harsh shadow. Night light is just the opposite, with lower global illumination and large swathes of deep shadow. Incorrect contrast can make dialing the look in later much more arduous.
With these essentials for effective day for night shooting covered, let’s take a look at dialing in the look using Adobe Premiere Pro.
Day for Night in Premiere
Let’s work with this shot from All the Real Girls. It is a very warm shot, despite the hazy mountains in the background. Due to the overcast weather, this shot lacks strong direct light, which will make dialing in the day for night look much easier.
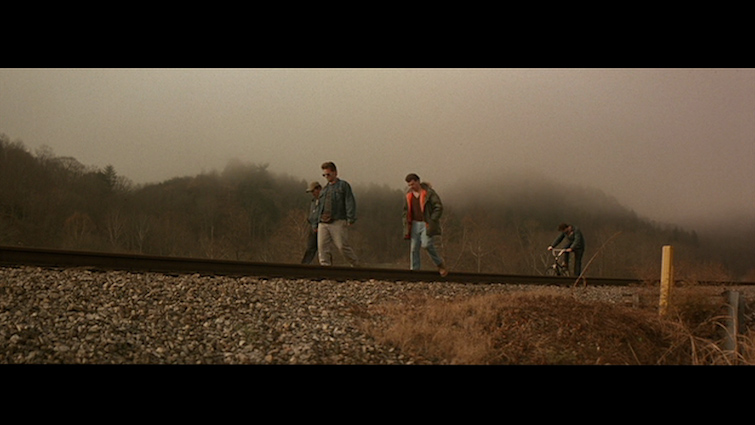 Image via All the Real Girls (Sony Pictures Classics).
To begin, let’s make some basic adjustments to the original clip. The first order of business is to bring the overall exposure down. While adjusting exposure, we want to deepen the shadows and the low end of the image, while doing everything we can to bring the highs way down. I’m being careful to maintain the atmospheric glow (from the fog) in the top of the frame. I’ve adjusted the basic corrections and am quickly cooling the temperature by about 25 percent — don’t go too crazy with this; we’ll fine-tune the results a little later in the process.
With the basic corrections made, we’ll head to the curves section, where we’re going to lower the reds and greens before making adjustments to the blues and exposure curves.
In both the red and green channels, we’ll drop the highs to indirectly enhance the blues in the high end of the image. For the blues, we will ever-so-slightly boost the shadows. This really helps to sell the basic corrections we applied above. Before leaving the curves panel, we will also adjust the exposure by crushing the blacks and clipping the highs a bit, after placing an anchor point at the center of the curve.
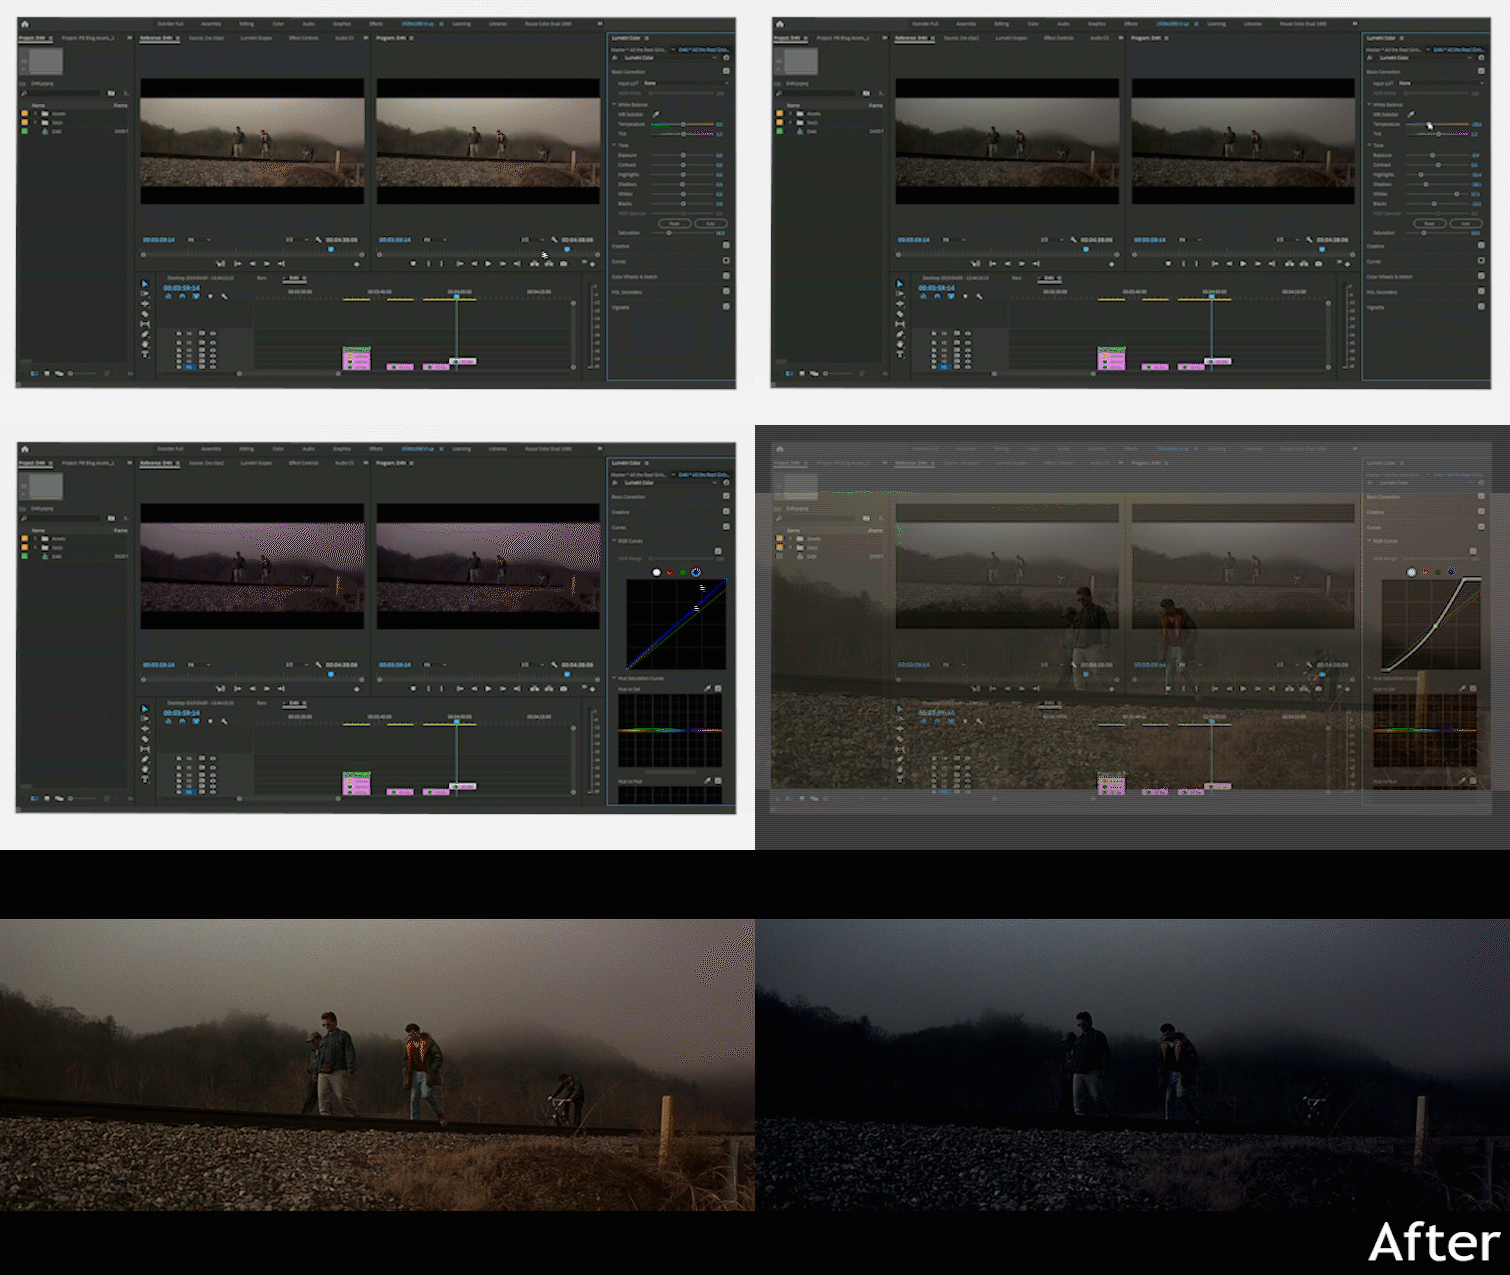
At this stage, we have already given the original shot a pretty effective day for night transformation, but let’s use our opacity tools to replace and enhance the sky in order to sell the effect just a little bit more.
Sky Replacement
Color adjustments can usually get you where you need to go with day for night, but by using the tips in my previous article on sky replacement, we can effectively hide the transformation to all but the keenest eyes.
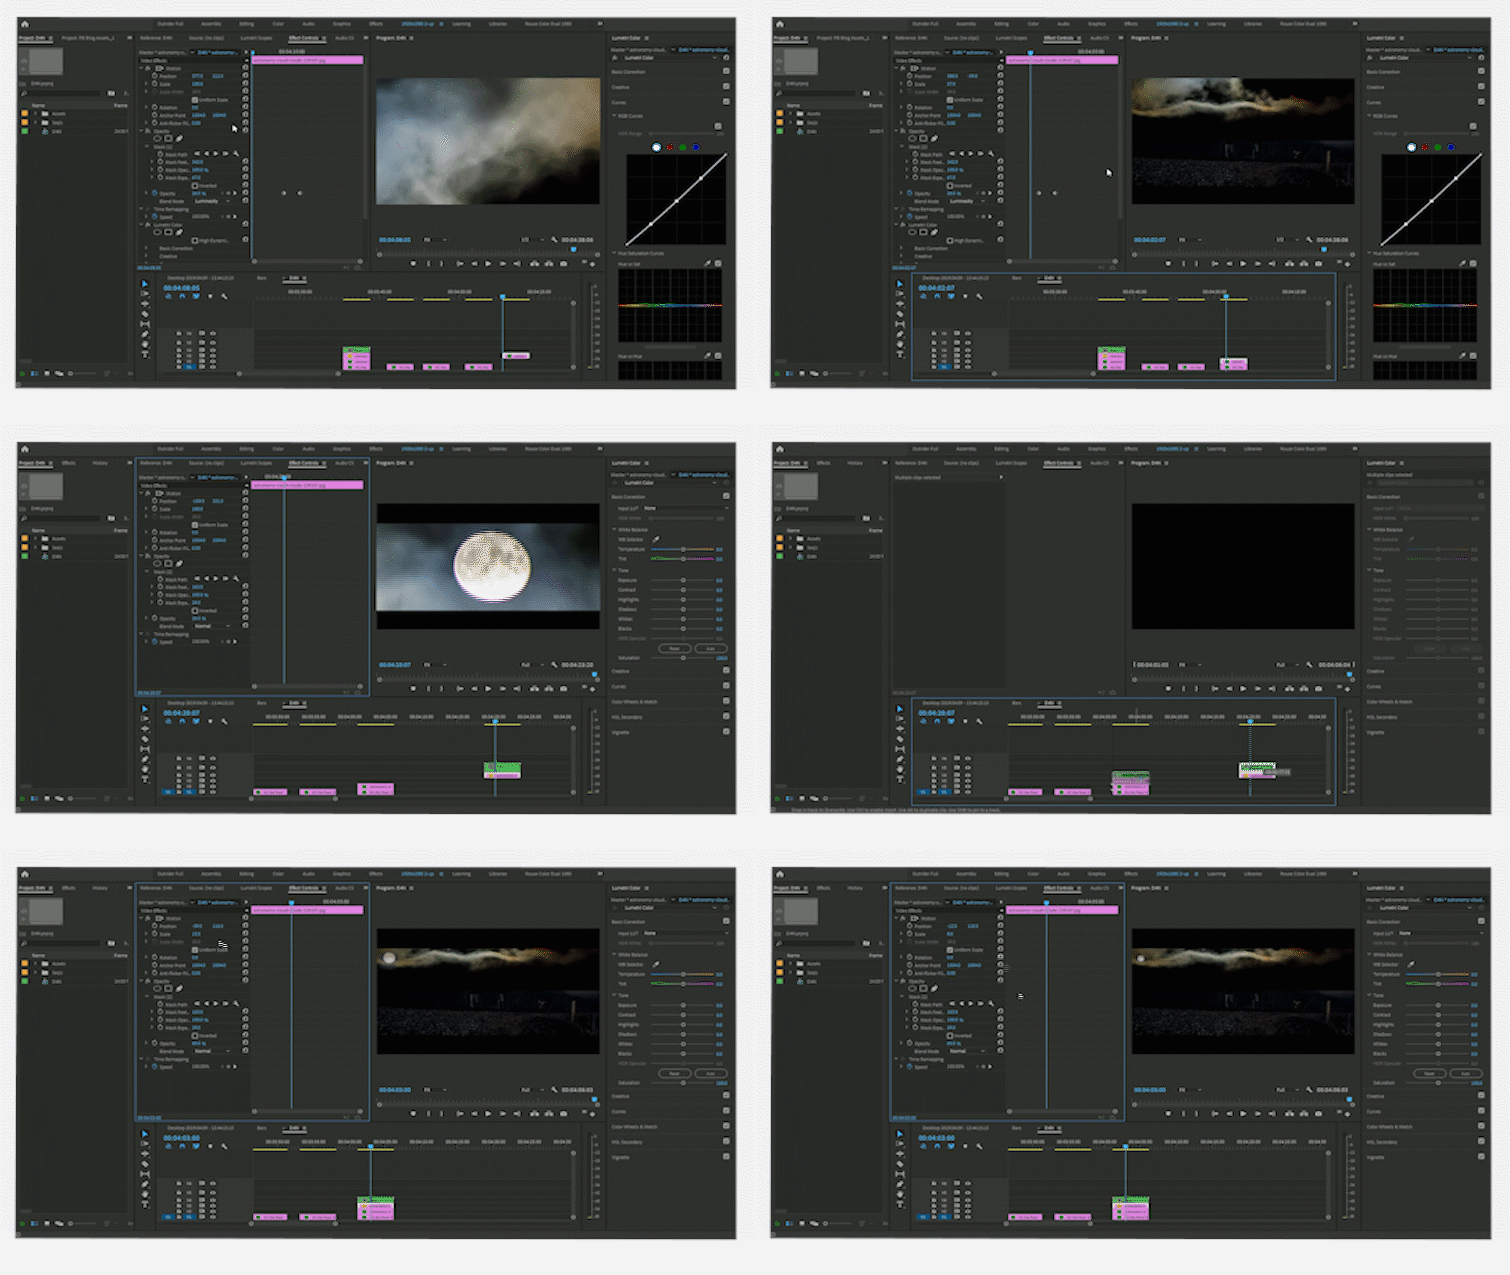
I’ve pulled a night sky image with some nice wispy clouds and a full moon that I think will blend well with the overcast sky in the original shot. I’ve resized and positioned the new sky in the rough position. I’ll blend it in just a moment.
First, I want to isolate the full moon so I can position it where I want in the frame. While this step is entirely optional, adding the moon or stars to a day for night shot can really help subconsciously sell the transformation. By adjusting a simple circular mask — with a bit of feather and expansion to capture the glow — the only step now is to find a portion of the frame where the moon fits best, based on the illumination for the shot.
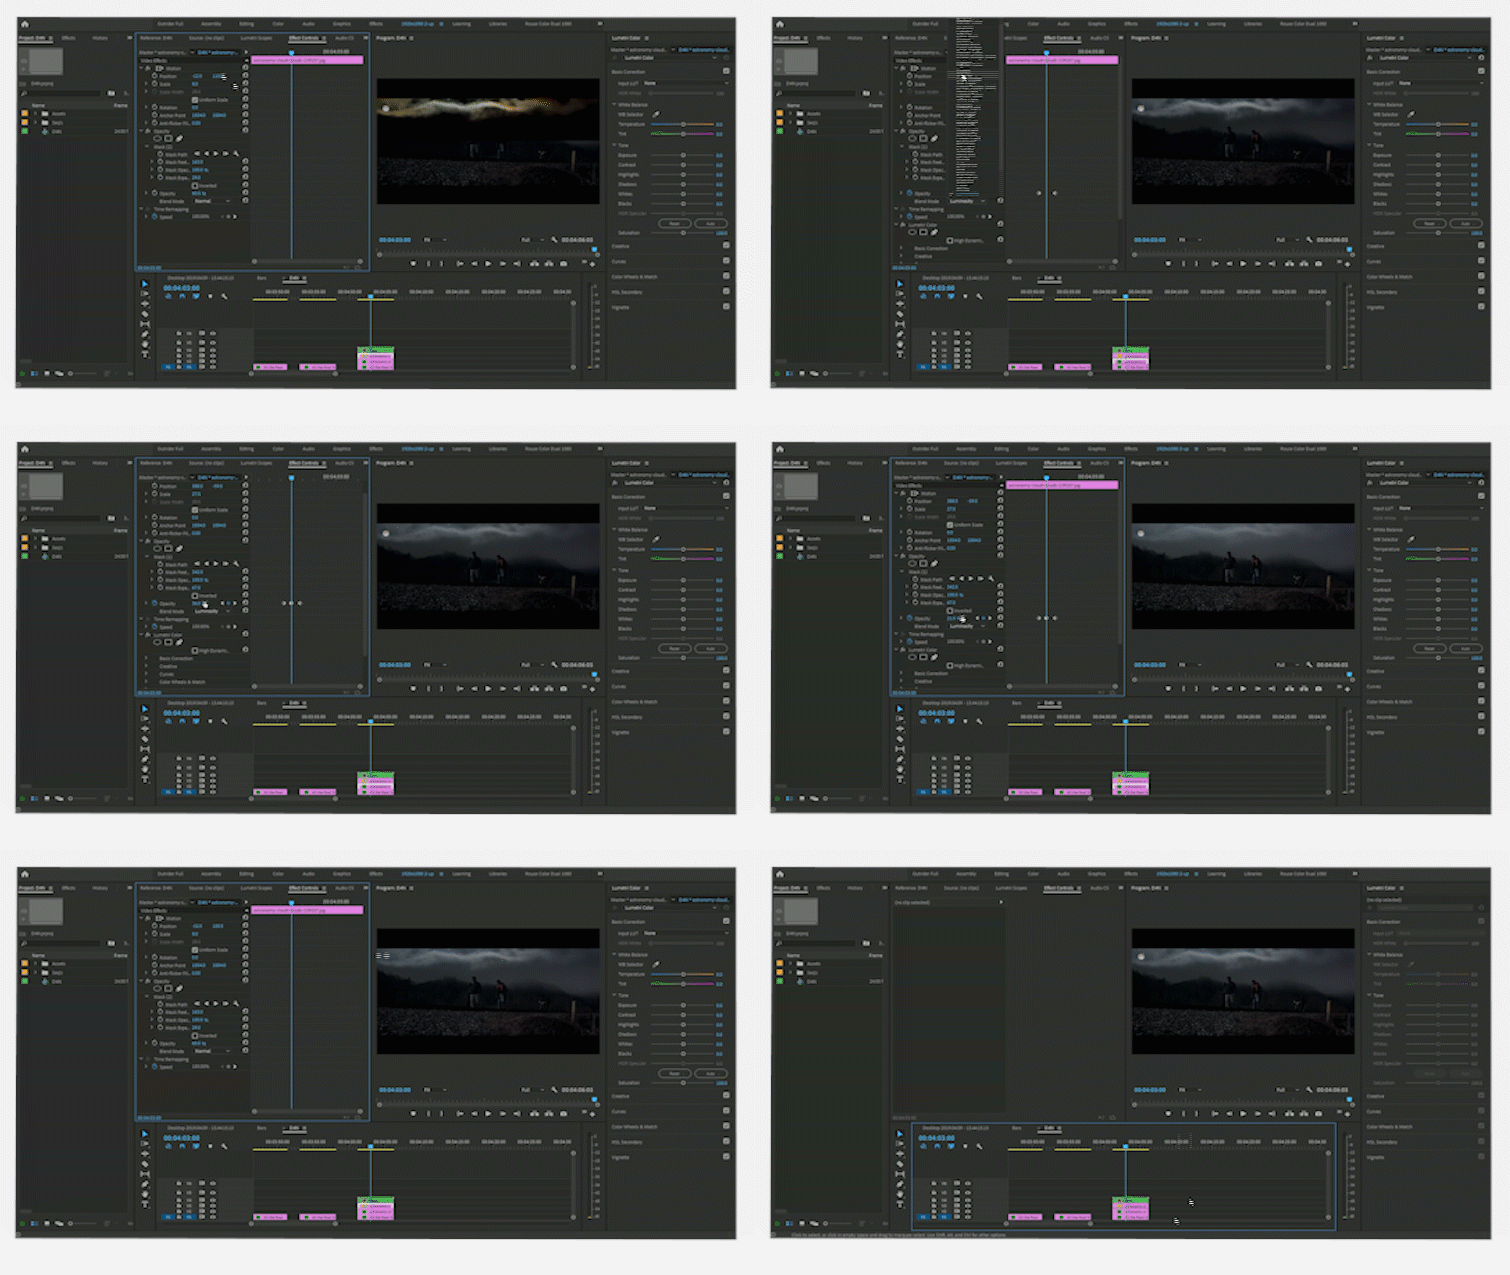
Now that I’ve found a place for the moon, I am drawing a basic mask around the natural features in the background of the original shot, before adjusting the feather and expansion to assist the blend. From here, I am simply changing the opacity blend mode to Luminosity to desaturate the new sky and base the blend of the shots on the brightness levels of each. After some tweaking, I settled on a 45 percent blend.
The Final Blend
I’m quite happy with the results so far, but there is one final step to tie the blended layers together. Simply nest your blending layers with your day for night footage and make final adjustments with the basic corrections tab in Lumetri.
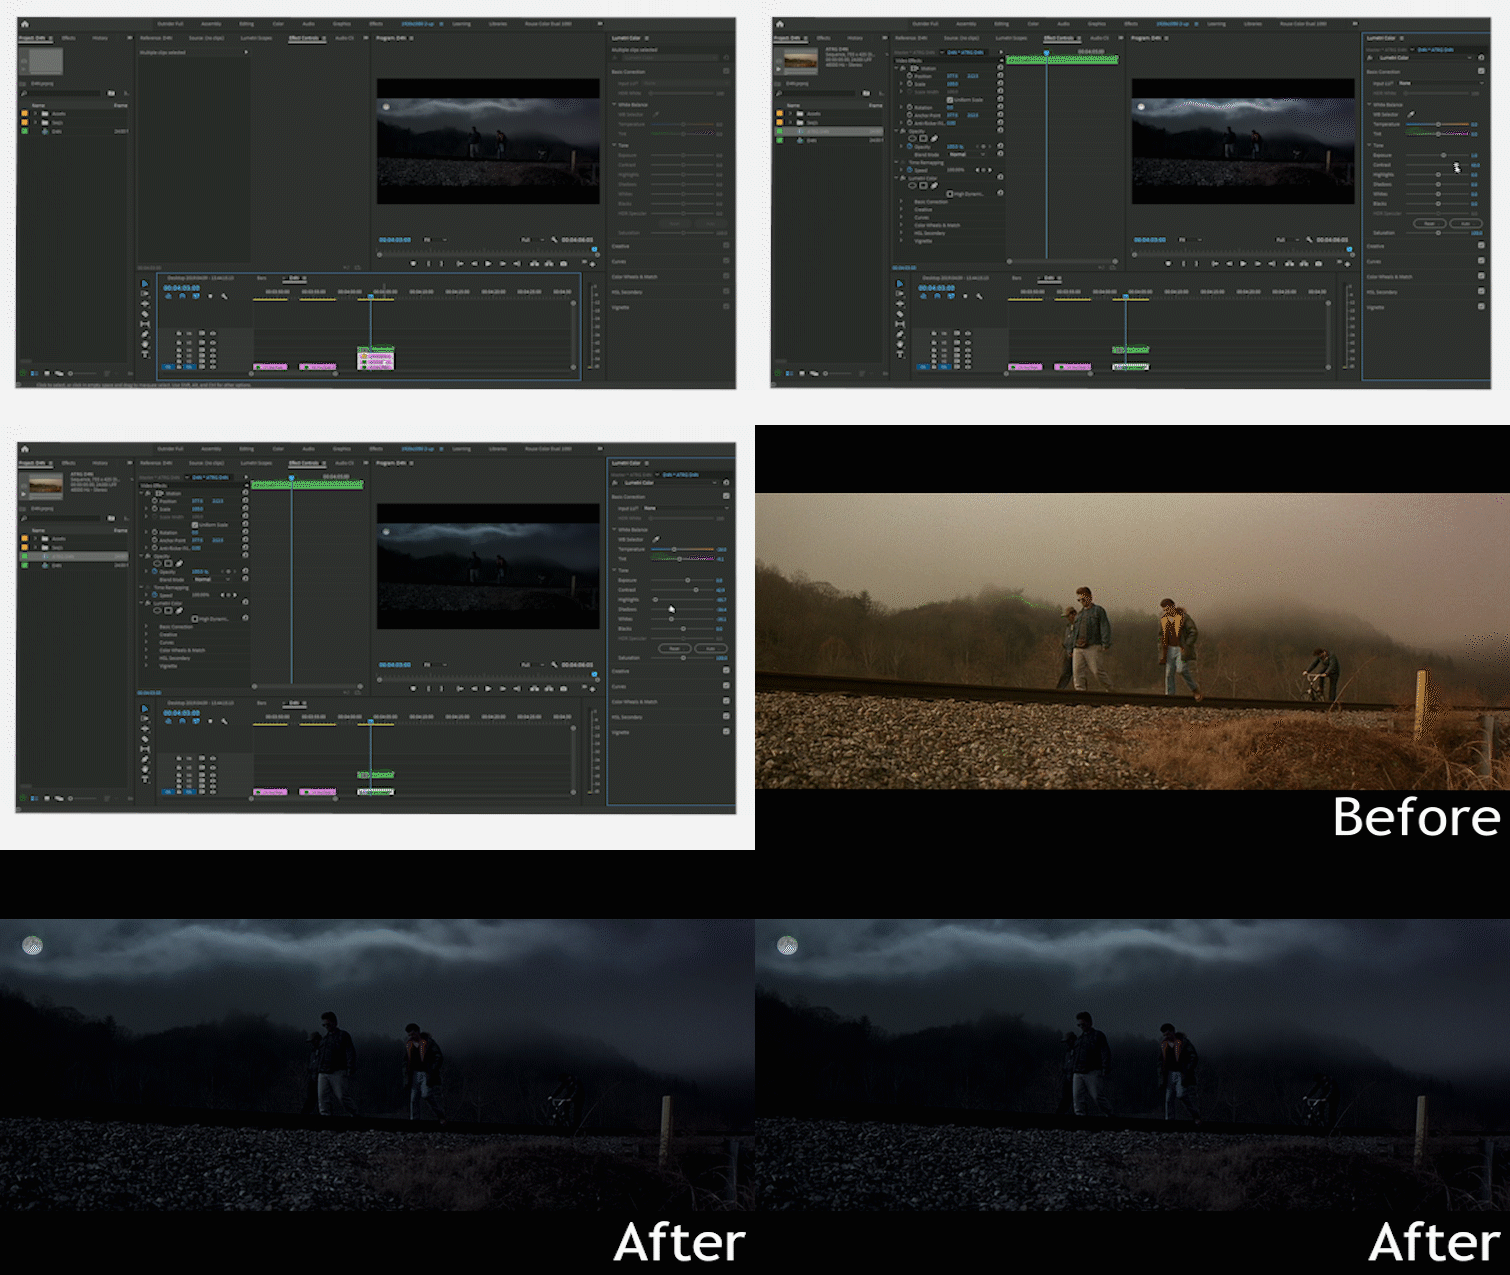
By nesting your footage together, you apply corrections to all simultaneously. This really helps tie all the work together. With a bit of an adjustment to the shadows, highlights, contrast, and color balance, I’m really happy with our results.

If your next script calls for extensive outdoor night shooting, have no fear. As long as your crew knows the basics of shooting day for night, you should be more than capable of bringing the look home, right in Premiere.
Cover image via Mad Max: Fury Road (Warner Bros).

