Ever wanted to make your videos pop but found After Effects too intimidating? Figuring out text animation can feel like a lot—especially if you’re just starting out.
Don’t stress, though. This guide walks you through adding text animations step by step. You’ll learn to create pro-looking animations, even if you’ve never touched After Effects before.
These steps are built for beginners. With clear instructions and simple tricks, you’ll be able to add text animations to your projects and give your videos a polished, creative vibe.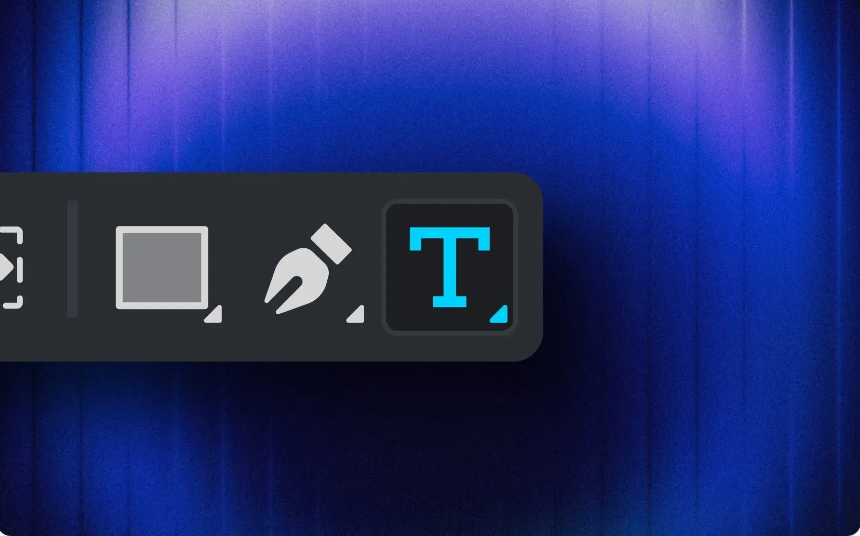
Why Text Animations Matter
Text animations make your videos more dynamic and visually engaging. Whether you’re making YouTube intros, educational content, or social media reels, animated text grabs attention and keeps viewers hooked. Instead of plain, static words, animated text delivers your message more effectively—turning text into part of your visual story.
Let’s jump into how to create your own text animations in After Effects.
Step 1: Set Up Your Composition
First, you need to create a new composition in After Effects. This is the workspace where all your animation will happen.
1.Launch After Effects, then click “New Composition” in the toolbar.
2.Name your composition, then pick a resolution, frame rate, and duration. 1920×1080 resolution at 30fps is the go-to for most online videos, but tweak these to fit your project.
3.Click “OK” to create your composition.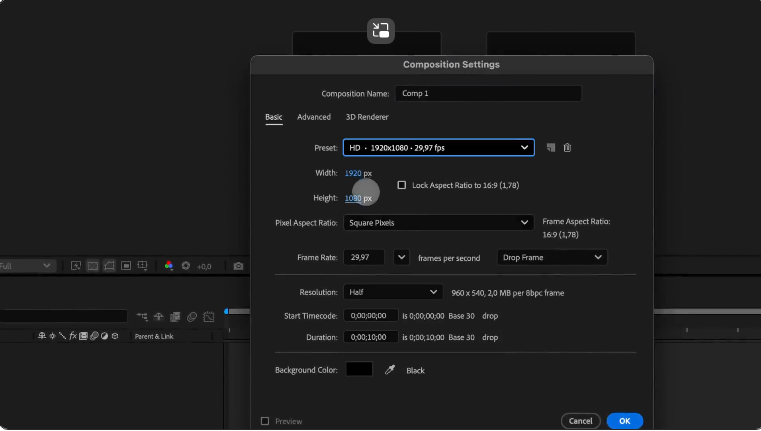
Think of the composition as your canvas—this is where all your layers and animations come together. If you’re making something for a specific platform (like Instagram, where square aspect ratios are popular), adjust the dimensions to match.
Step 2: Add Text to Your Composition
Next, it’s time to add text to your composition.
1.Grab the Text Tool (you can also press Ctrl+T on Windows or Cmd+T on Mac) from the toolbar.
2.Click anywhere in the composition window and type the text you want to animate.
3.Once the text is added, use the Character Panel to adjust its font, size, color, and other styling details.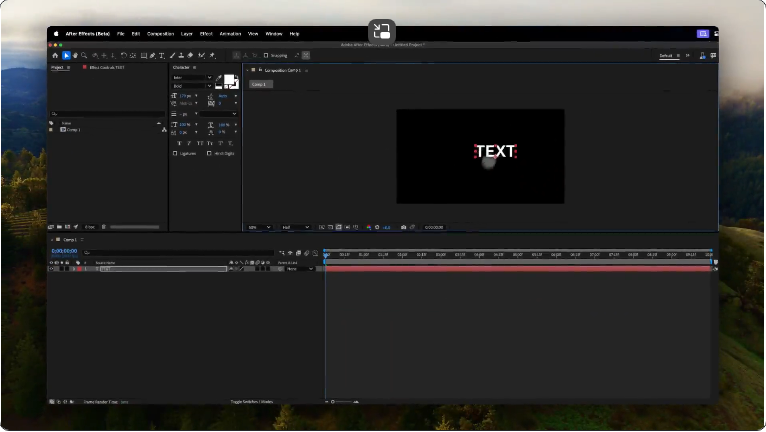
Keep readability in mind—bold fonts and high-contrast color pairs tend to work best for animated text. If your project has branding rules, stick to those to keep things consistent.
Step 3: Use Presets to Animate Text
If you’re new to After Effects, starting with animation presets saves time and helps you learn how text animation works.
1.In the “Effects & Presets” panel on the right, search for “Text Animation Presets.”
2.You’ll see options like “Fade In,” “Typewriter,” and “Blur By Word.”
3.Drag-and-drop a preset onto your text layer.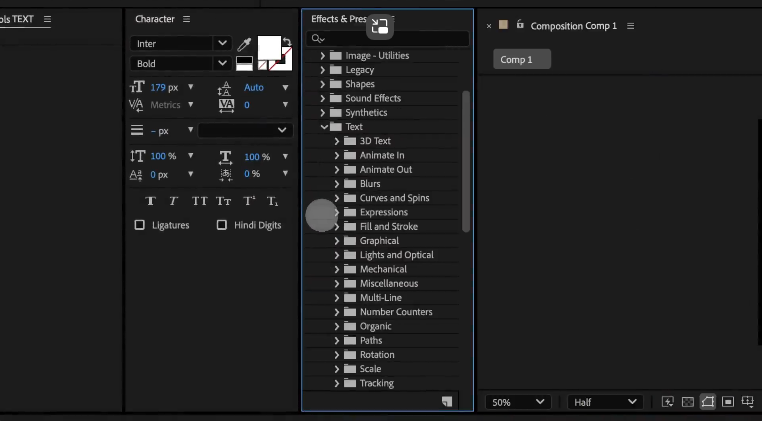
Once the preset is applied, press the Spacebar to preview the animation. This is a quick way to add basic motion to your text. If the preset doesn’t fit what you’re going for, just remove it and try another one—or tweak it to match your style.
Step 4: Fine-Tune Presets with Keyframes
Presets are great, but they might not always fit your exact needs. The good news is you can adjust them by tweaking keyframes.
1.Select your text layer, then press the U key to reveal the preset’s keyframes.
2.Drag keyframes closer together to speed up the animation, or move them apart to slow it down.
3.You can also adjust properties like Opacity, Scale, and Position in the timeline to get more control over the animation.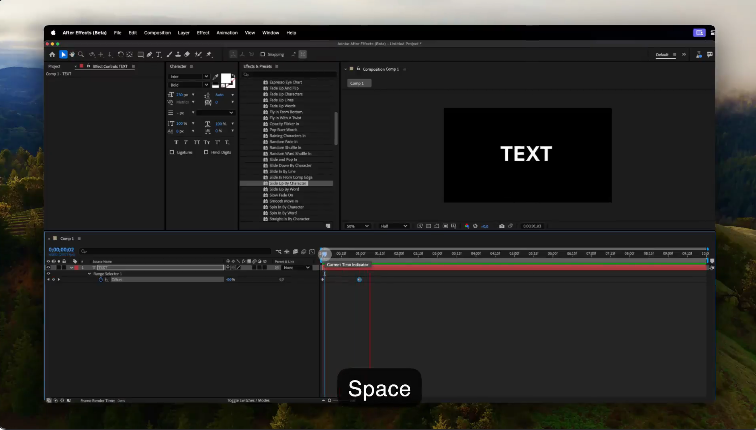
For example, if a preset fades text in but you want it slower, just widen the gap between the opacity keyframes. Play around with different properties to get the look you want.
Step 5: Animate Text with the Range Selector
For more control over how individual letters or words appear, After Effects’ Range Selector is a game-changer.
1.Select your text layer, then click the arrow next to the layer name in the timeline to open the Text options.
2.Under “Animator,” click “Add” > “Opacity.”
3.A Range Selector will pop up—use the “Start” and “End” sliders to animate the opacity of individual characters or whole words.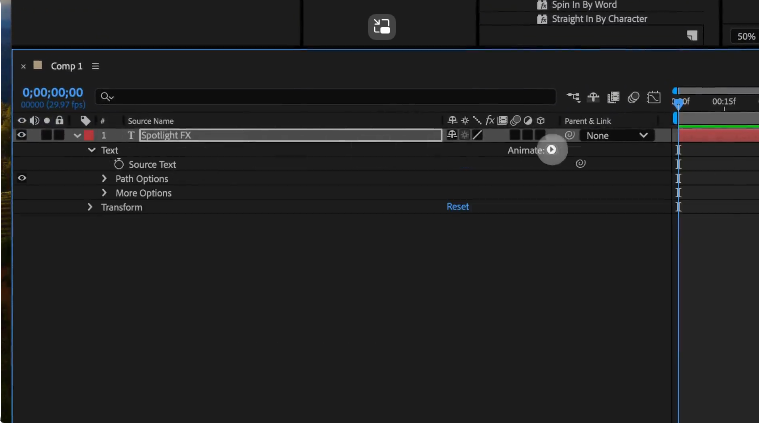
To make text appear one letter at a time, set the “Start” slider to 0% and the “End” slider to 100%. Then move the playhead forward in the timeline and adjust the “End” slider until all the text is visible. You can also animate properties like Position, Scale, and Rotation this way to add depth.
Step 6: Add Effects for More Animation Options
Text animation doesn’t have to be just movement—you can use After Effects’ huge library of effects to animate text in subtler ways.
1.Select your text layer and open the “Effects & Presets” panel.
2.Try effects like Gaussian Blur, Glow, or Warp.
3.To animate the effects, press E on your keyboard to reveal the effects you’ve applied. Then click the Stopwatch icon next to the effect property you want to animate (like “Blur Radius” or “Glow Intensity”).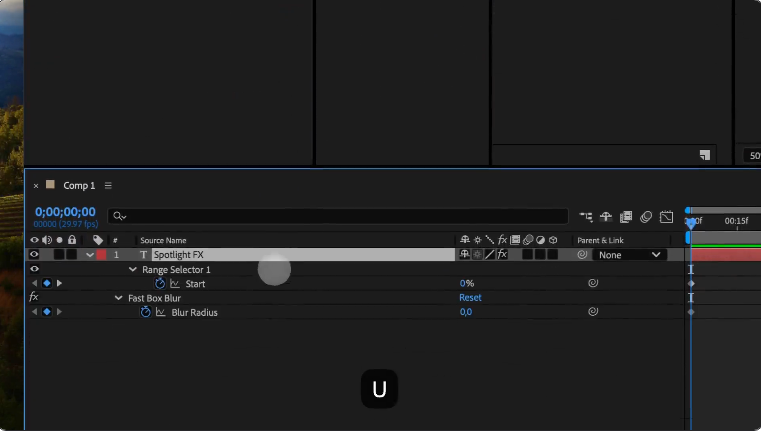
For example, animating Gaussian Blur can make text go from blurry to clear—giving your animation a soft, cinematic feel. For more details on effects, check out this video tutorial on applying and customizing text effects in After Effects.
Step 7: Add Motion Blur for Realism
Motion blur makes your text animations feel more natural (less robotic) by adding a subtle blur to fast-moving elements.
1.First, make sure the Motion Blur Toggle (it looks like three overlapping circles) is visible in your timeline. If not, click the “Toggle Switches/Modes” button at the bottom of the timeline.
2.Check the “Motion Blur” box for your text layer.
3.Turn on Motion Blur for the whole composition by clicking the Motion Blur Icon at the top of the timeline.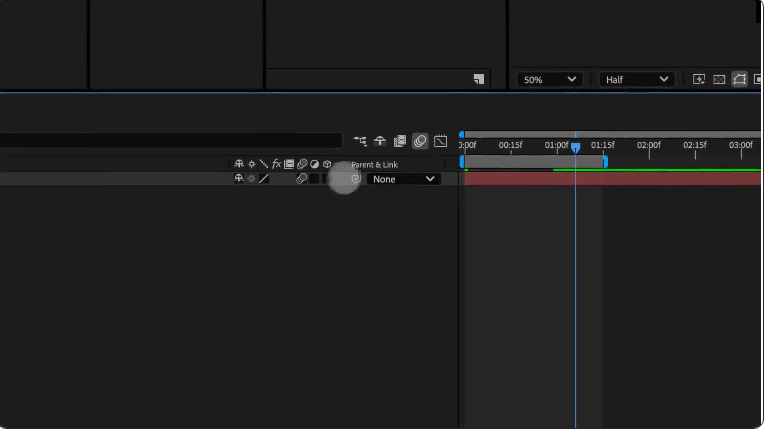
This small tweak can make a big difference—especially if your text has quick or large movements.
Step 8: Advanced Technique: 3D Text Animation
For a more advanced look, you can convert your text into a 3D object and animate its position in 3D space.
1.Select your text layer, then click the 3D Layer icon in the timeline (it looks like a tiny cube).
2.Now, when you expand the Transform properties, you’ll see options for the X, Y, and Z axes (for Position, Rotation, and Scale).
3.Animate the text by changing its position or rotation along these axes over time. For example, you could have the text rotate or zoom in from the background.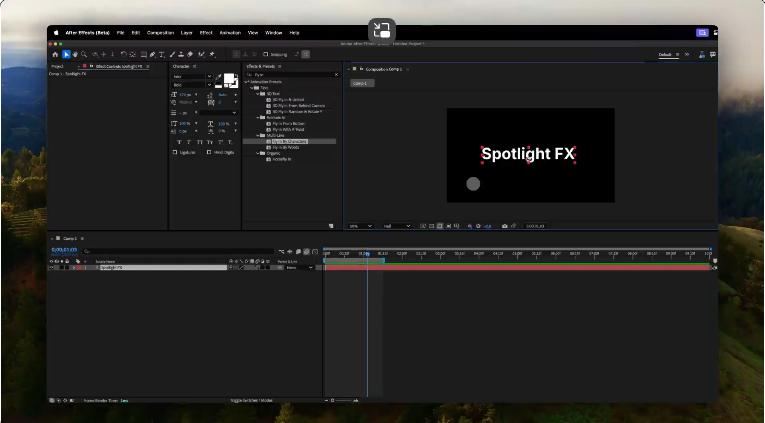
3D animations add depth, making your text effects feel more dynamic and cinematic.
Step 9: Preview and Export Your Animation
After perfecting your animation, it’s key to preview it properly before exporting.
1.Press the Spacebar to preview the animation in real time. If playback is slow, lower the preview quality to speed things up.
2.To export, head to File > Export > Add to Render Queue.
3.In the Render Queue, pick your output settings. For most web projects, exporting as an MP4 with the H.264 codec works great.
4.Choose a save location, then click “Render” to finish.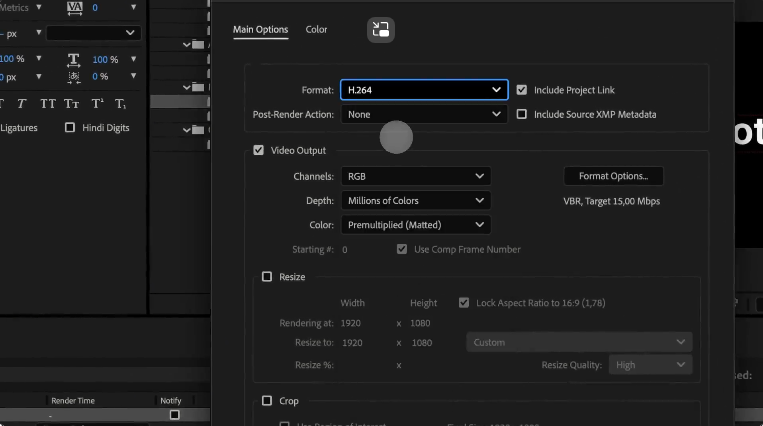
Step 10: Troubleshoot Common Issues
Here are quick fixes for problems you might run into while animating text in After Effects:
●Text MIA in Preview? Double-check that your text layer isn’t hidden, and make sure the playhead is on the part of the timeline where your text is visible.
●Animation Feels Choppy? This usually comes down to frame rate. A higher frame rate—60fps is a solid choice—will make animations smoother.
●Fonts Not Displaying Right? Make sure the correct fonts are installed on your computer. After Effects uses fonts from your computer’s library.
Conclusion
Animating text in After Effects unlocks a ton of creative potential. Whether you’re using basic presets or diving into advanced tricks like 3D animation, the software lets you fully control how your text looks and moves. Don’t hold back on experimenting with effects, timings, and styles—this is how you make your animations unique.
Now it’s your turn! Use these steps to start creating text animations, and see what you can come up with. The more you practice, the better you’ll get at tailoring animations to your projects. Happy animating!