How to Zoom in Adobe Premiere Pro 2025: A Step-by-Step Tutorial
Want to create a zoom effect in Premiere Pro? It’s a simple yet powerful way to make your videos more engaging. But instead of just scaling your clip, we’ll use the Transform effect for a smoother, more professional result—complete with motion blur. Plus, I’ll show you how to save your custom zoom as a preset. Let’s dive in!
Step 1: Import Your Clip and Prepare Your Timeline
Start by bringing your video into Premiere Pro. Drag your footage into the Project panel, then onto the timeline. You’re now ready to apply the zoom effect.
Pro Tip: Zooming in too much can reduce image quality, especially with 1080p footage. If you’re working in 4K or higher, you’ll have more flexibility. For HD video, try to keep scaling under 150% to avoid pixelation.
Step 2: Apply the Transform Effect
● Skip the basic Scale property. For better control and motion blur, we’ll use the Transform effect. Here’s how:Go to the Effects panel (Window > Effects if it’s not visible).
●Search for “Transform.”
●Drag and drop the effect onto your clip.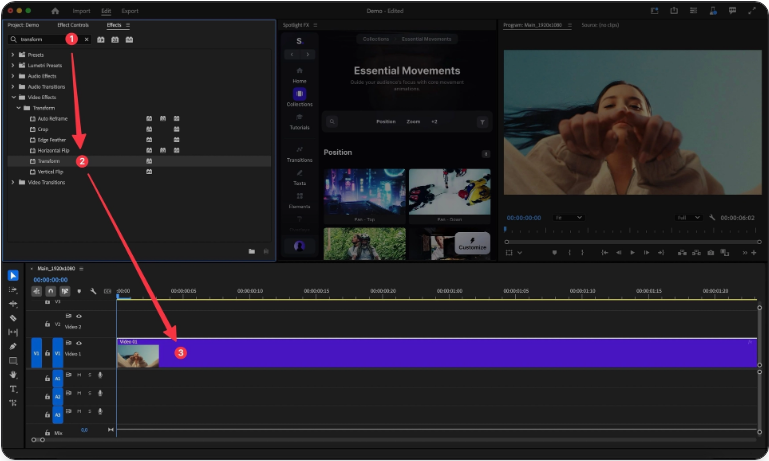
Now, in the Effect Controls panel, you’ll see new settings—including Shutter Angle, which we’ll use later.
Step 3: Set the Initial Keyframe
● Keyframes tell Premiere when an animation should start and end. Don’t worry—they’re easy to use.Move the playhead to where you want the zoom to begin.
●Under Effect Controls, find Scale within the Transform effect.
●Click the stopwatch icon next to Scale to set your first keyframe. A value of 100% means no zoom yet.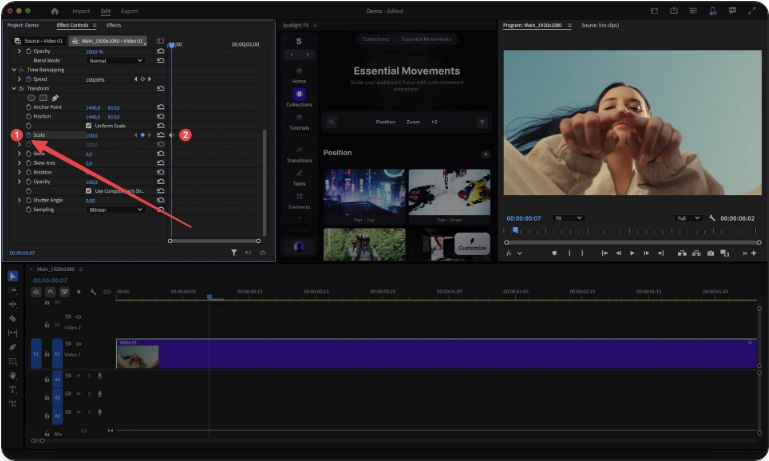
Step 4: Create the End Keyframe
● Now let’s define the zoom’s end point.Move the playhead to where the zoom should finish.
●Increase the Scale value—try 120% or 150%.
●Premiere will automatically create a new keyframe.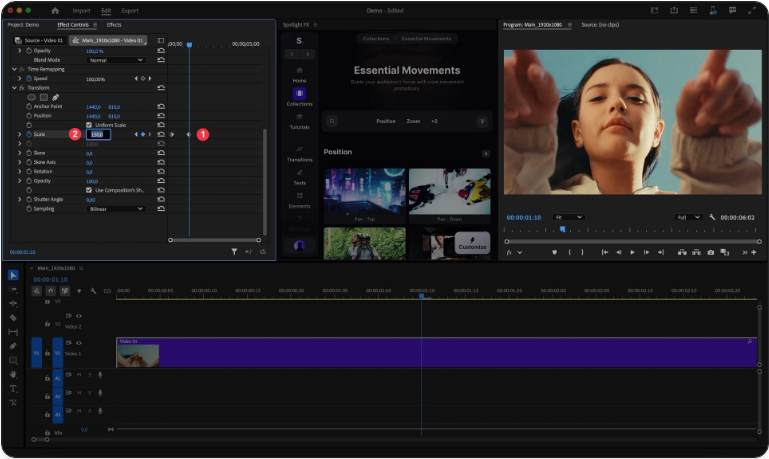
Remember: Over-zooming can make footage look soft or pixelated. Stay within reasonable limits.
Step 5: Refine the Zoom Area
● Want to zoom into a specific area—like a face or an object? Use the Position settings.With the playhead at your first keyframe, click the stopwatch next to Position.
●Adjust the values to reframe your shot.
●Move to the end keyframe and tweak the Position again to keep the focus consistent.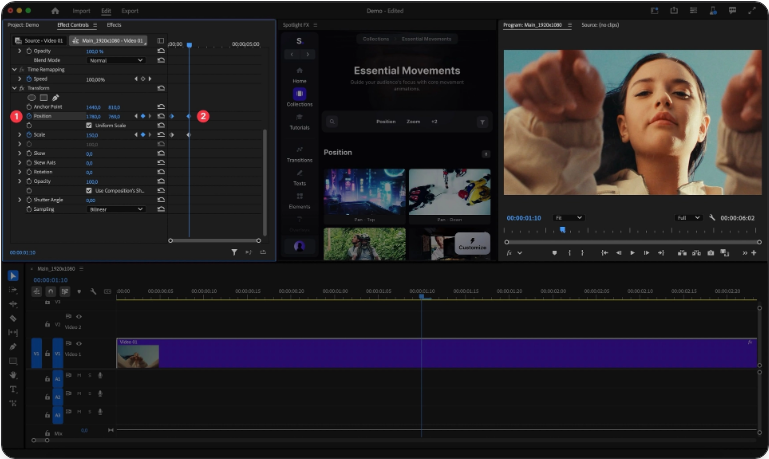
You can also click the Transform effect in Effect Controls and drag the on-screen controls directly in the Program Monitor.
Step 6: Use Easing for a Natural Zoom
● To avoid a robotic, linear movement, apply easing to your keyframes.Right-click the first keyframe and choose Ease Out.
●Right-click the end keyframe and select Ease In.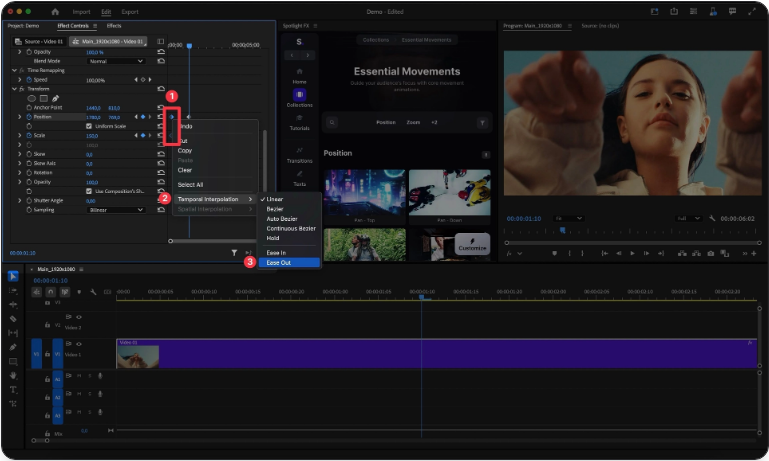
For more control, open the Graph Editor and adjust the velocity curves.
Step 7: Enable Motion Blur
● This is where the Transform effect stands out. Motion blur makes movement look more natural.In the Transform effect settings, uncheck “Use Composition’s Shutter Angle.”
●Set Shutter Angle to 180° for a standard blur, or up to 360° for a stronger effect.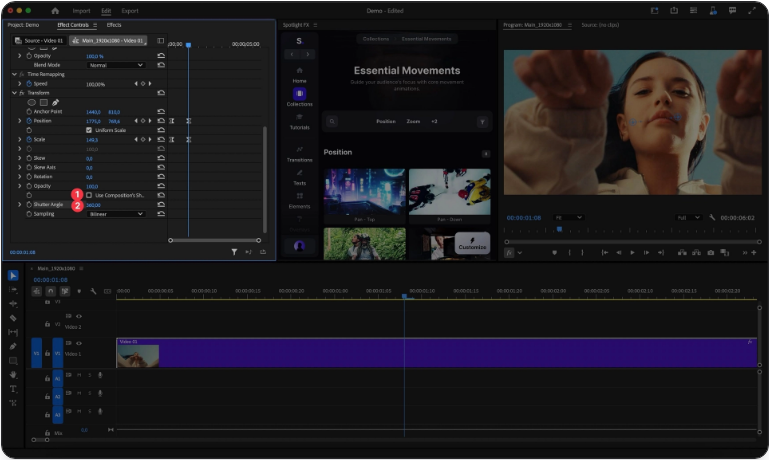
Step 8: Save Your Zoom as a Preset
● If you plan to reuse this effect, save it as a preset.Right-click the Transform effect header in Effect Controls.
●Select Save Preset.
●Name it (e.g., “Smooth Zoom-In”) and click OK.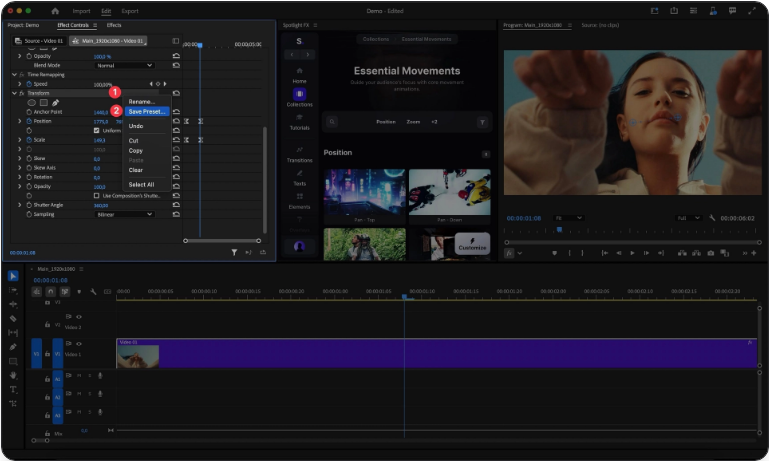
Now you can quickly apply it from the Presets folder in the Effects panel.
Step 9: Create a Zoom Transition
● You can also use this technique to transition between clips.On your first clip, end with a high scale value (e.g., 400%).
●On the next clip, start at 400% and zoom out to 100%.
●Apply Ease Out on the first clip and Ease In on the second for a seamless effect.
Frequently Asked Questions
How do I control zoom speed?
Place keyframes closer together for a faster zoom. For a slower zoom, spread them farther apart.
Why does my zoom look blurry?
This is often due to scaling beyond the clip’s native resolution. Use higher-resolution source footage when possible.
Is motion blur necessary?
Not required, but it adds polish and r+ealism—especially for faster zooms.
Can I zoom out instead of in?
Yes! Start with a higher Scale value and end at 100%.
What if I make a mistake?
Click the stopwatch icon again to remove keyframes and start over.