How to Change Aspect Ratio in Adobe Premiere Pro (Simple 3-Step Guide)
Need your video to perfectly fit a specific screen or platform? Whether you’re creating content for YouTube, Instagram, or a professional project, getting the right aspect ratio in Adobe Premiere Pro is essential—and easier than you might think.
Here’s a straightforward method to help you change your aspect ratio quickly without digging through endless menus.
Step 1: Set Up Your Sequence Correctly
Starting a new project?
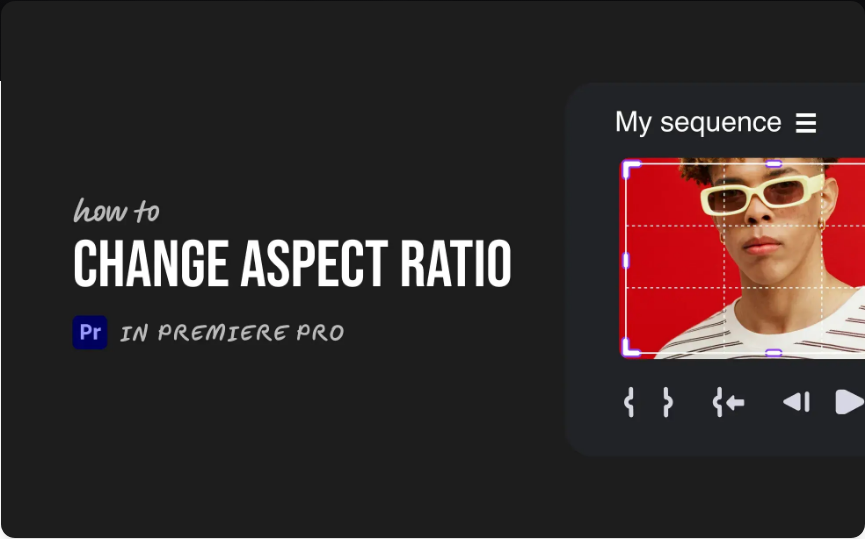
Go to File > New > Sequence.
Under the Sequence Presets tab, select a template that matches your goal—for example, HD 1080p 29.97 fps.
Switch to the Settings tab.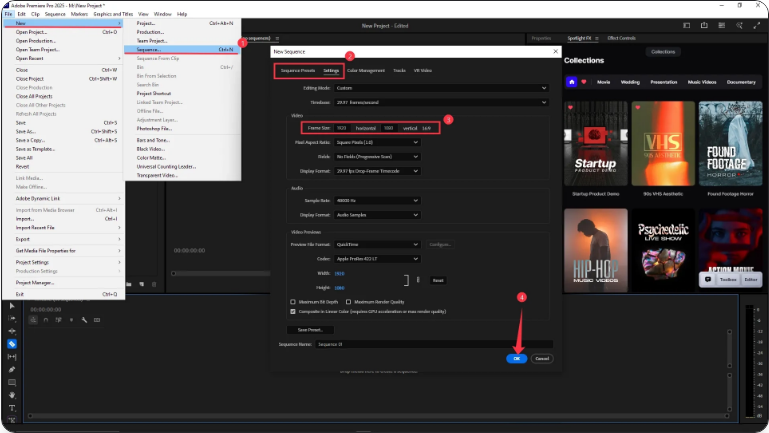
Find the Video section and enter your custom Frame Size dimensions (e.g., 1920 x 1080 for a standard 16:9 widescreen view).
Click OK.Working with an existing sequence?
Right-click the sequence in the Project Panel.
Select Sequence Settings.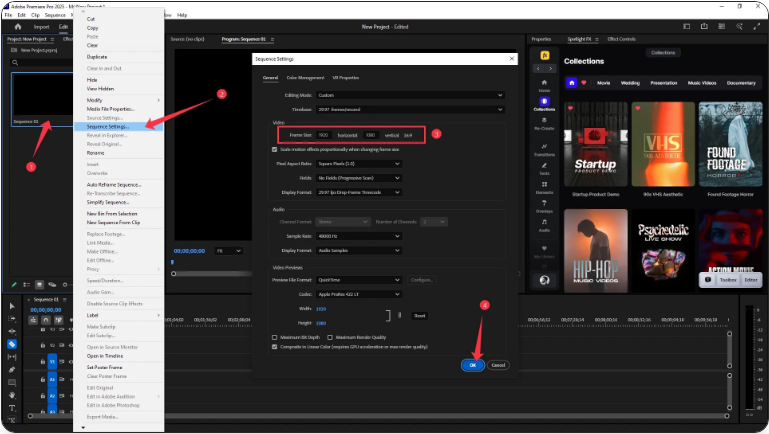
Update the Frame Size values to your desired width and height.
Click OK and approve any confirmation messages.Your sequence now serves as a canvas with the correct dimensions.
Step 2: Adjust Your Video Clips
Changing the sequence settings doesn’t automatically resize your clips. If things look stretched or cropped:
Select the clip in the timeline.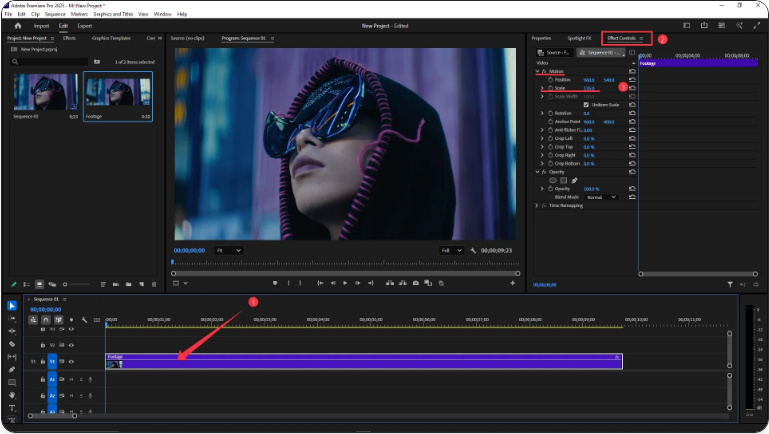
Open the Effect Controls panel.
Under Motion, tweak the Scale until it fits properly.Alternatively, right-click the clip and use one of these quick-fit options:
●Set to Frame Size (matches width or height without distortion)
●Scale to Frame Size (older method—may affect quality)
●Fill (good for vertical video, but may crop edges)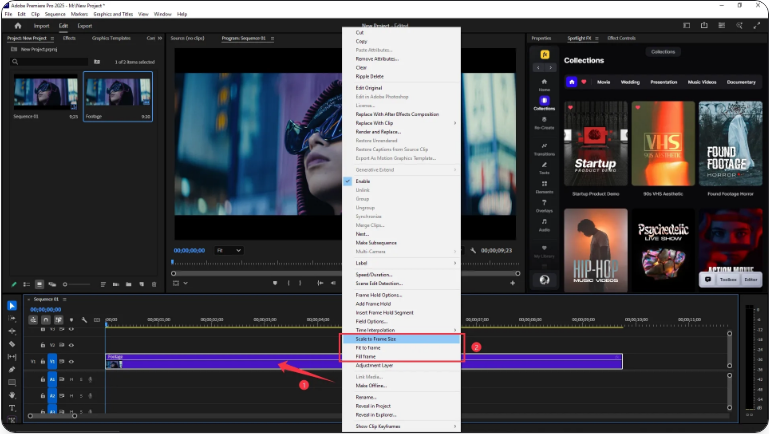
Experiment to see which option works best with your footage.
Step 3: Export with the Right Settings
Once your video looks perfect:
Go to File > Export > Media.
In the Export Settings window, navigate to the Video tab.
Under Basic Video Settings, confirm that the resolution matches your sequence (e.g., 1920×1080).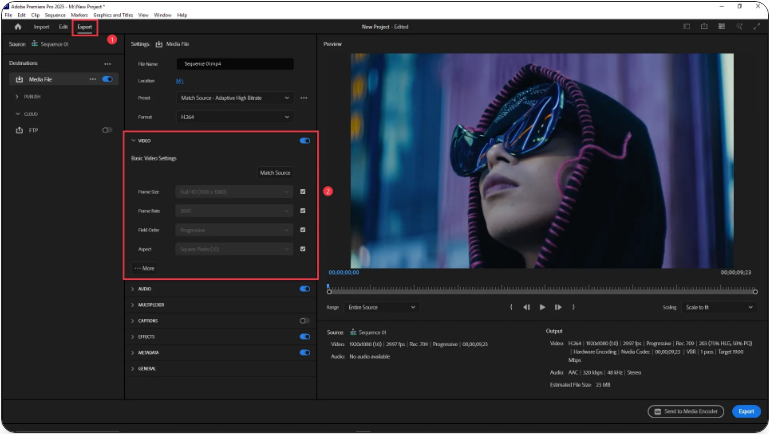
Click Export.And that’s it!
Final Thoughts
Adjusting the aspect ratio in Premiere Pro is simple once you get the hang of it. Whether you’re formatting for square (1:1), vertical (9:16), or cinematic widescreen (16:9), just remember: correct your sequence, fit your footage, and export carefully. After a few tries, it’ll feel like second nature.
Frequently Asked Questions
How do I make my video 1920×1080 in Premiere Pro?
Right-click your sequence > Sequence Settings.
Set Frame Size: Horizontal = 1920, Vertical = 1080.
Click OK, then use Set to Frame Size on clips if needed.
How do you change the aspect ratio of a video?
Aspect ratio is changed via Sequence Settings by modifying the Frame Size. Always remember to reposition or scale your clips afterward to fit the new frame.
What’s the best way to resize a clip in Premiere?
Use Effect Controls > Motion > Scale to resize manually.
For a quicker method, right-click the clip and choose Set to Frame Size to auto-fit without quality loss.
How do I change the screen size in Premiere Pro?
“Screen size” is determined by the sequence settings. Adjust via Sequence Settings > Frame Size. Clips can be resized within the sequence using the Scale property.