Want your footage to look more cinematic or professionally polished? Whether you’re going for a specific mood or just correcting lackluster shots, color grading is where your video truly comes to life.
The best part? You don’t need advanced software or expensive gear—Adobe Premiere Pro includes powerful built-in tools to get the job done. Once you learn the basics, you might even find color grading enjoyable.
Here’s a straightforward 5-step process to color grading in Premiere Pro.
1. Switch to the Color Workspace
Start by switching your workspace to the color-focused layout:
●Go to Window > Workspaces > Color
This will bring up the Lumetri Color panel on the right and arrange your windows for easier color grading.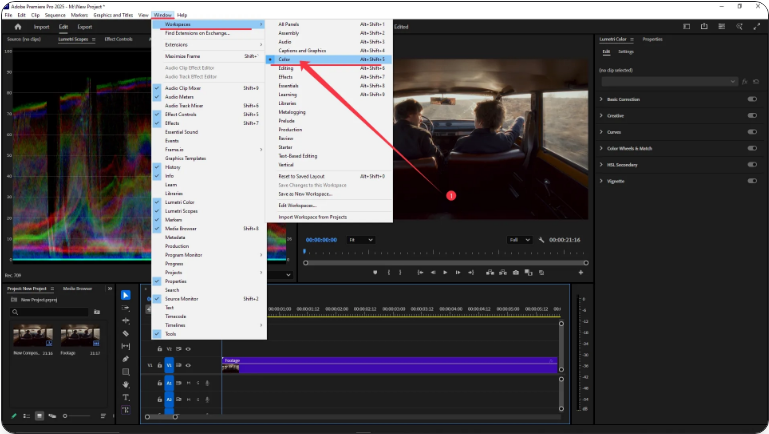
If you don’t see the panel, make sure it’s enabled under Window > Lumetri Color.
2. Select Your Clip
Click on the clip in your timeline that you want to color grade.
Make sure it’s selected so that your adjustments apply only to that specific clip.
Tip: If you’re grading multiple clips from the same scene, you can copy the settings from your first graded clip to the others later.
3. Apply Basic Corrections
In the Lumetri Color panel, go to the Basic Correction tab:
●Use Temperature and Tint to adjust white balance
●Control brightness using Exposure, Highlights, and Shadows
●Enhance depth with Contrast
●Increase or reduce color intensity with Saturation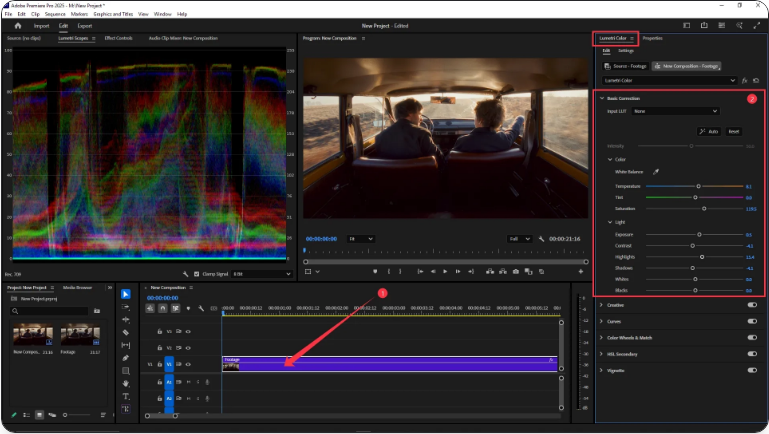
You can also click the Auto button to let Premiere Pro make initial adjustments—then refine as needed.
4. Get Creative with Looks
Navigate to the Creative section:
●Browse and apply built-in LUTs (Look-Up Tables) for instant stylistic looks
●Tweak Vibrance for more natural color boosts
●Add a film-like fade or adjust sharpness
●Tint shadows or highlights for atmospheric effects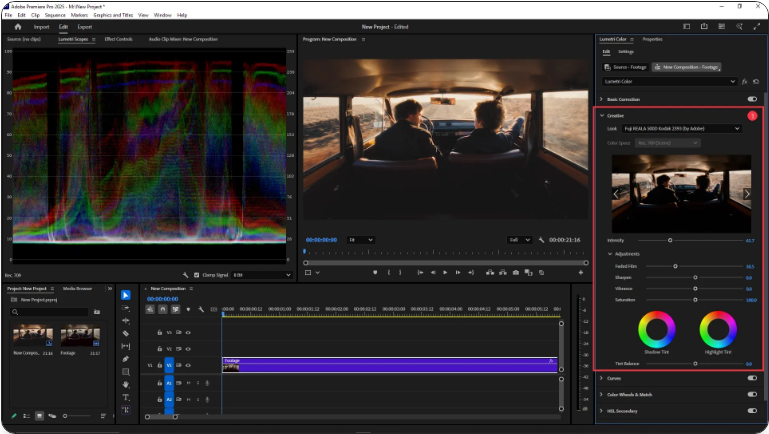
Simply hover your mouse over the LUTs to preview how they’ll look before applying.
5. Fine-Tune with Curves & Wheels
For advanced control:
●Use the Curves tool to adjust specific tonal ranges (e.g., brighten only the shadows)
●Try the Color Wheels to individually modify shadows, midtones, and highlights
●Under Vignette, add a subtle darkening or lightening around the edges to draw focus to the center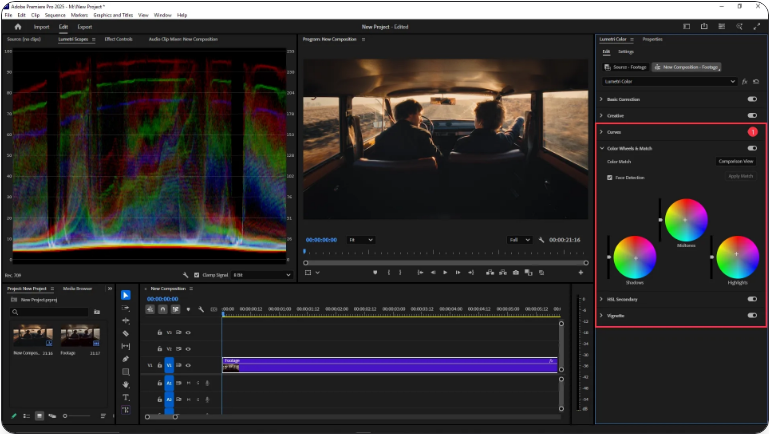
Copying Your Color Grade
Once you’re happy with a clip:
1.Right-click it in the timeline
2.Select Copy
3.Right-click another clip and choose Paste Attributes
4.Check Lumetri Color and click OK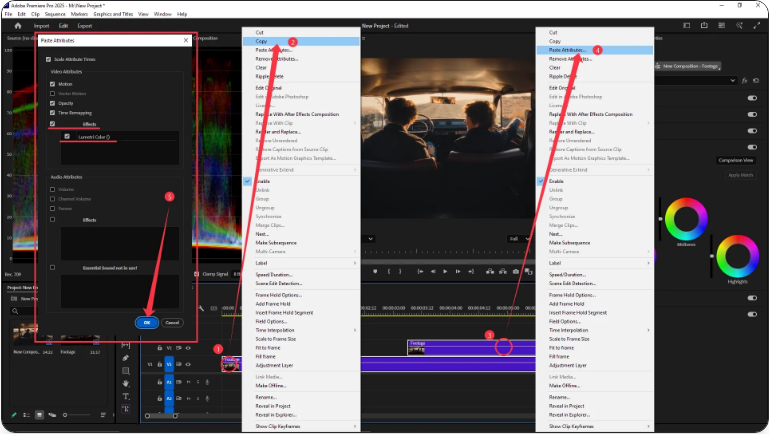
Keyboard Shortcuts:
●Windows: Ctrl + Alt + C to copy, Ctrl + Alt + V to paste
●Mac: Cmd + Option + C to copy, Cmd + Option + V to paste
Final Thoughts
Color grading can feel overwhelming at first, but it becomes intuitive with practice. Begin with basic corrections like exposure and white balance. Then experiment with creative looks, and finally, refine your image using curves and color wheels.
The more you grade, the better you’ll become at recognizing what each shot needs.
Frequently Asked Questions
Can I use Lumetri on an adjustment layer?
Absolutely. Apply Lumetri Color effects to an adjustment layer to affect all clips beneath it. This is a great way to maintain a consistent look across multiple clips without grading each one individually.
How do you color grade in Premiere Pro?
Follow these steps:
1.Switch to the Color workspace
2.Select your clip
3.Make basic corrections in the Basic Correction tab
4.Apply a style or LUT under the Creative section
5.Use Curves and Color Wheels for final tweaks
Which panel is used for color grading in Premiere Pro?
The Lumetri Color panel is the central hub for all color grading inside Premiere Pro. You can access it through Window > Lumetri Color or by switching to the Color workspace.
How do you create color effects in Premiere Pro?
To apply stylistic color effects:
●Select your clip and open the Lumetri Color panel
●Go to the Creative tab to choose a LUT or manually adjust vibrancy, tint, and saturation
●For more dramatic effects, use the Curves tool for contrast adjustments or split-toning