How to Use Masks in Adobe Premiere Pro (Easy Step-by-Step Tutorial)
Want to blur a face, highlight an object, or create that cool “video inside text” effect? Masking in Premiere Pro is the key. While it might seem tricky at first, it’s actually pretty straightforward once you get the basics down.

In this guide, we’ll cover three ways to mask in Premiere: Shape Masks, the Pen Tool, and Motion Tracking.
1. Apply an Effect That Works with Masking
Before creating a mask, you need an effect to apply it to. Popular choices include:
● Gaussian Blur (for hiding faces or sensitive info)
● Lumetri Color (for selective color adjustments)
● Opacity (for fade-ins or custom transitions)
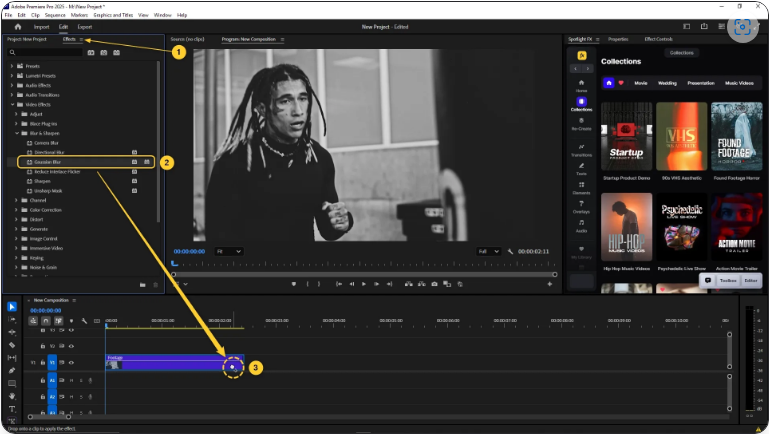
Here’s how to get started:
1. Drag your clip into the timeline.
2. Open the Effects panel and search for your desired effect.
3. Drag the effect onto your clip.
4. Go to the Effect Controls panel—now you’re ready to mask!
2. Pick Your Mask Shape
Inside the Effect Controls panel, you’ll see masking options:
● Ellipse Mask (for circles/ovals)
● Rectangle Mask (for squares or rectangles)
● Pen Tool (for custom shapes)
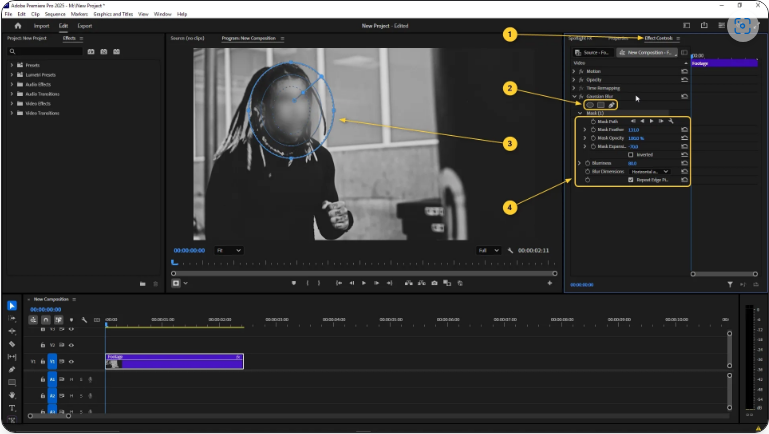
Click one of these, and the mask will appear in your preview window. From there, you can:
● Move the mask by dragging it
● Resize it by pulling the edges
● Feather the edges for a softer look
● Invert the mask to affect everything outside the shape
3. Track Moving Objects Automatically
If your subject moves, you don’t have to adjust the mask frame by frame. Instead:
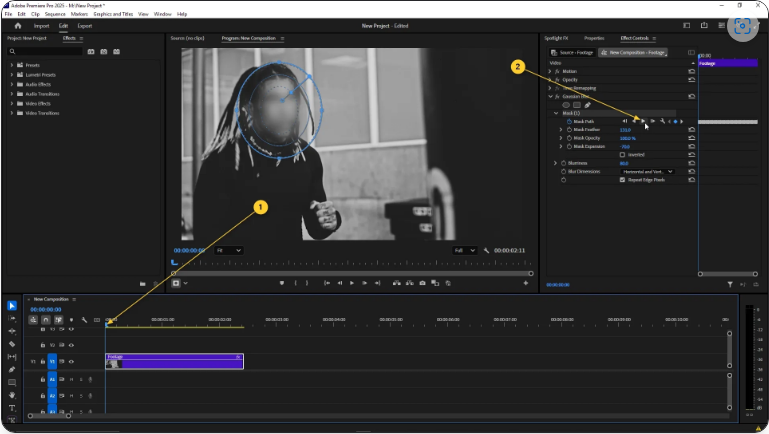
1. In Effect Controls, find Mask Path.
2. Click the “Track Selected Mask Forward” button (the play icon).
3. Premiere will analyze the movement and adjust the mask automatically.
While it’s not always perfect, this feature saves tons of time compared to manual keyframing.
Final Thoughts
Masking might look complex at first, but after a few tries, you’ll start using it everywhere—whether it’s blurring logos, spotlighting subjects, or creating stylish text effects. Just take it step by step, and don’t be afraid to experiment!
FAQs
How does mask tracking work in Premiere Pro?
Mask tracking lets a mask follow a moving object. After creating a mask, click “Track Selected Mask Forward” in the Effect Controls panel, and Premiere will move the mask automatically across frames.
How do I blur a face in a video?
1. Apply Gaussian Blur to your clip.
2. Use an Ellipse Mask to cover the face.
3. Adjust Feather and Opacity for a natural look.
4. Enable Mask Tracking so it follows the movement.
5. Fine-tune if needed.
Does Premiere Pro have a clipping mask tool?
Not exactly, but you can simulate it using Track Mattes:
1. Place your shape or text layer above your footage.
2. Apply the “Track Matte Key” effect.
3. Set the matte source and choose Alpha or Luma.
4. Your video will now only show through the matte shape.
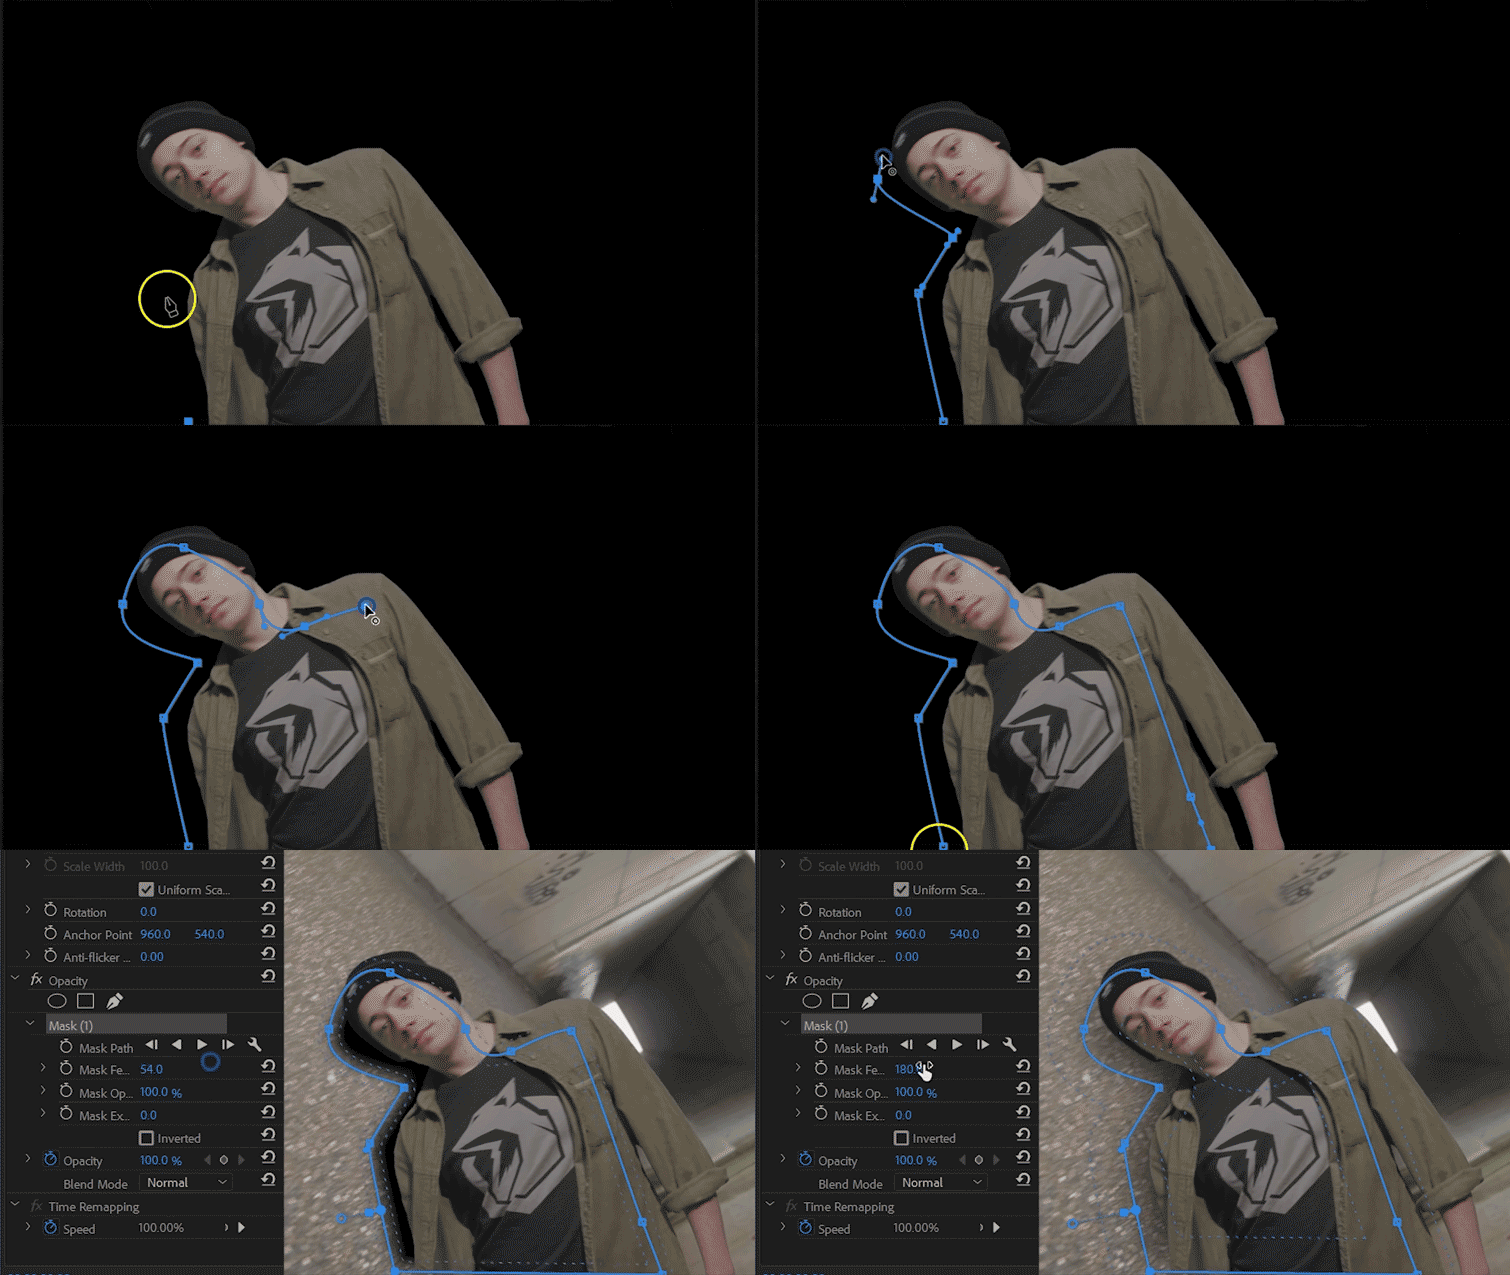
How do I use the Pen Tool for masking?
1. Apply an effect (like Gaussian Blur) to your clip.
2. In Effect Controls, click the Pen Tool icon.
3. Click to create points around your subject.
4. Adjust curves by dragging the handles.
5. Use Feather and Expansion to refine the edges.
